# Formulierung dehnbarer leitfähiger Tinten für 3D-Drucker vom Typ Direct Ink Writing (DIW)
[Junior-Prof. Hongye Sun](https://www.tu-ilmenau.de/universitaet/fakultaeten/fakultaet-elektrotechnik-und-informationstechnik/profil/institute-und-fachgebiete/fachgebiet-funktionswerkstoffe/team) arbeitet mit Ihren Kollegen an einer[ Formulierung dehnbarer leitfähiger Tinten für 3D-Drucker vom Typ Direct Ink Writing (DIW)](https://www.tu-ilmenau.de/universitaet/fakultaeten/fakultaet-elektrotechnik-und-informationstechnik/profil/institute-und-fachgebiete/fachgebiet-funktionswerkstoffe/forschung)
In the fablab we tried to help with measuring the resistance of this material with a RaspberryPi Pico.
[2legged_robot_01.blend](https://unikat-ilmenau.de/wiki/attachments/111)
Resistance Measurement
For doing the “Multi-channel-measurement” of your Resistors we used the https://www.raspberrypi.com/documentation/microcontrollers/pico-series.html
I just realized that the pico only has 3 analog inputs.
It would be better to use the Arduino Mega, the Teensy4.1, the STM32 Blue Pill or a ESP32
https://chat-ai.academiccloud.de
How can I measure a resistance between 1 and 10 Ohms with an Raspberry Pi Pico using a Voltage divider?
We use the software:
https://www.arduino.cc/
[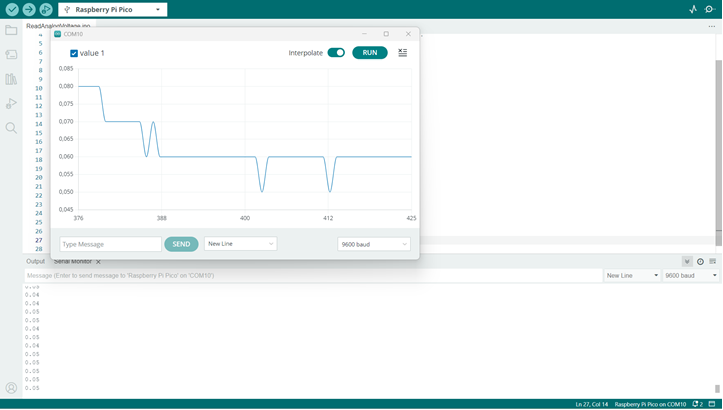](https://unikat-ilmenau.de/wiki/uploads/images/gallery/2025-10/image-1759764983610.png)
With this sketch:
/*
ReadAnalogVoltage
Reads an analog input on pin 0, converts it to voltage, and prints the result to the Serial Monitor.
Graphical representation is available using Serial Plotter (Tools > Serial Plotter menu).
Attach the center pin of a potentiometer to pin A0, and the outside pins to +5V and ground.
This example code is in the public domain.
https://www.arduino.cc/en/Tutorial/BuiltInExamples/ReadAnalogVoltage
*/
// the setup routine runs once when you press reset:
void setup() {
// initialize serial communication at 9600 bits per second:
Serial.begin(9600);
}
// the loop routine runs over and over again forever:
void loop() {
// read the input on analog pin 0:
int sensorValue = analogRead(26);
// Convert the analog reading (which goes from 0 - 1023) to a voltage (0 - 5V):
float voltage = sensorValue * (5.0 / 1023.0);
// print out the value you read:
Serial.println(voltage);
delay(100);
}
And this electrical setup (we only had a 220ohm resistor):
3.3V
|
[ R_ref ] = z. B. 100 Ω
|
+----+----------------+
| |
[Rx] ADC-Messpunkte
| (A+ und A− an GPIO26/27)
GND
[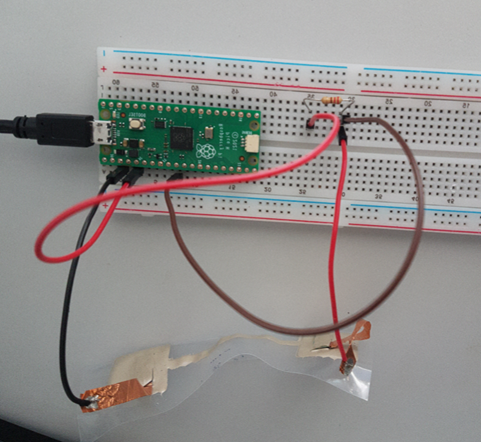](https://unikat-ilmenau.de/wiki/uploads/images/gallery/2025-10/image-1759765042965.png)
https://chat-ai.academiccloud.de
How can I measure a resistance between 110 ohms and 1 kOhm with a arduino Nano using a Voltage divider?