# How to use
## 0. Wear Safety Gear and Setup Suction
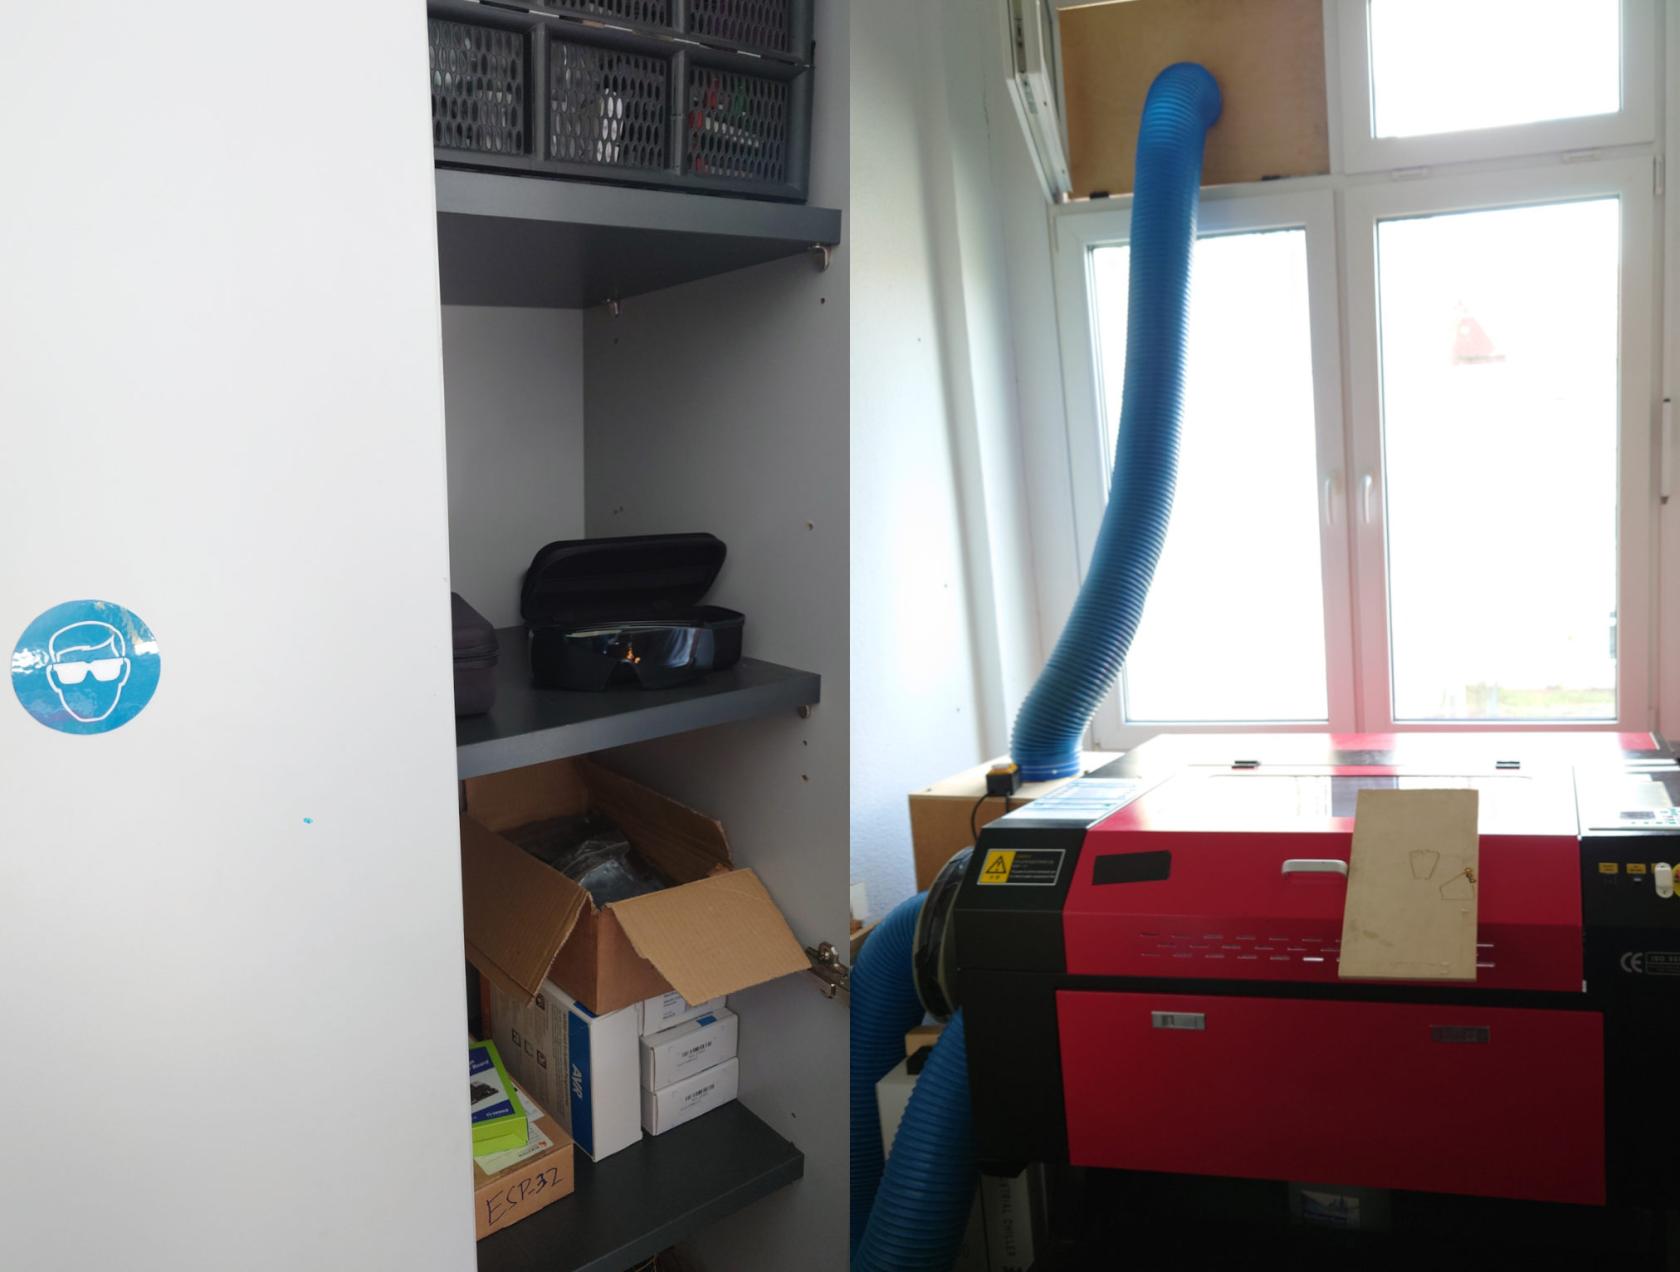
Safety glasses are found in the cabinet next to the door, DON'T TOUCH THE GLASSES ON THE PROTECTIVE SIDE.
Before starting, install the tube to the upper window like here:
[](https://unikat-ilmenau.de/wiki/uploads/images/gallery/2025-08/laser-setup.jpg)
## 1. Turn on Suction, Cooling and Laser
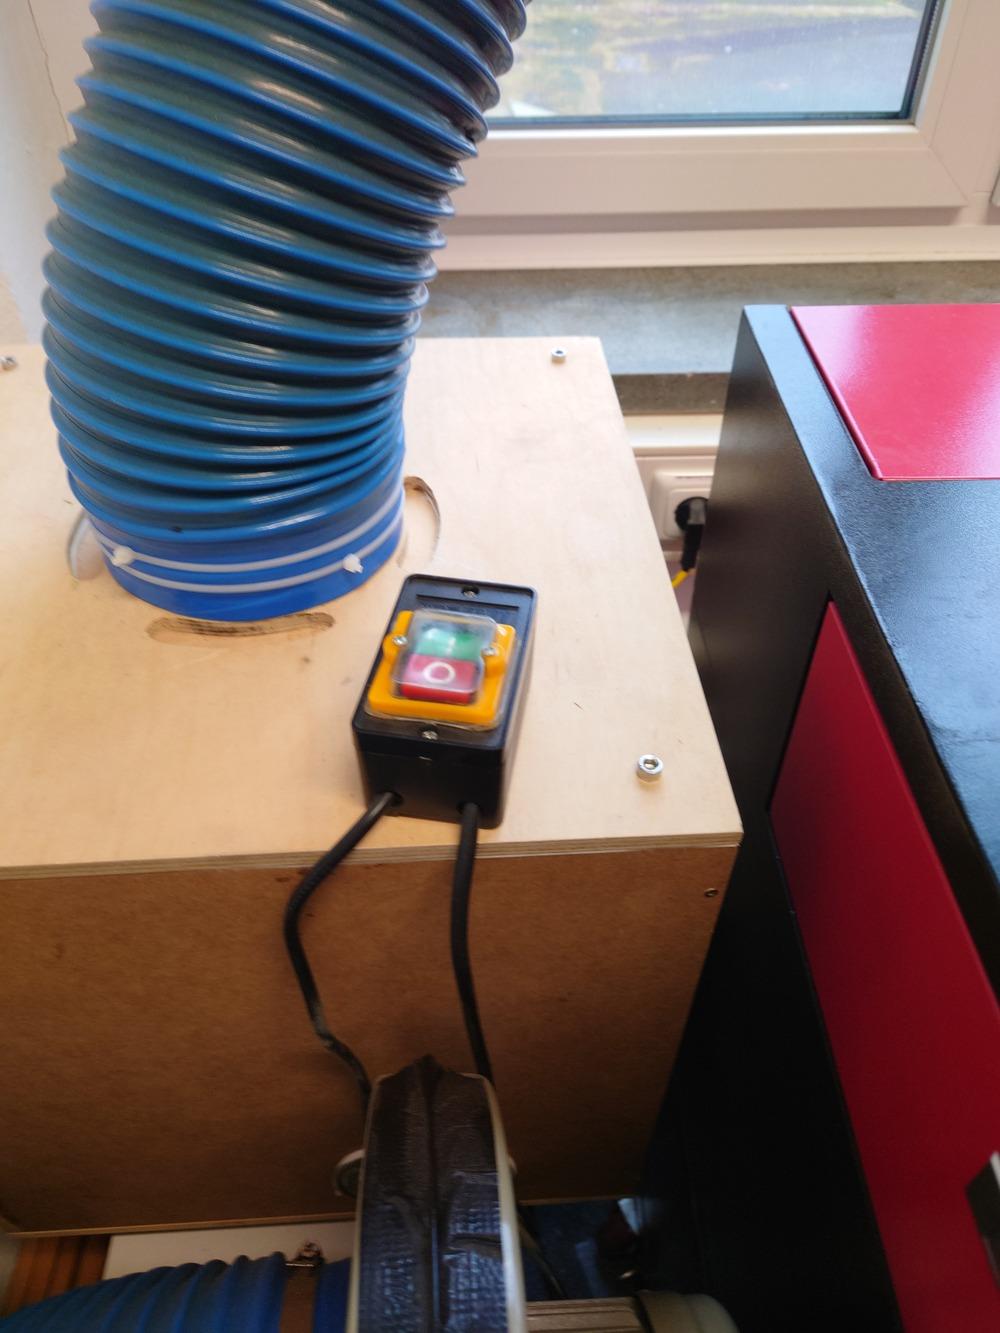
First turn on the suction:
[](https://unikat-ilmenau.de/wiki/uploads/images/gallery/2025-08/prep-vent-switch.jpg)
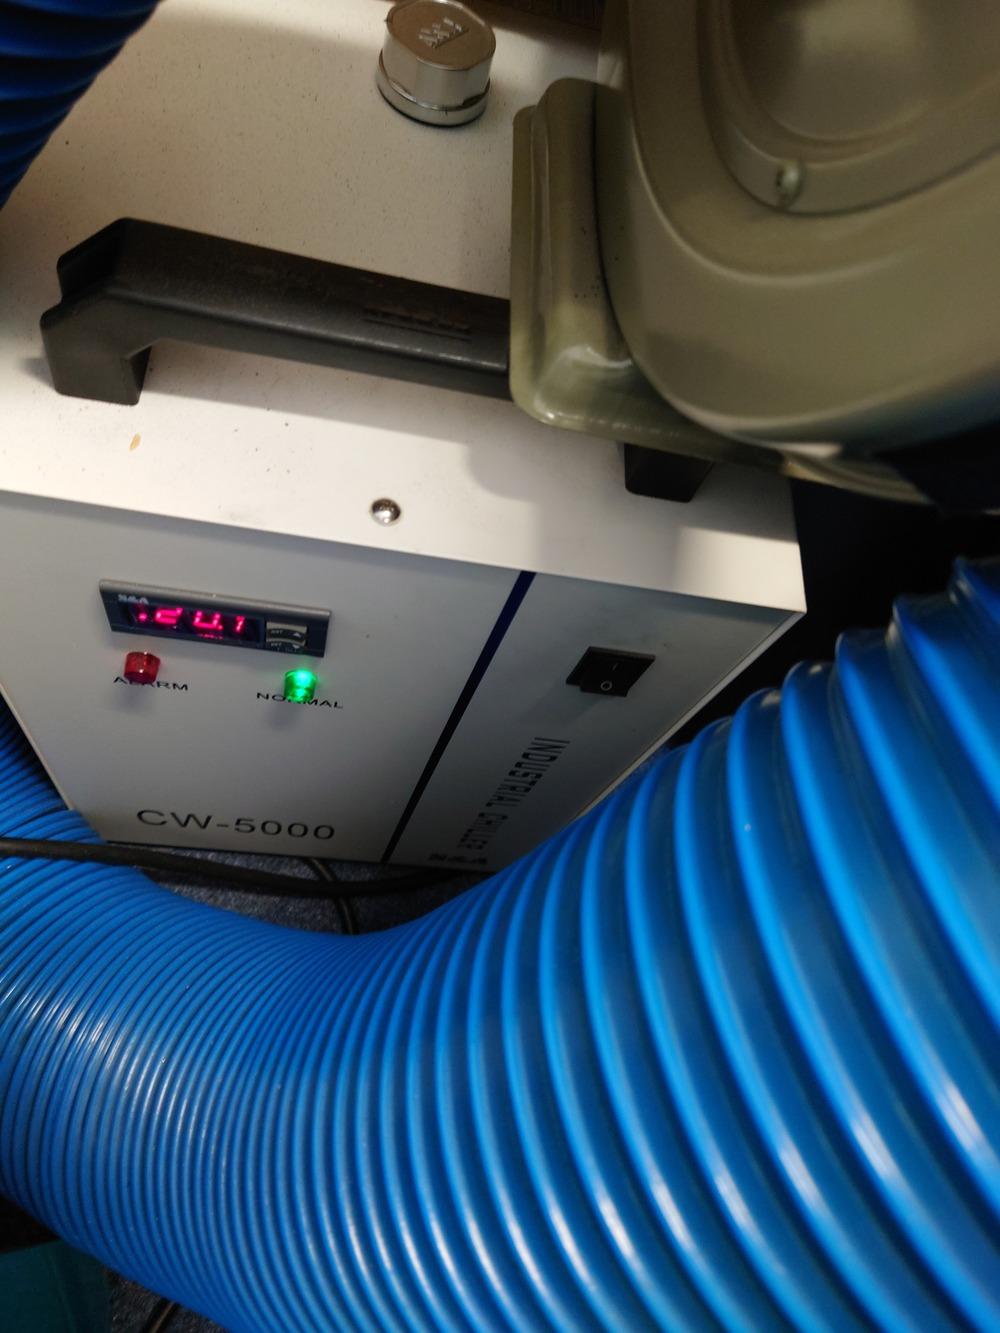
Then the cooling for the laser (behind the blue tube):
[](https://unikat-ilmenau.de/wiki/uploads/images/gallery/2025-08/prep-other-vent.jpg)
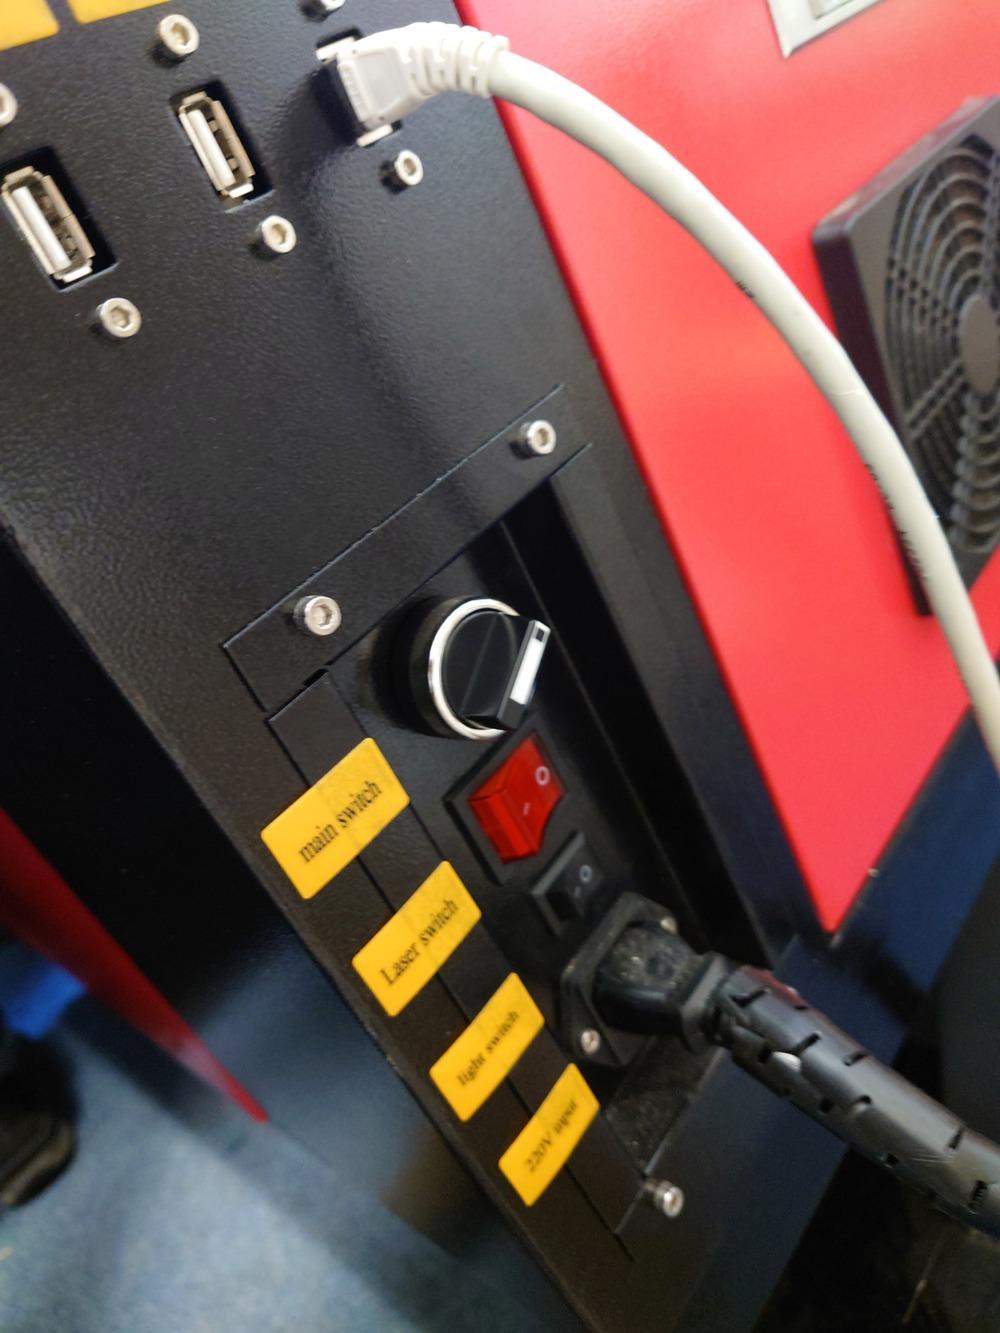
And afterwards the laser itself. It is on the bottom right side of the laser with the round switch (labeled 'main switch'):
[](https://unikat-ilmenau.de/wiki/uploads/images/gallery/2025-08/prep-laser-side.jpg)
Also on the side panel there is the switch for the **laser tube** and the **light switch**.
Only turn on the laser itself ('Laser switch') when needed.
## 2. Fasten Material
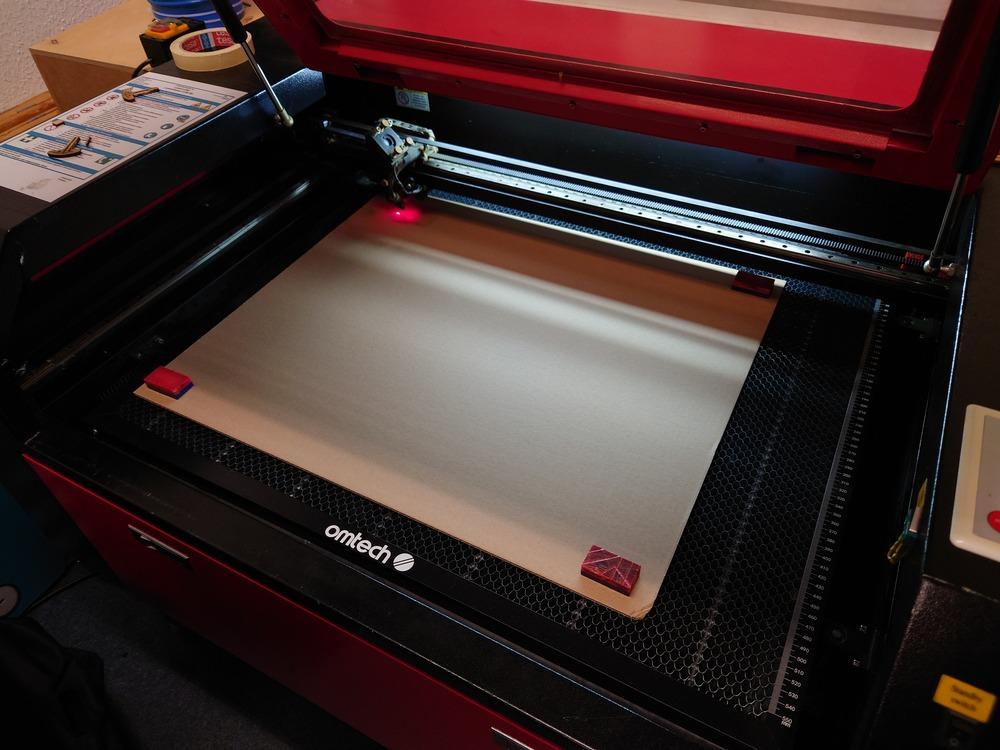
Next place the material and if its not heavy/flat enough, use the red/blue magnets and fixture onto the table.
[](https://unikat-ilmenau.de/wiki/uploads/images/gallery/2025-08/param-cut.jpg)
## 3. Adjust Focus
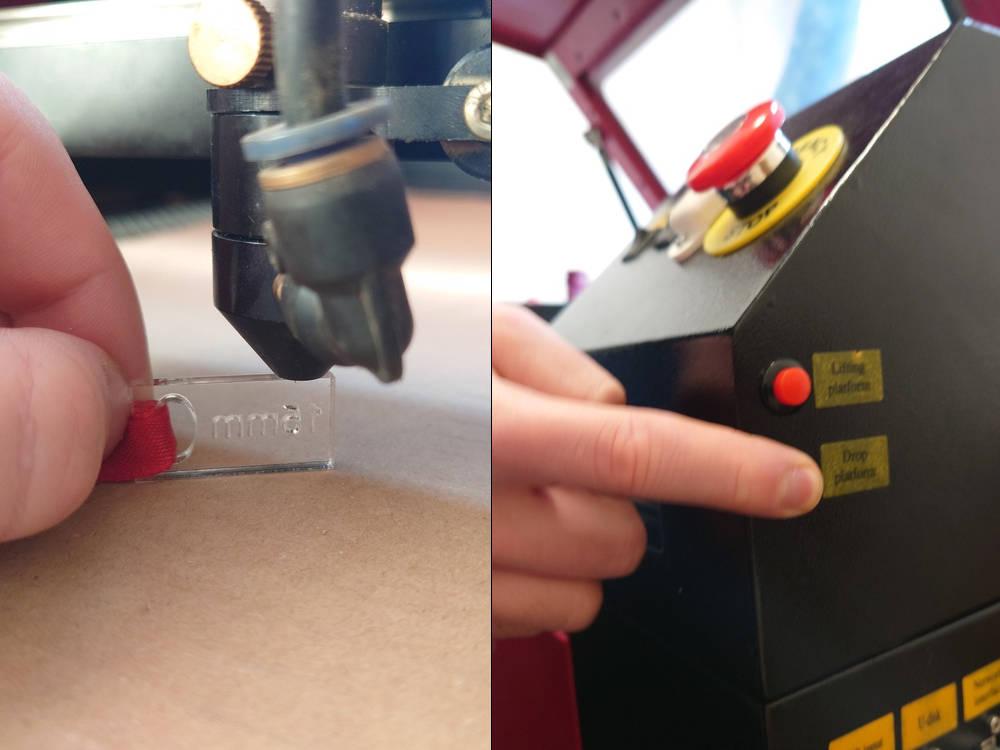
For a precise cut you have to set the focus onto the surface of the material. Use the top right side buttons for lift/lower the workplate.
Then use the focus-piece and place it between material and laser.
**Caution! Two focus-pices are available: 15mm and 20mm**
**Use the 20mm pice**
[](https://unikat-ilmenau.de/wiki/uploads/images/gallery/2025-08/laser-setting-focus.jpg)
To find the right settings you can laser [this test array](https://cloud.tu-ilmenau.de/f/113977552) to dial in the parameters.
## 4. Set Origin
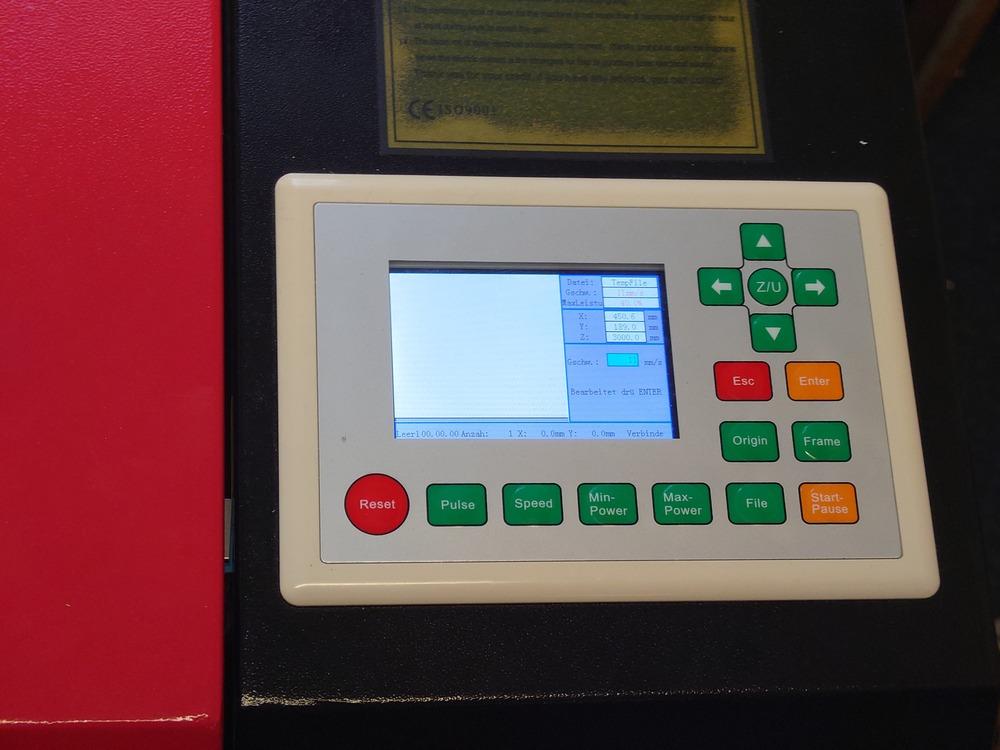
Then use the control panel on top of the laser to set the origin of your work by using the arrow keys to move and the 'Origin' button to set it.
[](https://unikat-ilmenau.de/wiki/uploads/images/gallery/2025-08/prep-panel.jpg)
### Control Panel Buttons
**Reset**
: restarts machine controller, also homing on restart, abrupt stop
**Pulse**
: aktivates the laser for a short period with the currently set power
**Speed/Min-Power/Max Power**
: sets the current Speed/Max-/Min-Power of the machine; after choosing the value with the arrow keys above, press 'ENTER'
**File**
: used for selecting uploaded files, shows a preview on the right side of the panel, for selecting, use again the arrow keys and 'ENTER', for exiting 'ESC'
**Origin**
: sets the current position as the origin
**Frame**
: If a file is selectet, drives the outline of the file
**Start/Pause**
: start/pause currently selected file/operation
**Esc**
: Used for stopping the currently **paused** operation gracefully
When nothing is selected the **Arrow Keys** are used for X/Y-Movement with the currently set speed.
## 5. Prepair File to Cut/Etch in RDWorks
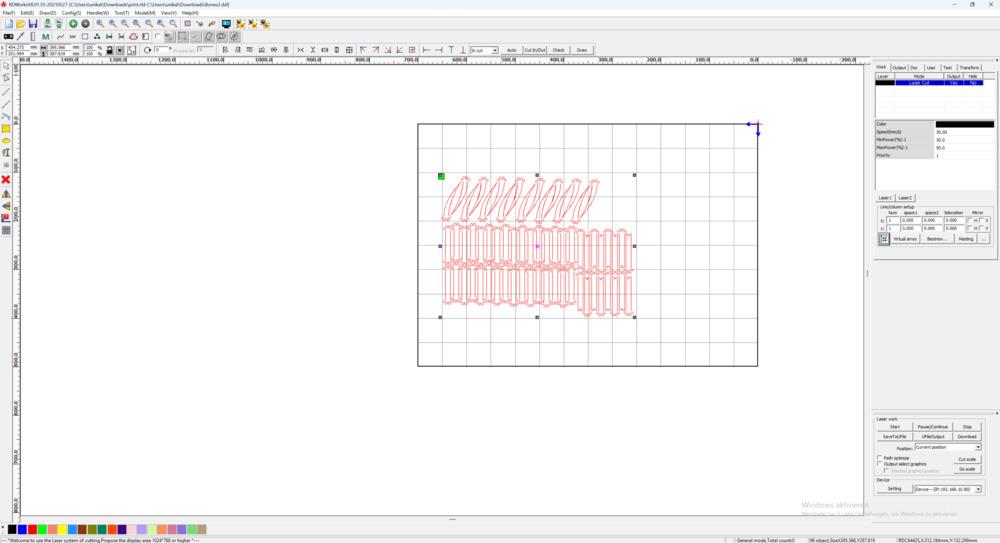
Open **RDWorks** [](https://unikat-ilmenau.de/wiki/uploads/images/gallery/2025-08/rdworks.png)
Here you can import **ONLY DXF** files on the top left Menu **_File_->_Import_**.
[](https://unikat-ilmenau.de/wiki/uploads/images/gallery/2025-08/rdworks.jpg)
On the bottom left side, you can assign new layers with the colors for your components when needed. (Yes, only as many layers as there are those colors -.-)
[](https://unikat-ilmenau.de/wiki/uploads/images/gallery/2025-08/rdworks-layers.png)
The importent settings are on the right side:
[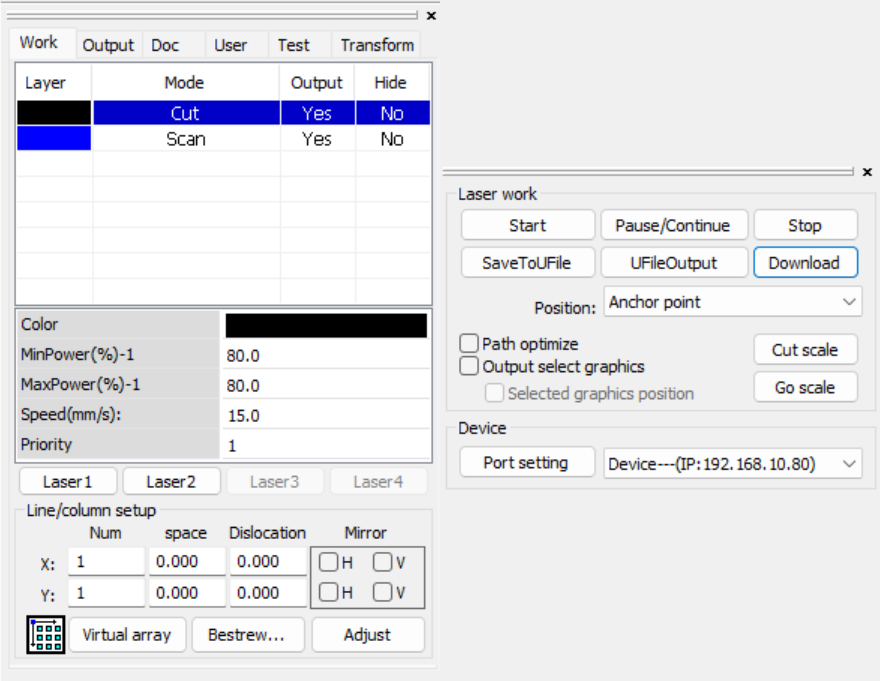](https://unikat-ilmenau.de/wiki/uploads/images/gallery/2025-08/rdwork-layer-settings.png)
Then on the top right panel (left on the picture) are the settings for layers, the operation, speed and power for each of them. And on the bottom right (right in the picture) you can select the choosen position, port/address of the laser and can control it here (more later)
The selected one can be edited quickly with the fields below or with **Double Click** edit the advanced settings for the selected layer. Ensure in the column 'Output' is a yes for all layers.Here you can import **ONLY DXF** files on the top left Menu **_File_->_Import_**.
| | |
|--|--|
| [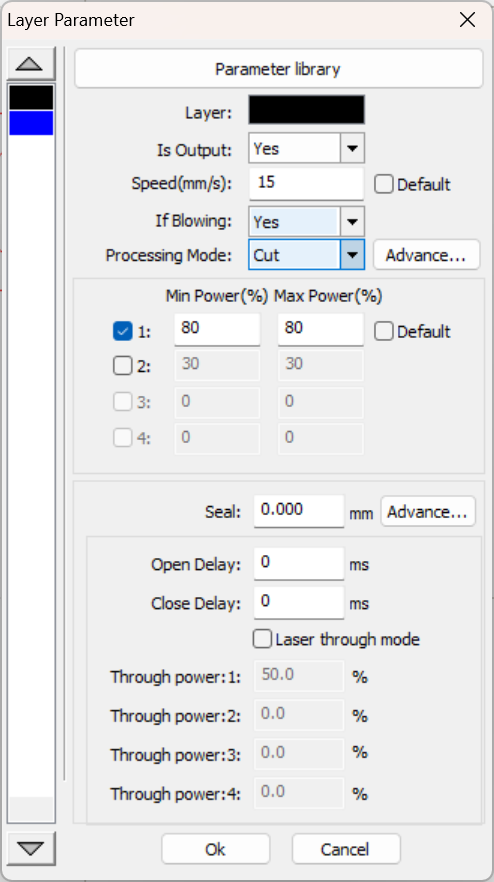](https://unikat-ilmenau.de/wiki/uploads/images/gallery/2025-08/rdworks-layer-settings.png) | In the top you have a small **parameter library** with
predefined parameters that should usually work.
Then Speed is very important and depends
heavily on the material/operation.
Then the operation mode, where
- **Cut** : Drives along the path of the vector graphic
- **Scan** : filles the area the vector graphic spans
with many parallel lines
- TODO : TODO
- TODO : TODO
Then Power is also very important and also
depends on material and operation.
TODO|
## 6. Start Cutting/Etching
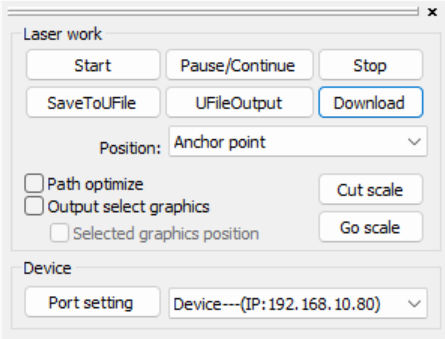
For starting you need the bottom right settings:
[](https://unikat-ilmenau.de/wiki/uploads/images/gallery/2025-08/rdworks-upload.png)
### 0. Origins in RDWorks
One important field is the **Position**, where you set the origin the machine should use.
**But it's only applied when starting from the software**
|Position|Meaning|
|--------|---------------|
|Absolut Coordinate|Uses absolute coordinates from the software, so the machine zero as reference point |
|Anchor Point|Uses the position of the origin setting on the machine|
|Current Position| Uses current position of the laser, not origin|
|Machine Origin|????|
When starting from the machine, the origin of the machine is always used.
### 1. Start directly in RDWorks
Then to start lasering, **Start** directly uploads and starts the file.
### 2. Upload to Laser and start
You can also use '**Download**' to upload the file to the machine.
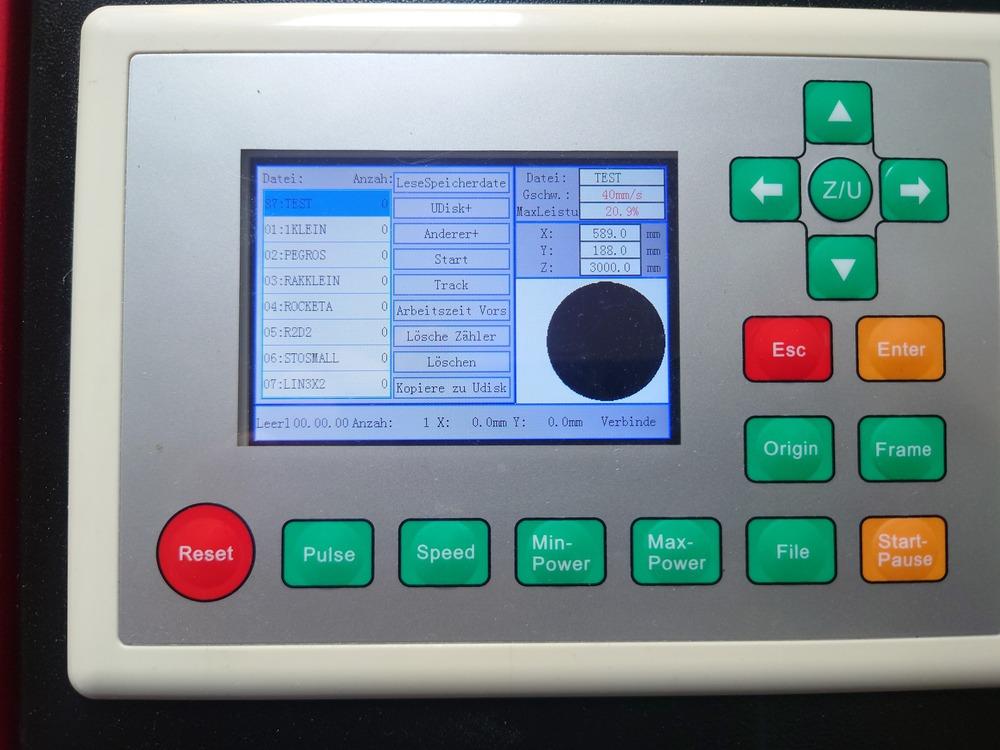
Then on the machine you can re-adjust the position and check the outline it with the '**Frame**' button.
To load the file, press **File** then select it and use it with **Enter**
[](https://unikat-ilmenau.de/wiki/uploads/images/gallery/2025-08/rdworks-file.jpg)