# How to use
## 1. Turn on
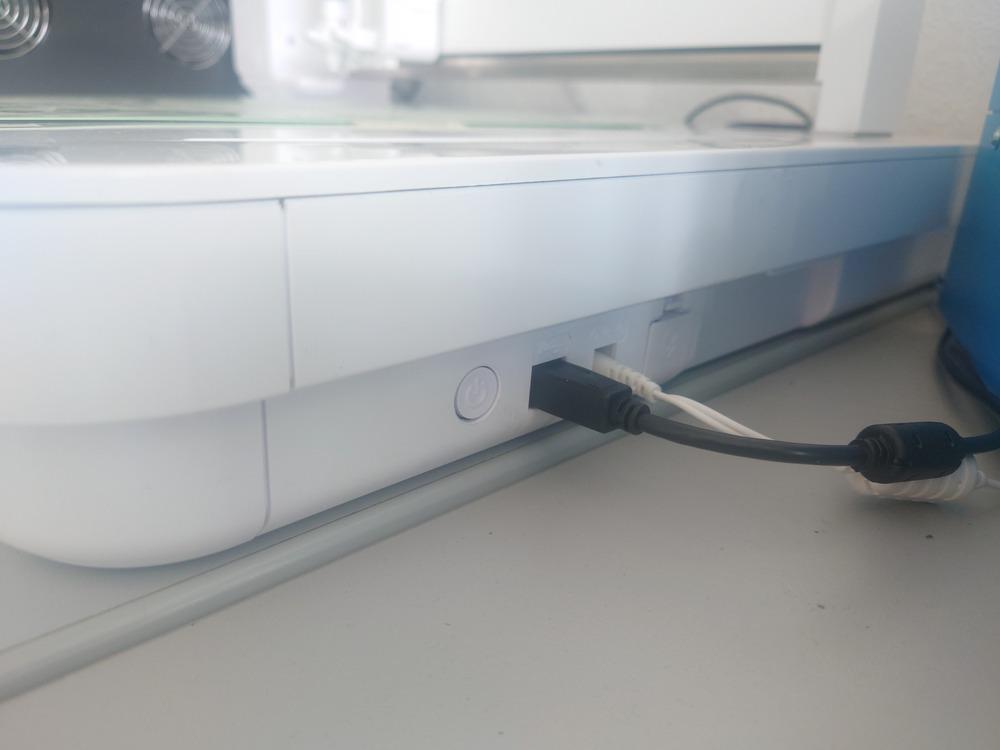
Press the power button on the right side **for a few seconds**:
[](https://unikat-ilmenau.de/wiki/uploads/images/gallery/2025-08/curio-side.jpg)
## 2. [Optional] Insert tools
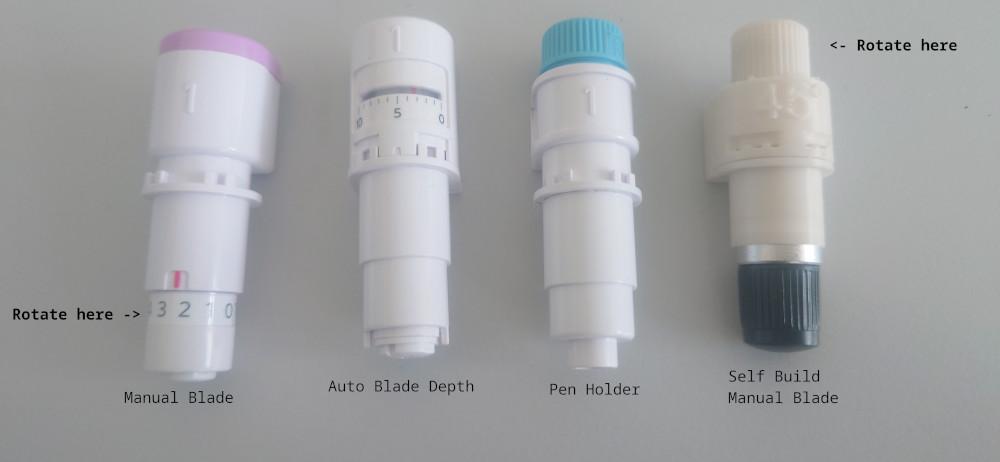
Next choose your tool you want to use, currently there are:
### Tools
[](https://unikat-ilmenau.de/wiki/uploads/images/gallery/2025-08/curio-tools.jpg)
|Tool| Feature|
|----|--------|
|Curio Manual Blade| Tool with blade, where the tool-depth needs to be adjusted **manually**
- adjustment and disamble by rotating the bottom scale|
|Curio Auto Blade| Tool with blade, where the tool-depth can be adjusted with the software, it then drives into the left side of the machine and presses mechanically the tool down
- press the bottom to manually set the tool-depth|
|Curio Pen Holder|Tool for a penn, which can be tightend on the top, an the top part can be changed for different pens|
|Self Build manual tool|Self printed manual tool, like the above, but to adjust it, **rotate on the top**
- rotate the bottom to change the blade|
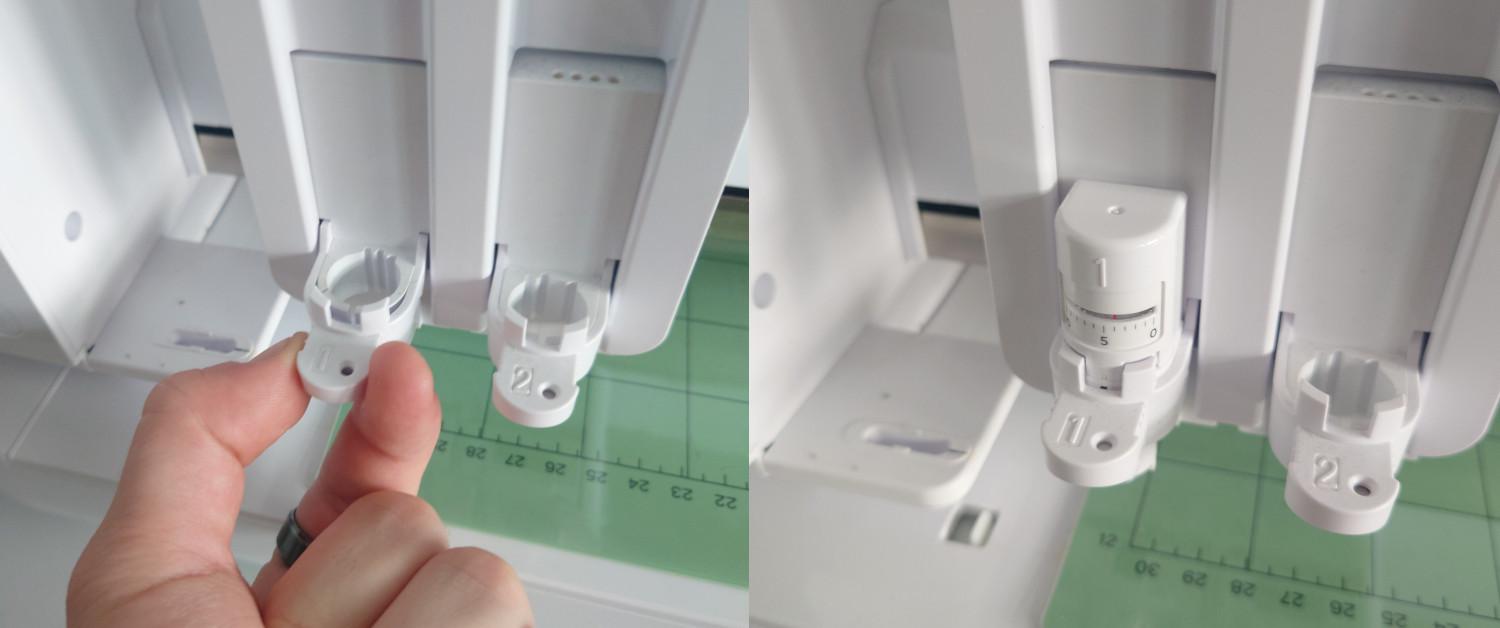
All tool belong into **SLOT 1**.
### Load A Tool
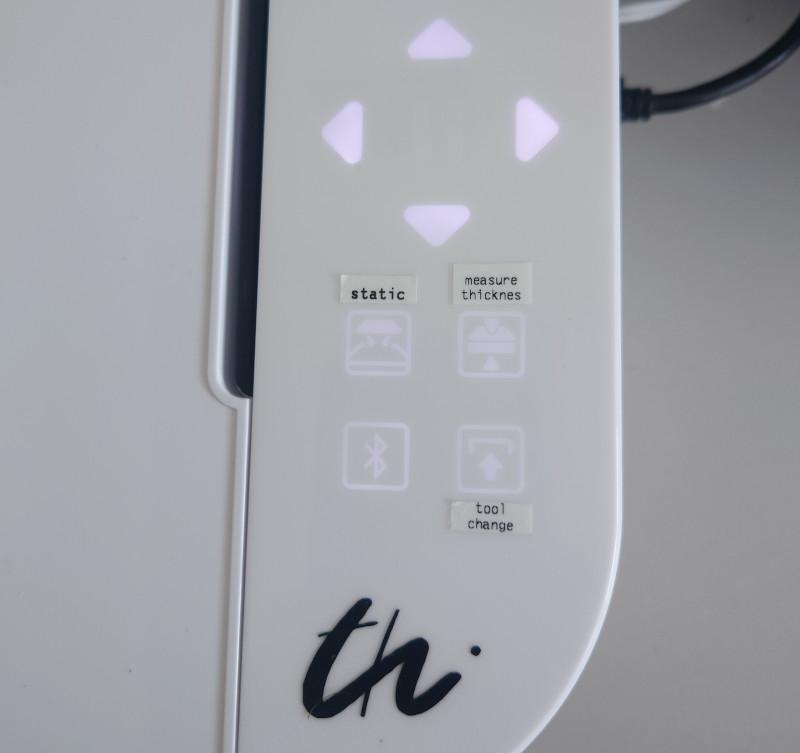
Then you can use the 'Tool Change' button to move the machine to the front or back (arrow keys) and insert the tool.
[](https://unikat-ilmenau.de/wiki/uploads/images/gallery/2025-08/curio-buttons.jpg)
Then to change the tool, pull on the latch, place the tool and push on it.
[](https://unikat-ilmenau.de/wiki/uploads/images/gallery/2025-08/tool-change.jpg)
## 3. Place Material
Before placing the material:
- remove the protective film placed on the cutting area (**place it back when finished**)
- activate the electrostatic bed with the '**static**' button, it **takes a while** to charge up the material
[](https://unikat-ilmenau.de/wiki/uploads/images/gallery/2025-08/curio-buttons.jpg)
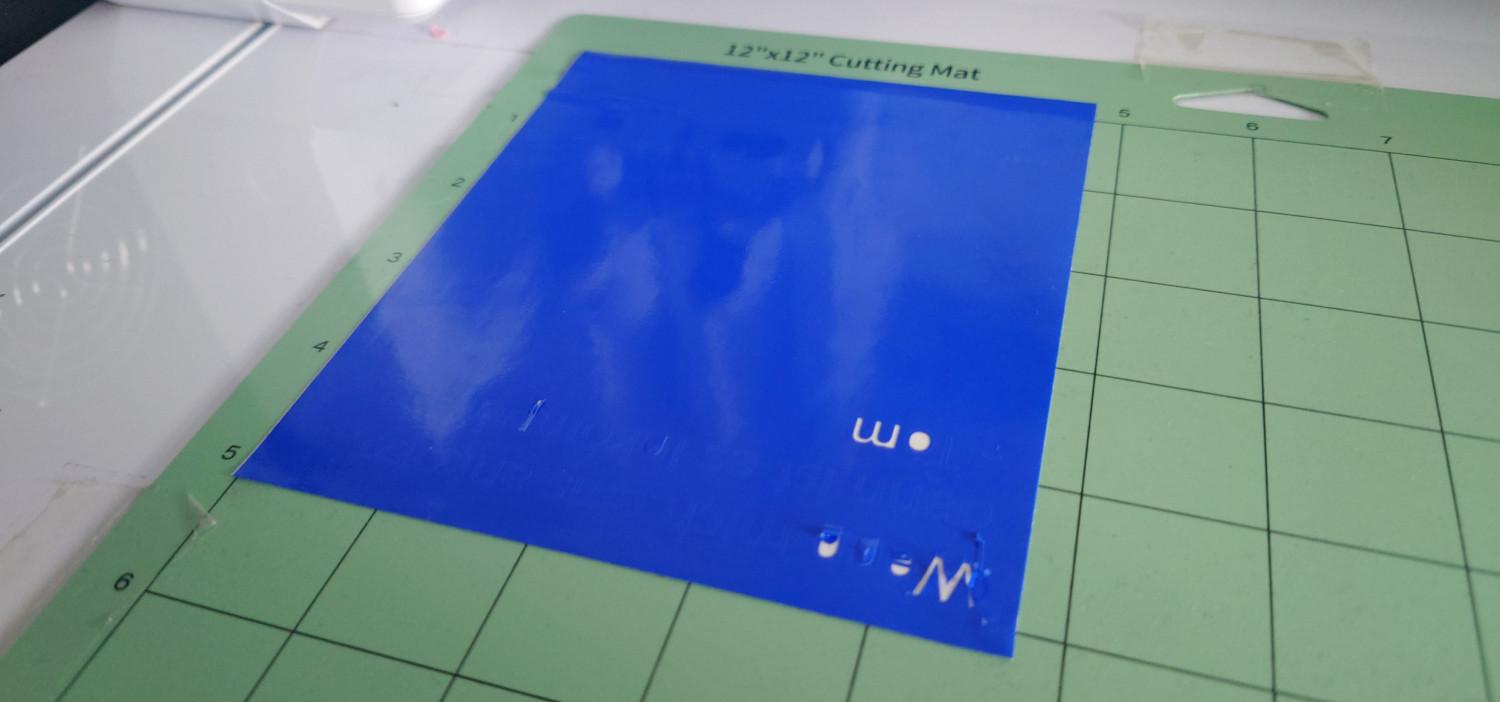
Then optionaly change the/place a cutting mat if your material is not flat enough/bends up. (Cutting mat is **optional** but especialy very bend materials hold better on it)
It should be **flat and stuck** on the bad, so **not easy to move away**.
[](https://unikat-ilmenau.de/wiki/uploads/images/gallery/2025-08/curio-material.jpg)
## 4. Make a test cut
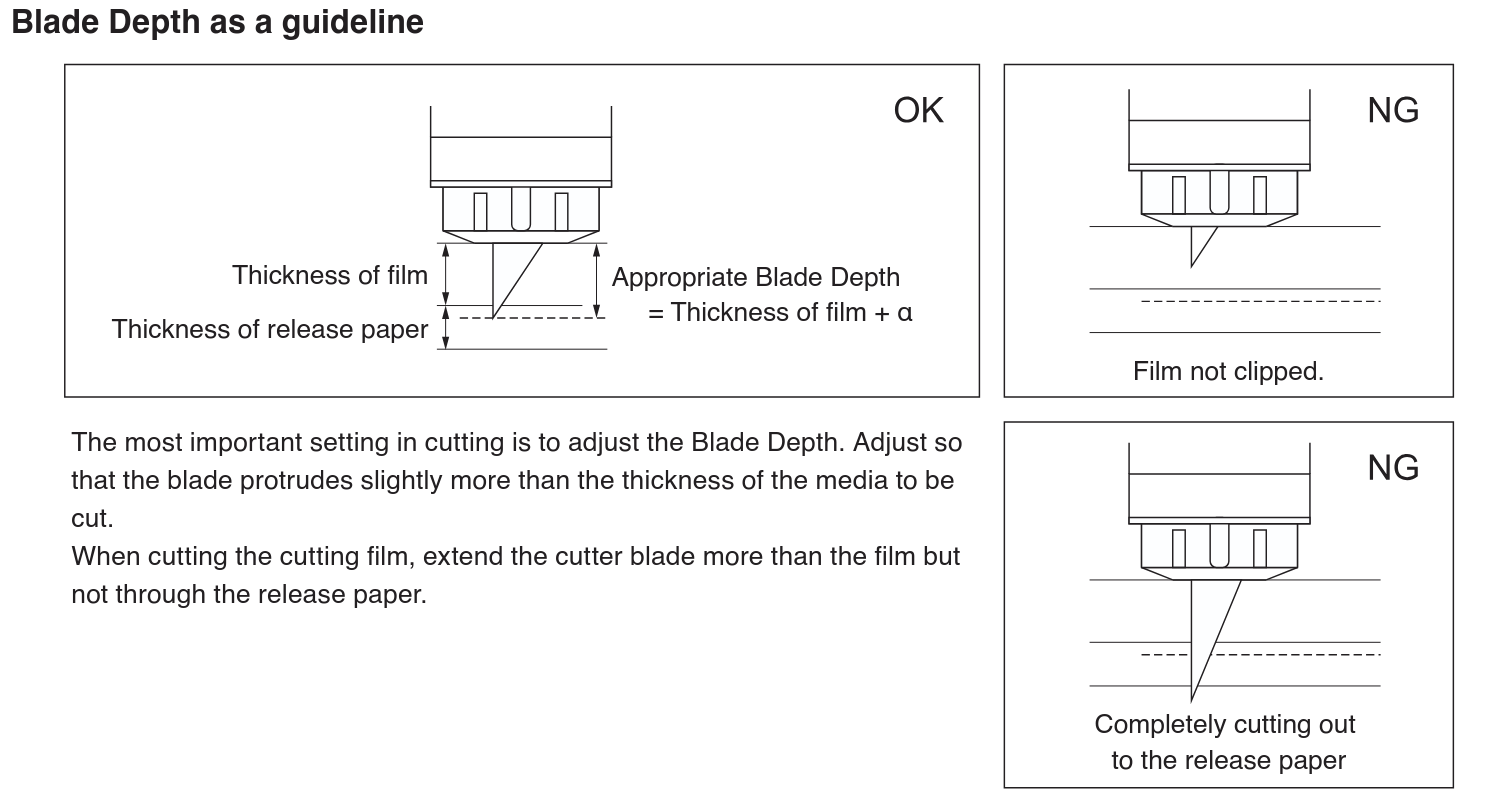
### Blade Depth Guideline
[](https://unikat-ilmenau.de/wiki/uploads/images/gallery/2025-08/blade-depth-guide.png)
### Adjust the settings
Open [](https://unikat-ilmenau.de/wiki/uploads/images/gallery/2025-08/silhouette-studio-logo-small.png) Silhouette Studio and go to the top right tab **'SENDEN'** (send).
There you can adjust the Settings for the tool.
The most important part it the seconds box from the top **'Schneiden'** (cut).
|Description|Image|
|-|-|
|**'Klingentiefe'**
(cutting depth)
- is **only** used for the **auto knife depth** tool,
the other ones need to be adjusted manually,
but **THE MOST IMPORTANT**
**'Anpressdruck'**
(contact preasure)
- is the preasure/z offset used to go into the material
-**higher for harder materials, lower for softer to not rip it'**
- not that important
**'Durchgänge'**
(rounds)
- the number of repititions
**'Geschwindigkeit'**
(speed)
- i guess the percentage from max speed
- lower for more complex structures to cut |[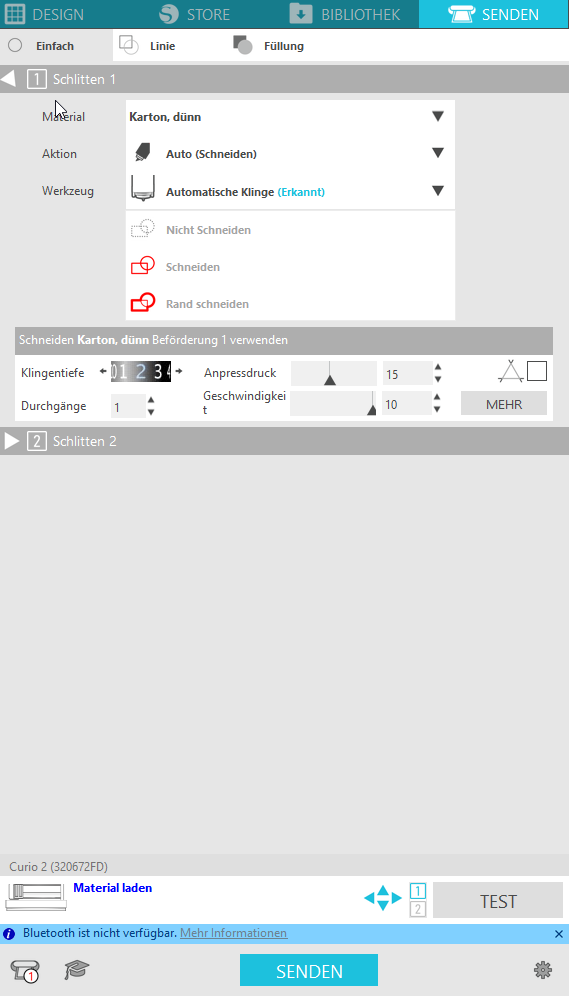](https://unikat-ilmenau.de/wiki/uploads/images/gallery/2025-08/silhouette-studio-settings.png)|
### Make the cut
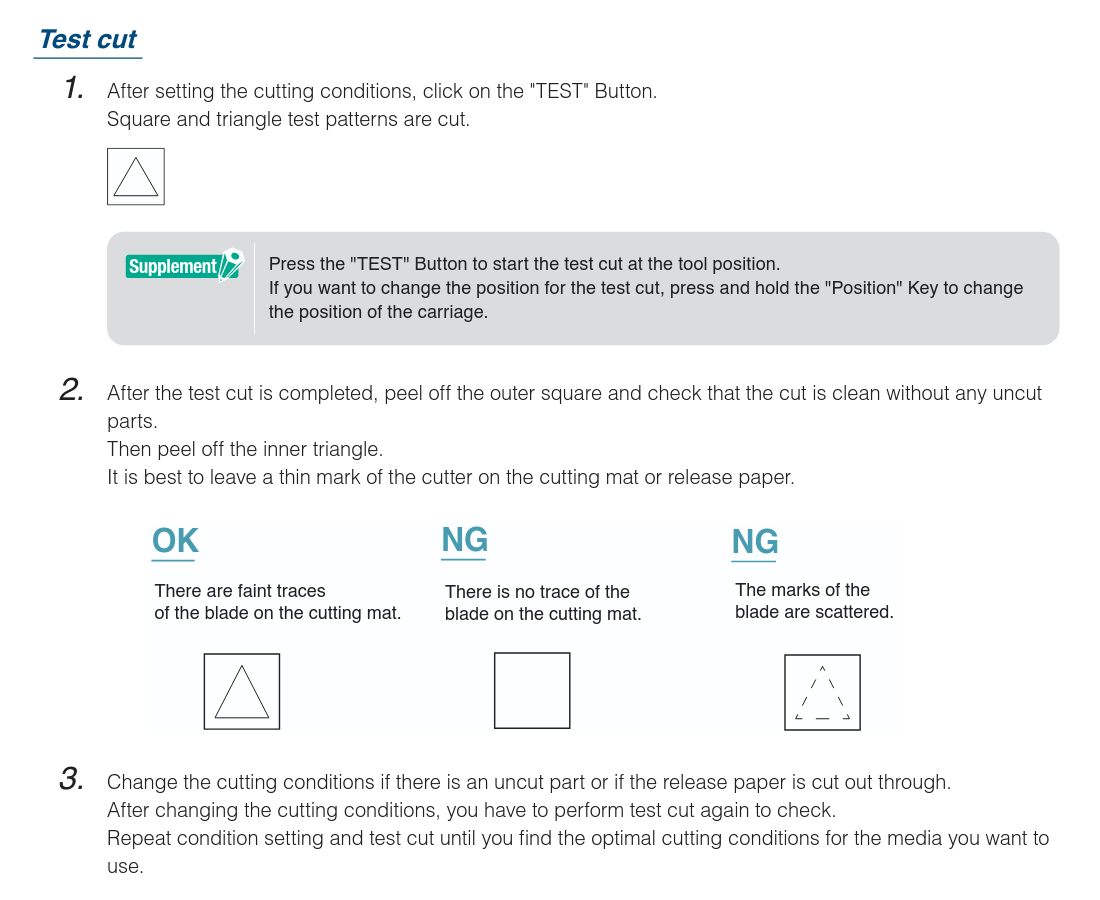
Drive to the position you want to test with the arrow keys on the machine.
**MEASURE THE THICKNESS** with the botton on the machine.
* When you use **reflective media,apply masking tape** and then detect the thickness at that position.
* The sensor is attached to the bottom of the **Tool Holder 2**.
[](https://unikat-ilmenau.de/wiki/uploads/images/gallery/2025-08/curio-test-cut.png)
## 5. Import and Prepair in software
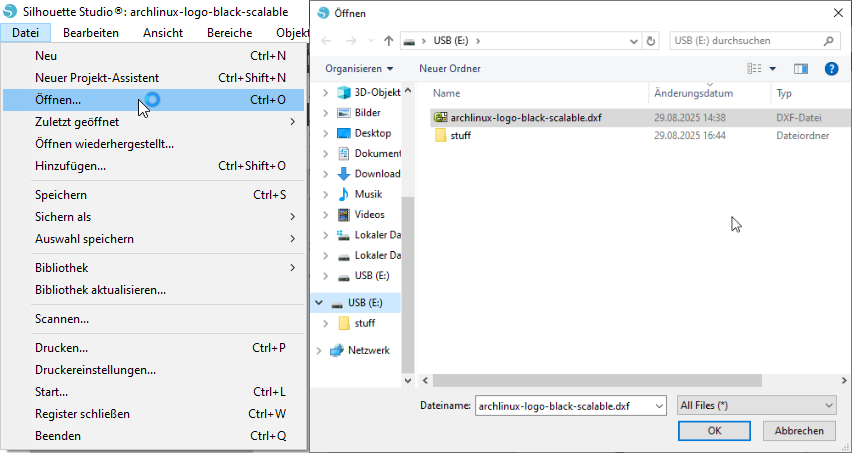
- save your garphic in **DXF R12** format and import it in Silhouette Studio in 'File'->'Open...' ("Datei"->"Öffnen...")
- **make sure, it has the right size** (the software is not that nice for adjustments afterwards
[](https://unikat-ilmenau.de/wiki/uploads/images/gallery/2025-08/silhouette-studio-import.png)
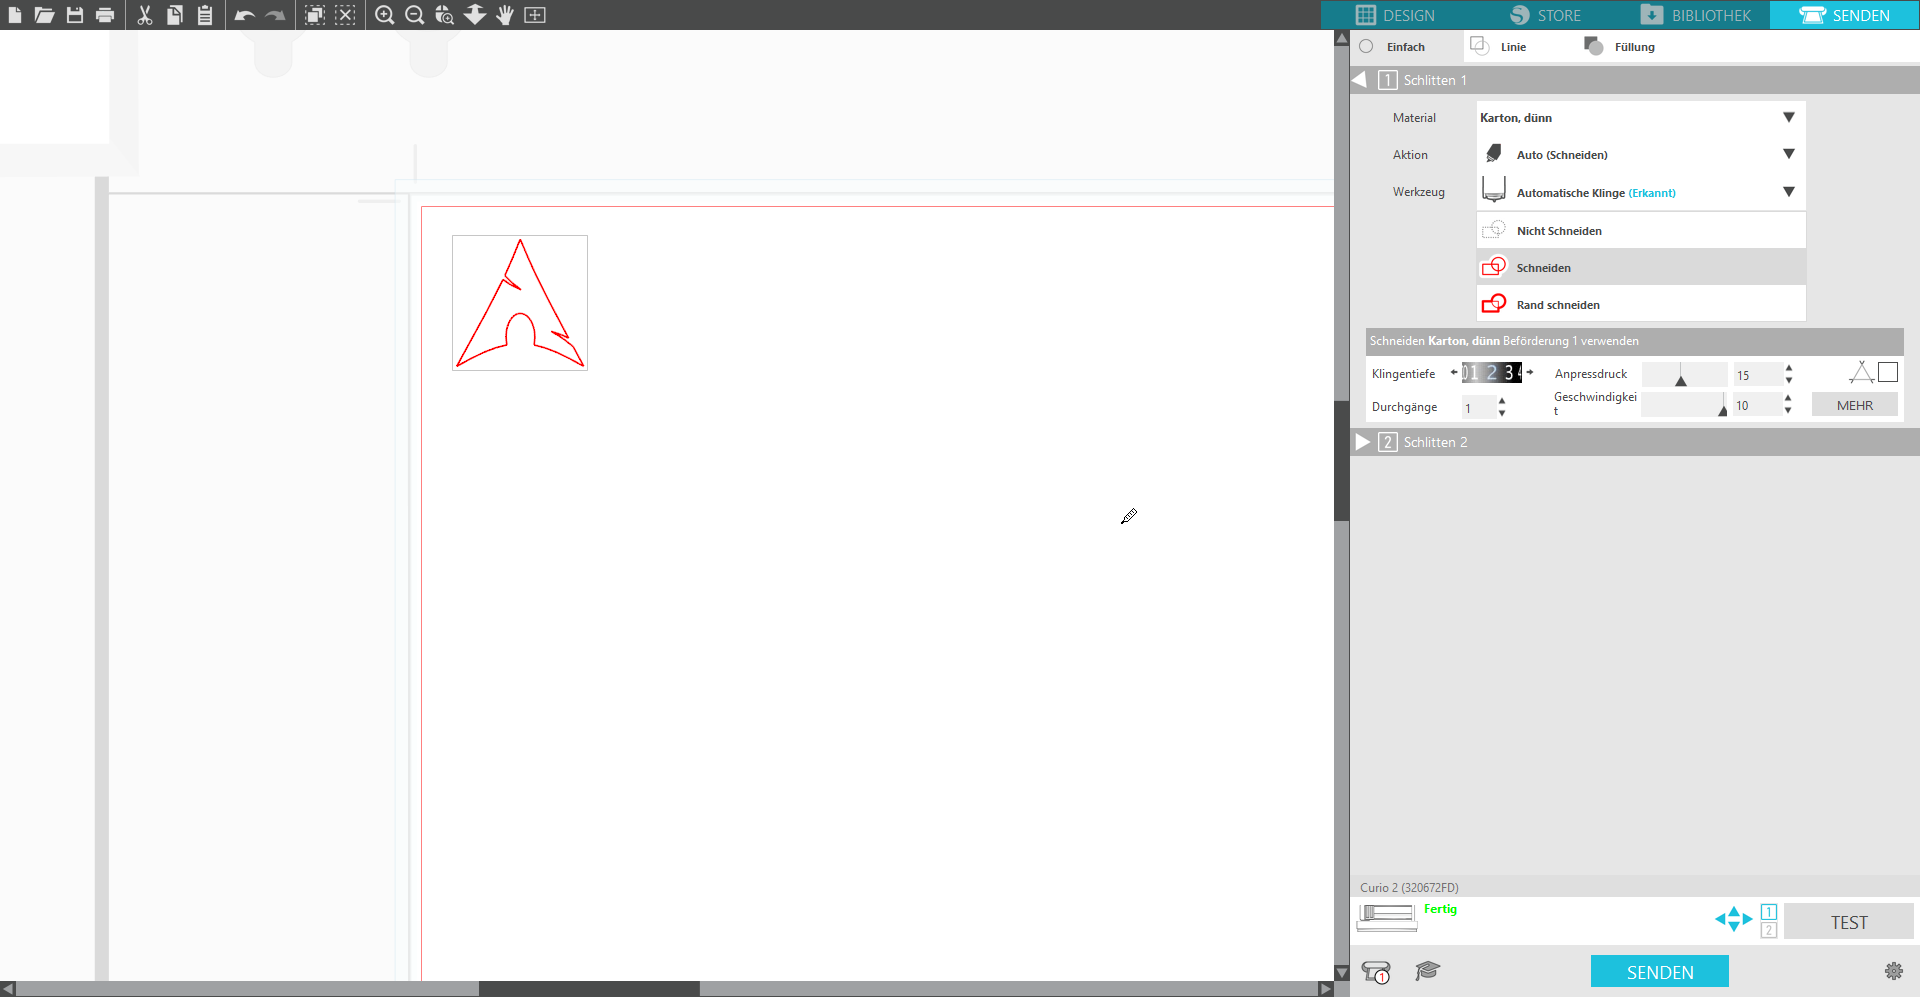
- then go to the **'Send'** (Senden) tab and adjust positioning and settings
[](https://unikat-ilmenau.de/wiki/uploads/images/gallery/2025-08/silhouette-studio-prepair.png)
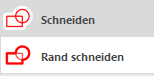
For the operations:
- **Cut ("Schneiden")** means cut along **ALL paths**
- **Cut Outline ("Rand schneiden")** means cut **ONLY OUTER PATHS**, so only arround your image
[](https://unikat-ilmenau.de/wiki/uploads/images/gallery/2025-08/cut-cut-outline.png)
### TODO Pass Markings
## 6. Start cutting
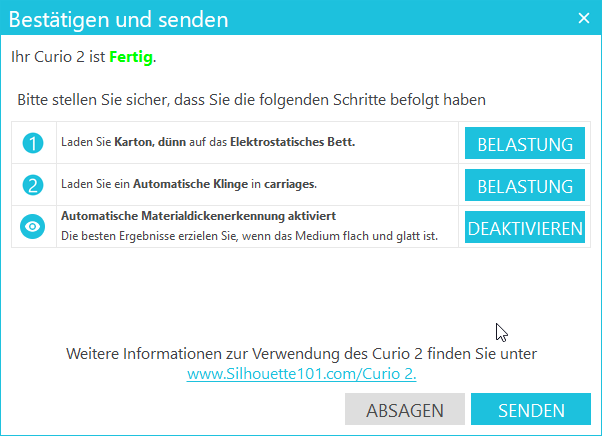
- and if everything is allright, start cutting by **sending ('SENDEN')**
[](https://unikat-ilmenau.de/wiki/uploads/images/gallery/2025-08/silhouette-studio-confirm.png)
Here it shows just a step by step guide plus the setting for material depth perseption. **If you did it before**, just press **deactivate ('DEAKTIVIEREN')** to turn it of.
Then again press **send ('SENDEN')**