# Carvera How to Use
## 1. Turn On
- Use the **Back-Switch** to turn on the CNC:
[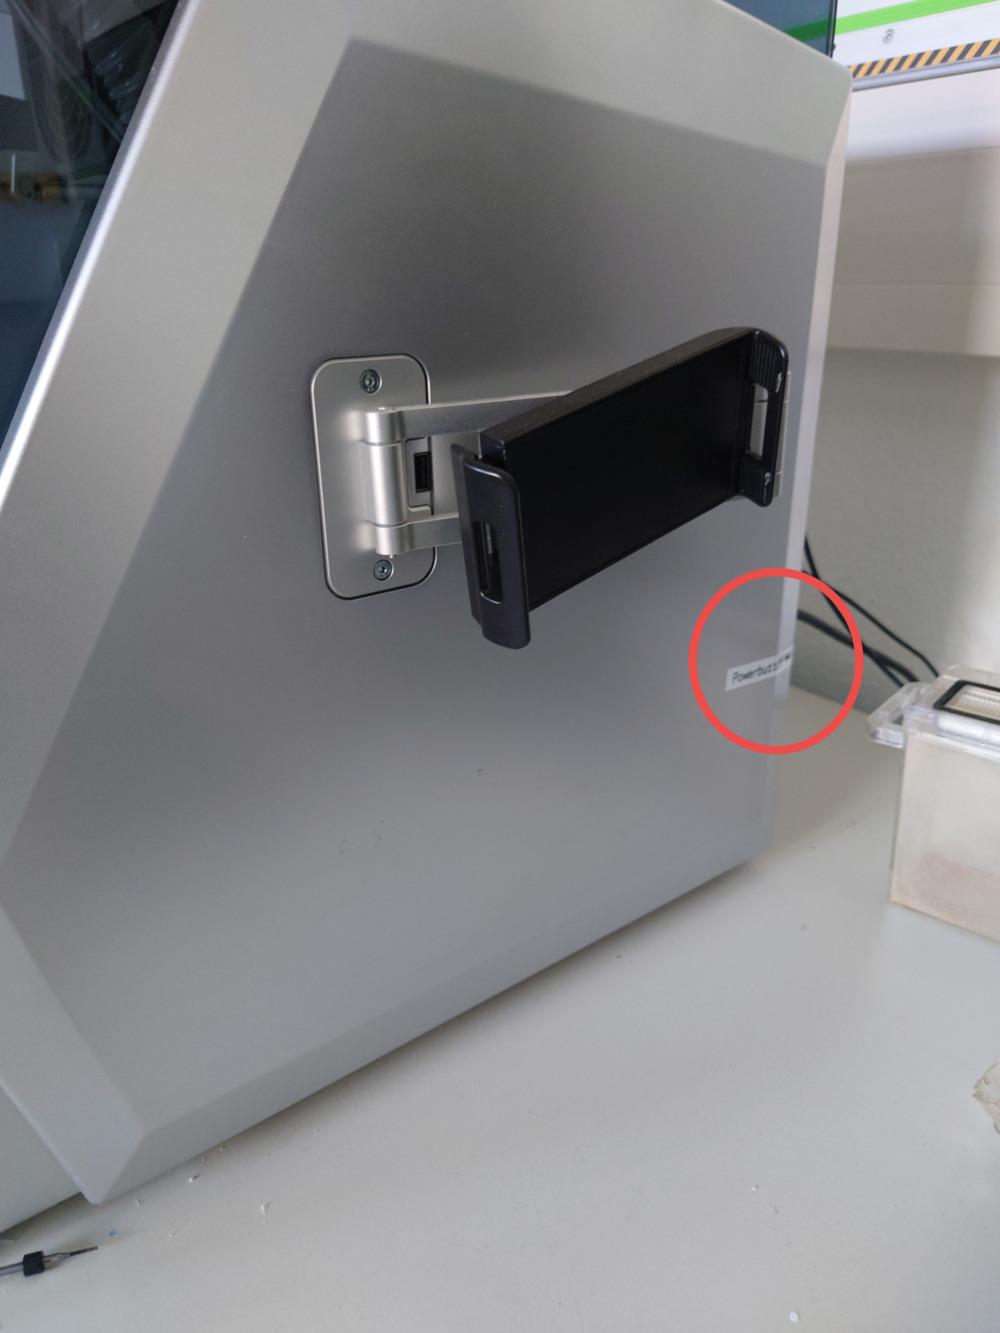](https://unikat-ilmenau.de/wiki/uploads/images/gallery/2025-07/carvera-power-button.jpg)
- The Front-Button shows the status of the machine and is used for stand by, but because of the USB Connection, always use the back-button for tuning on and of the machine
## 2. Connect and Home
You should always home the machine before milling, (even after starting it as a good practice)!
1. To do that, open makera controller: [](https://unikat-ilmenau.de/wiki/uploads/images/gallery/2025-07/makera-logo.png)
2. Connect the software via USB on the top left corner:
[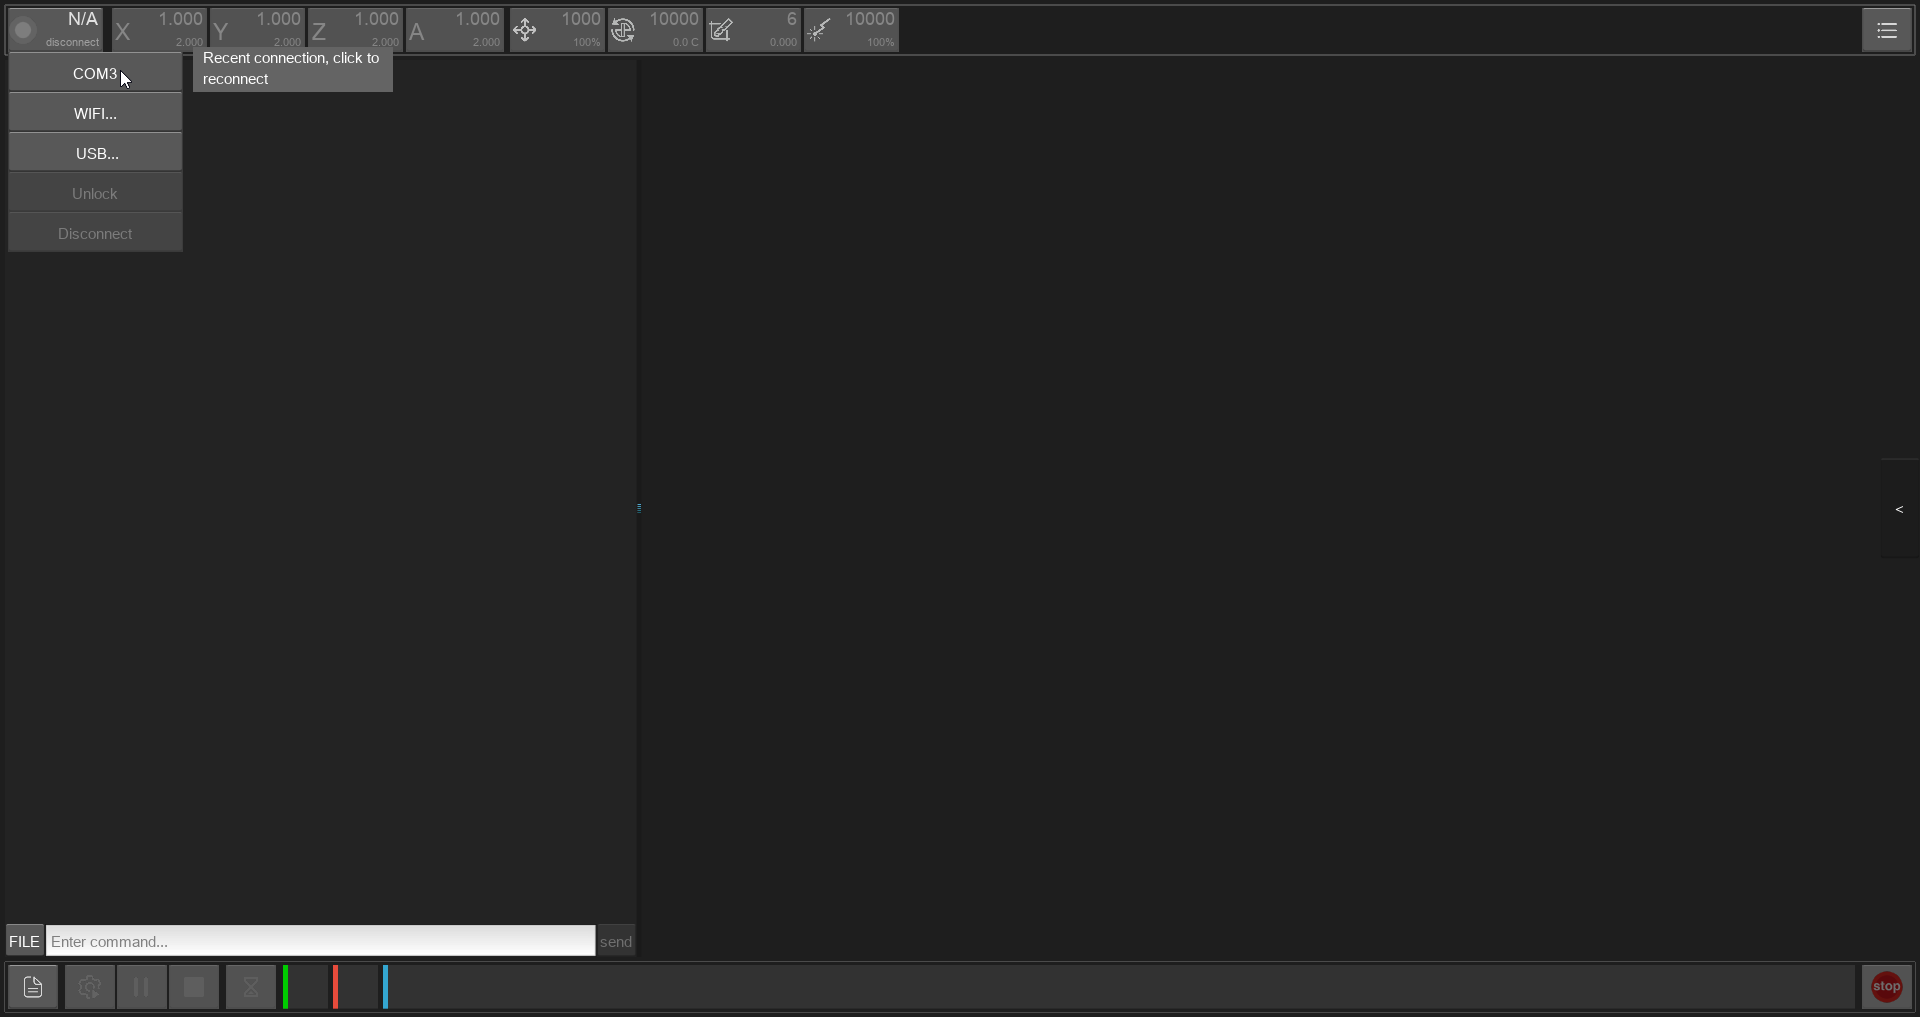](https://unikat-ilmenau.de/wiki/uploads/images/gallery/2025-07/carveracontroller-connect.png)
3. Go to the side panel and press 'HOME':
| Side Panel Button on the right | Virtual Controller with 'HOME' in the middle|
|------------------------|-------------------|
| [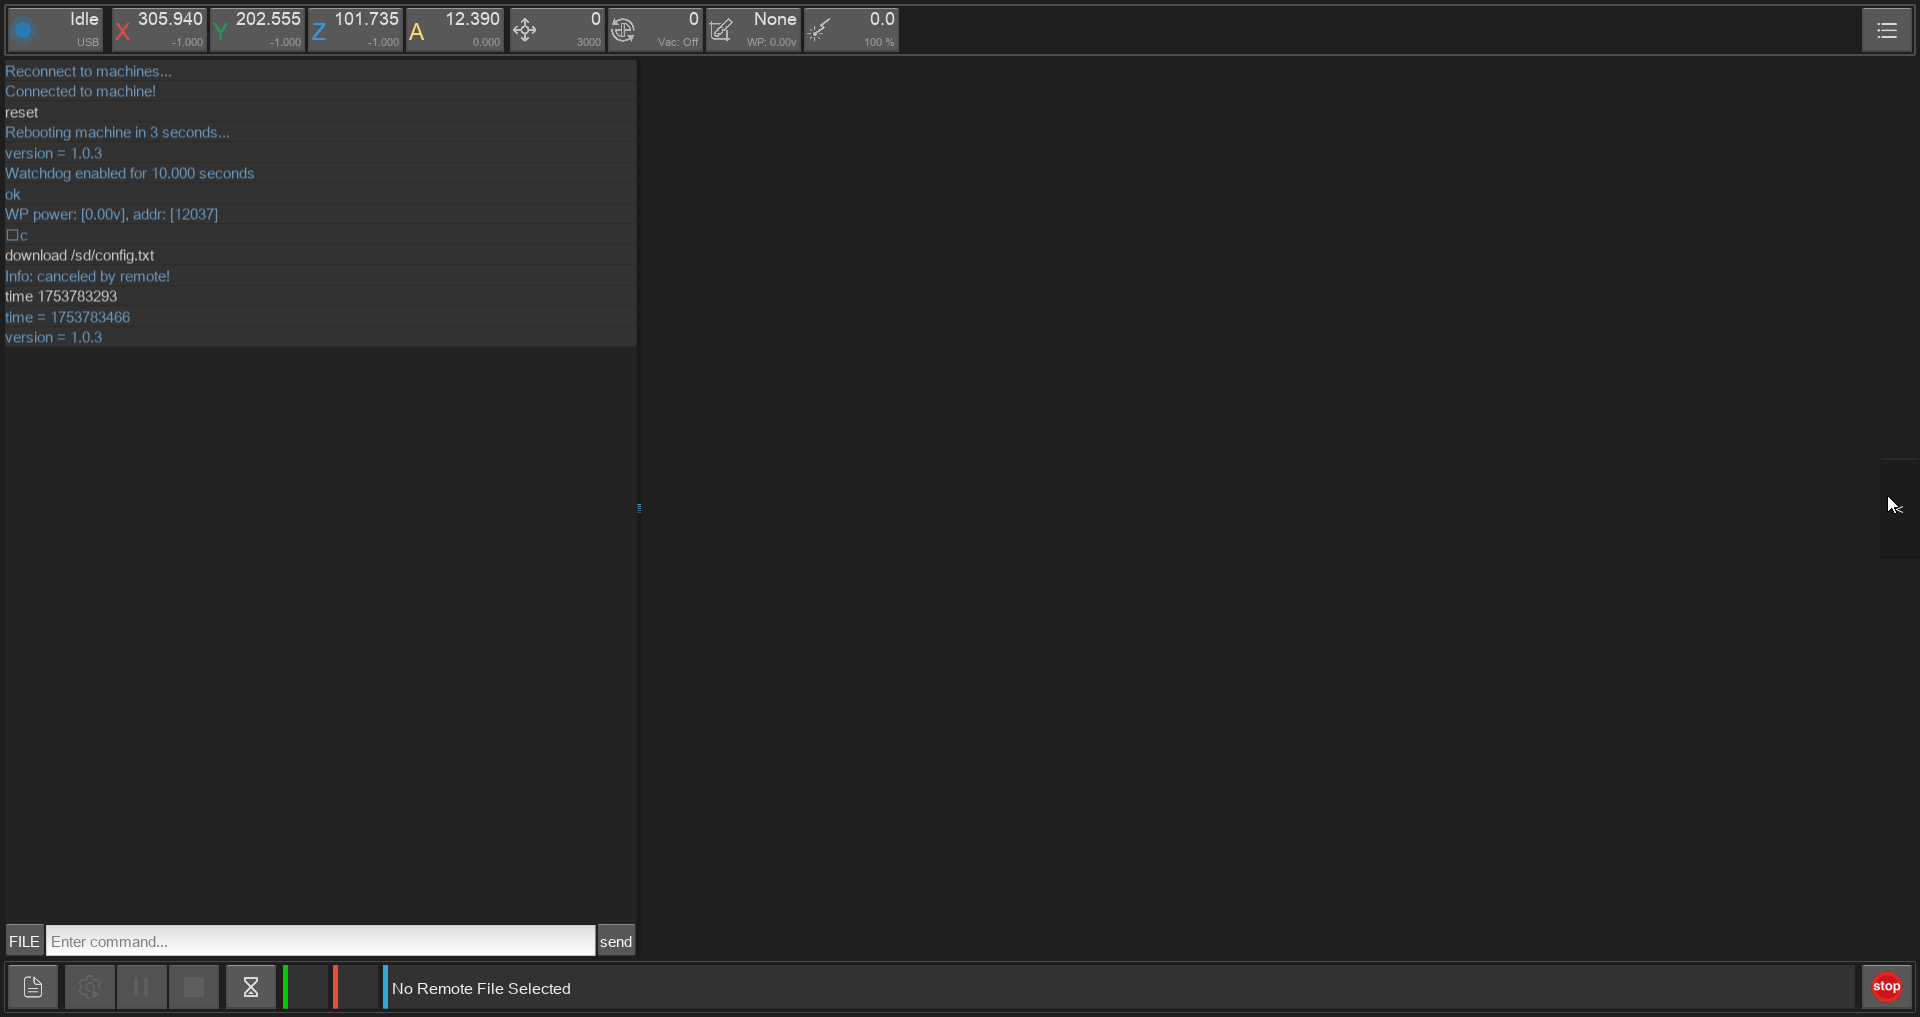](https://unikat-ilmenau.de/wiki/uploads/images/gallery/2025-07/carveracontroller-side.png) | [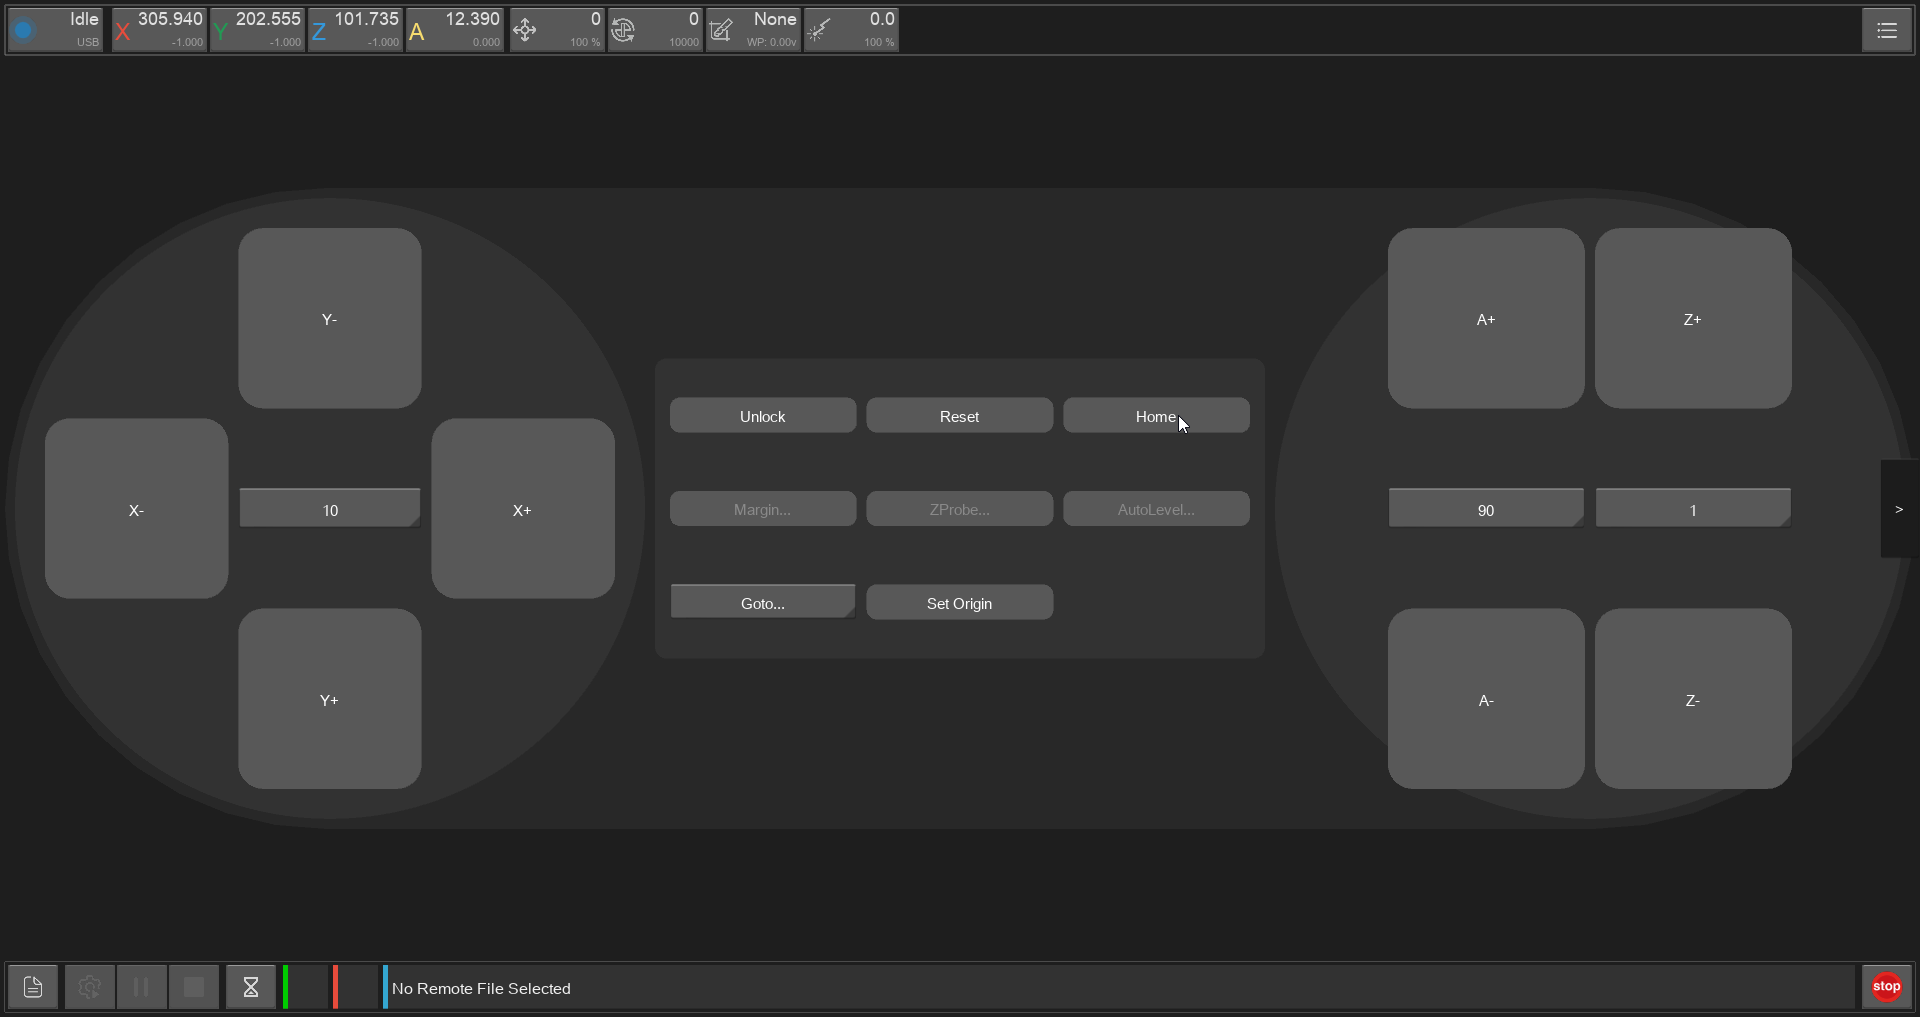](https://unikat-ilmenau.de/wiki/uploads/images/gallery/2025-07/carveracontroller-home.png) |
## 3. Fasten the Workpiece
Then use the controller to move the bed thowards you and fasten your workpiece:
| Type of fastening | Example |
|-------------------|---------|
|**Clamps**
Place the clamps on the bad
and tighten the workpiece with them |[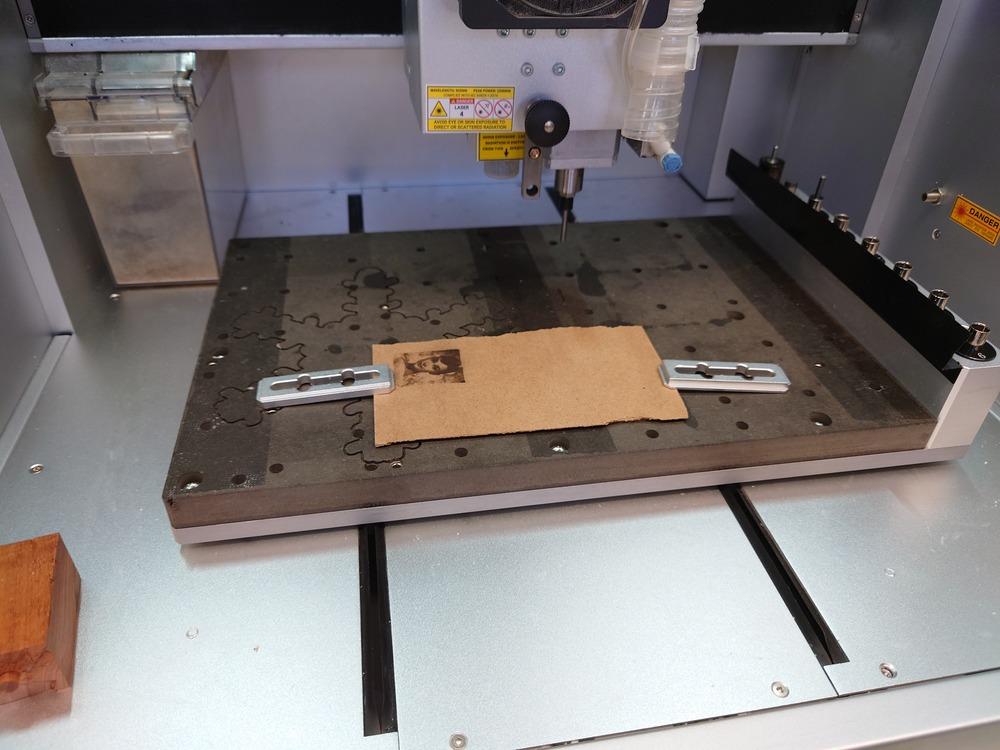](https://unikat-ilmenau.de/wiki/uploads/images/gallery/2025-07/carvera-clamps.jpg)[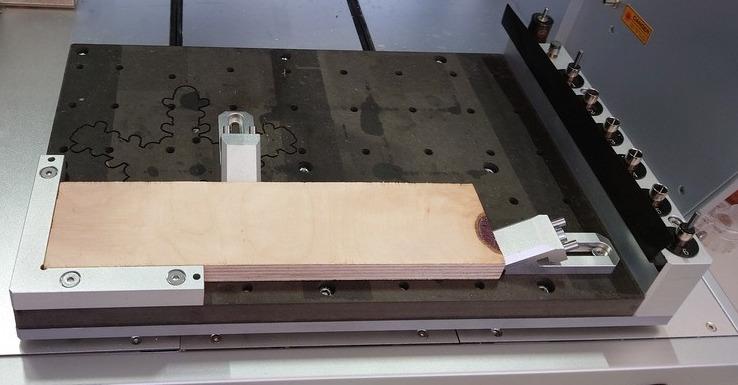](https://unikat-ilmenau.de/wiki/uploads/images/gallery/2025-07/carvera-wood-clamped.jpg)|
| **Tape**
on a flat workpiece, place some tape
on the bottom equally and just stick it onto the bed | [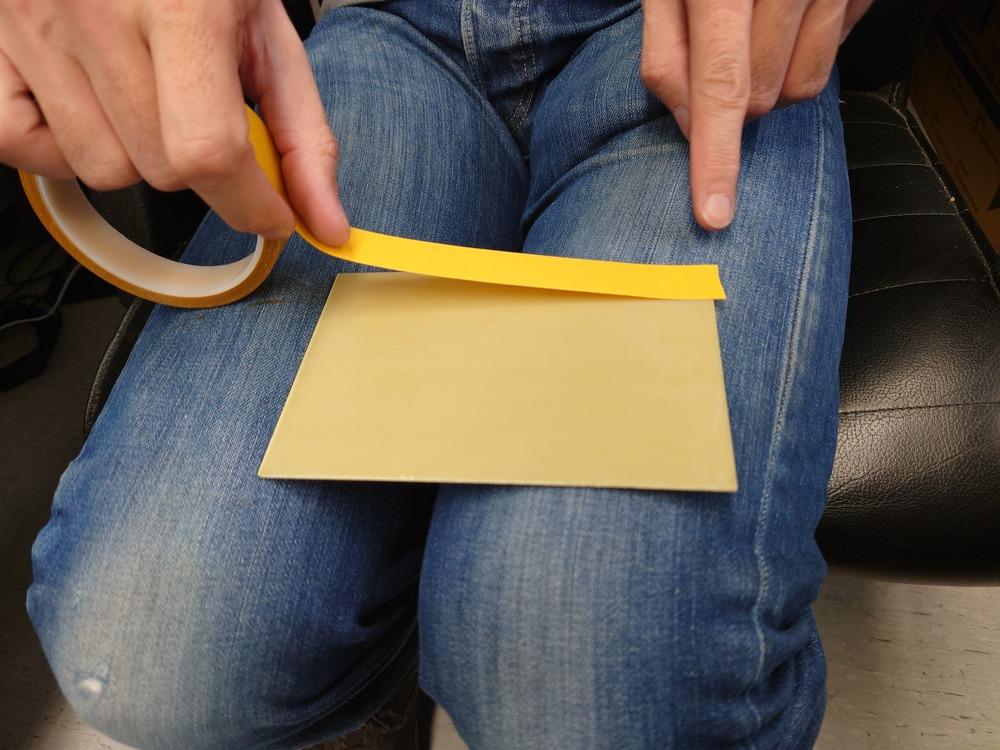](https://unikat-ilmenau.de/wiki/uploads/images/gallery/2025-07/group-tape.jpg)|
| Vacuum | TODO |
| Screws | TODO |
## 4. Zero
Then go to you work origin and use top left buttons to set it individually:
[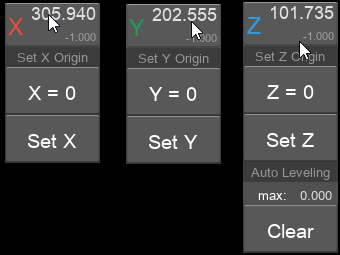](https://unikat-ilmenau.de/wiki/uploads/images/gallery/2025-07/carveracontroller-zero.png)
Or use the button **'Set Origin'** in the controller on the right:
[](https://unikat-ilmenau.de/wiki/uploads/images/gallery/2025-07/carveracontroller-home.png)
### Auto Z Probe
Finding the Z-zero-point is more special because of the precision needed for it. For this, the Auto Z Probe can be used like this:
0. Make sure, the Auto Z Probe is in the tool changer
1. Place the tool where you want to measure the Zero Point
2. Go to the controller and press **'ZProbe'** [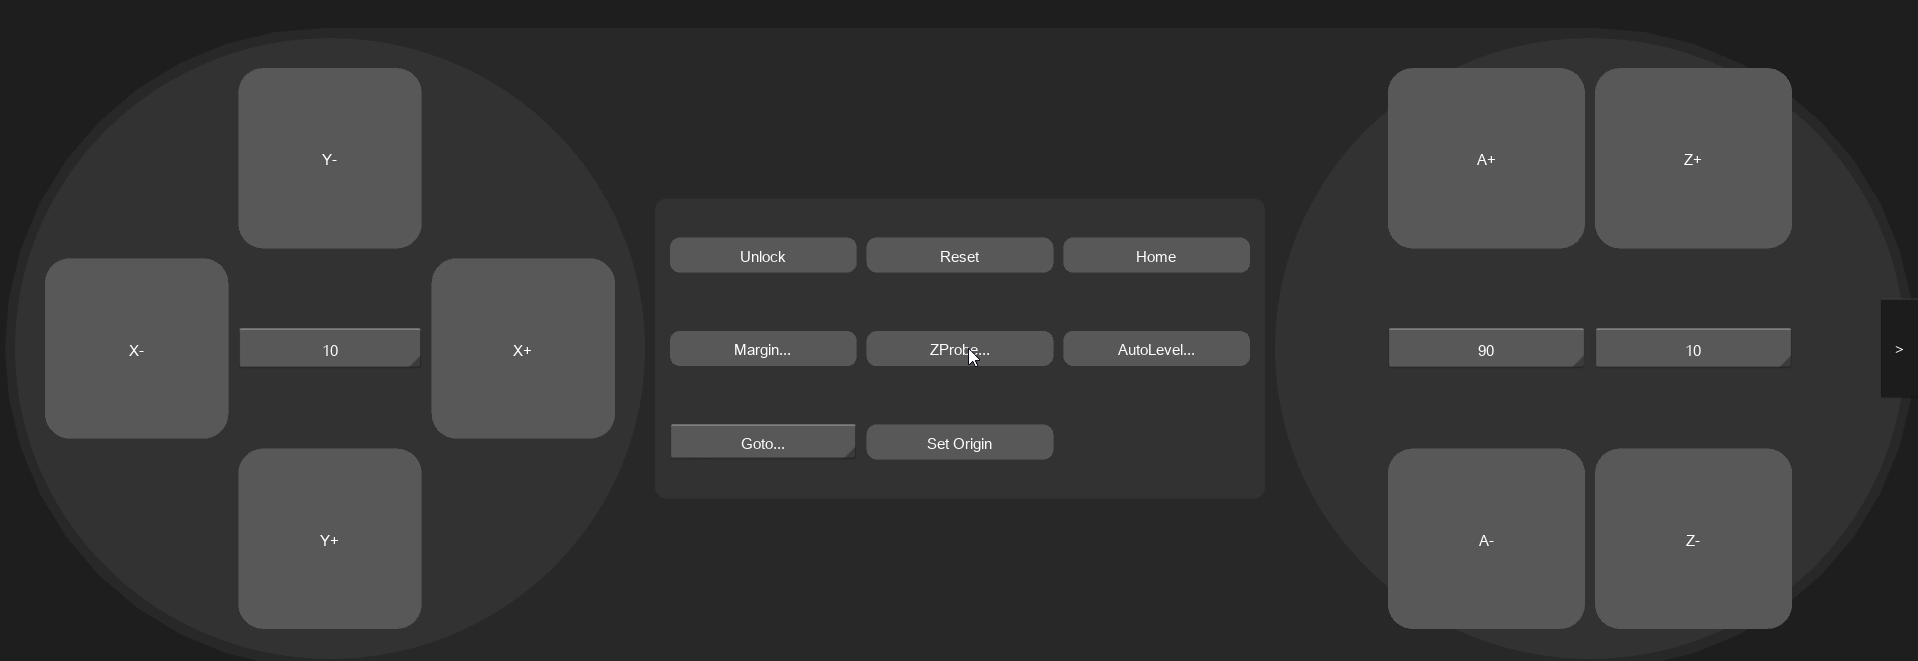](https://unikat-ilmenau.de/wiki/uploads/images/gallery/2025-07/carvera-cont-z-probe.png)
[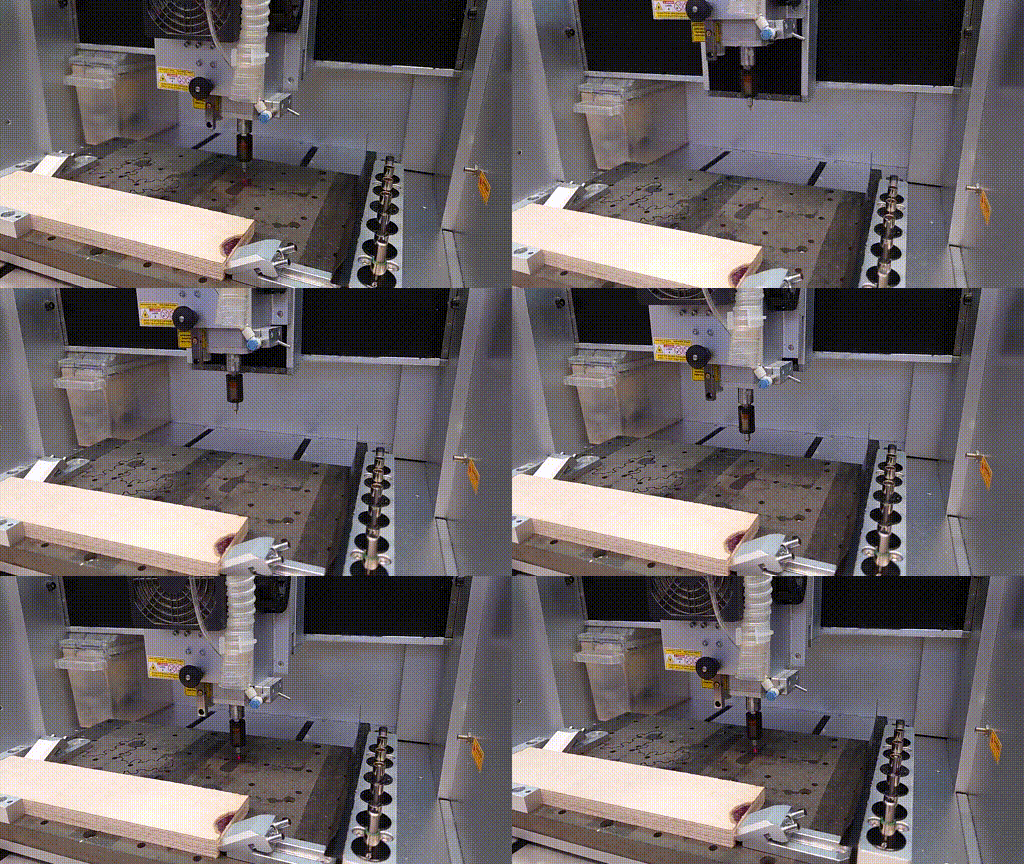](https://unikat-ilmenau.de/wiki/uploads/images/gallery/2025-07/carvera-auto-probe-timelaps.gif)
In this case we set the origin on the bottom of the workpiece.
##### Before Milling
It is also possible to probe before the milling (the Check-Box with **'Auto Z Probe'**):
[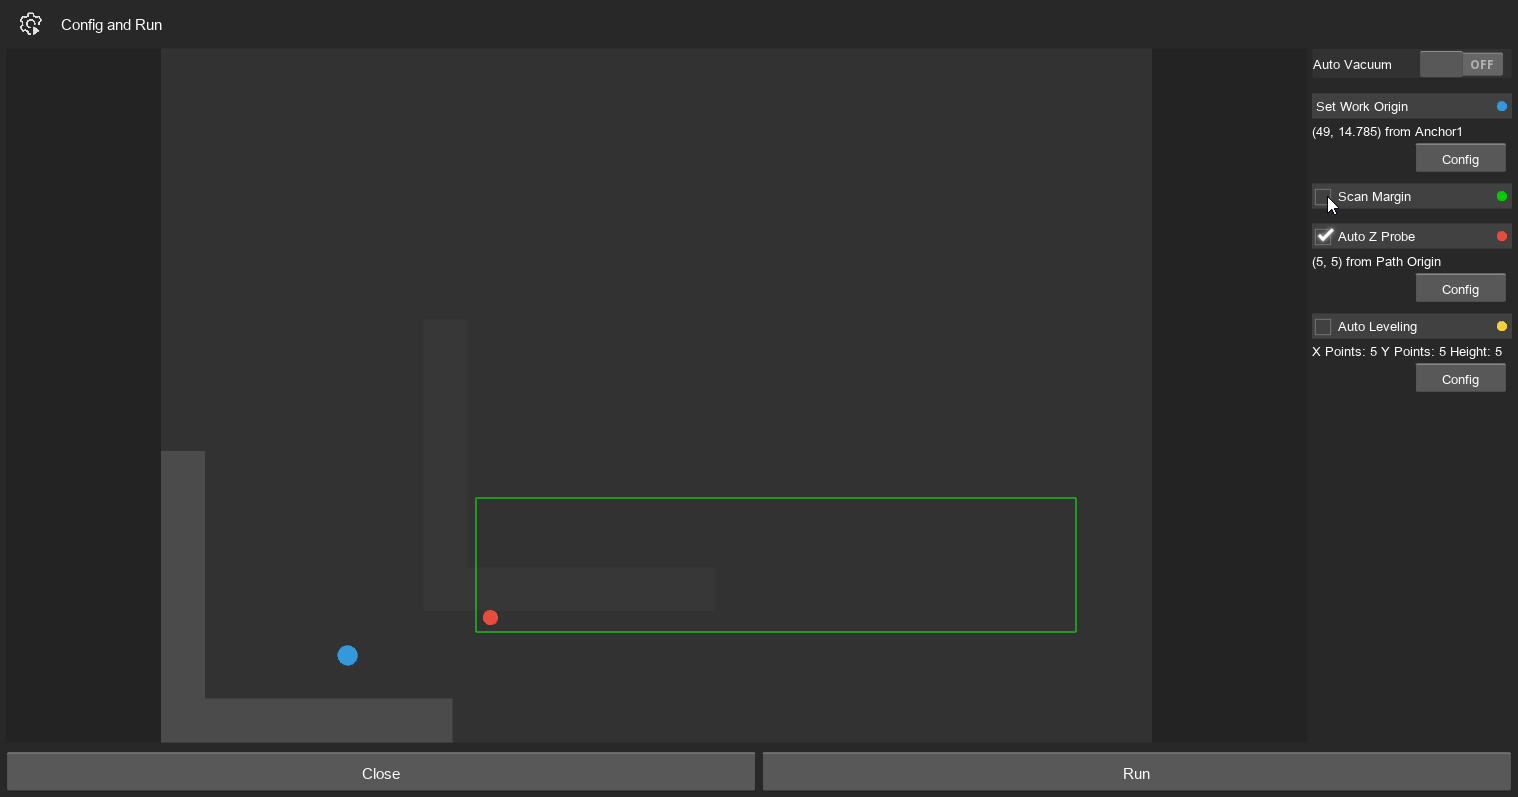](https://unikat-ilmenau.de/wiki/uploads/images/gallery/2025-07/carveracontroller-autozprobe.png)
## 5. Upload & Start GCODE
First you need to upload a file to the machine, then select it and then, you can run it.
1. Press the **File-Icon** on the bottom left (or in the top right hamburger-menu)
[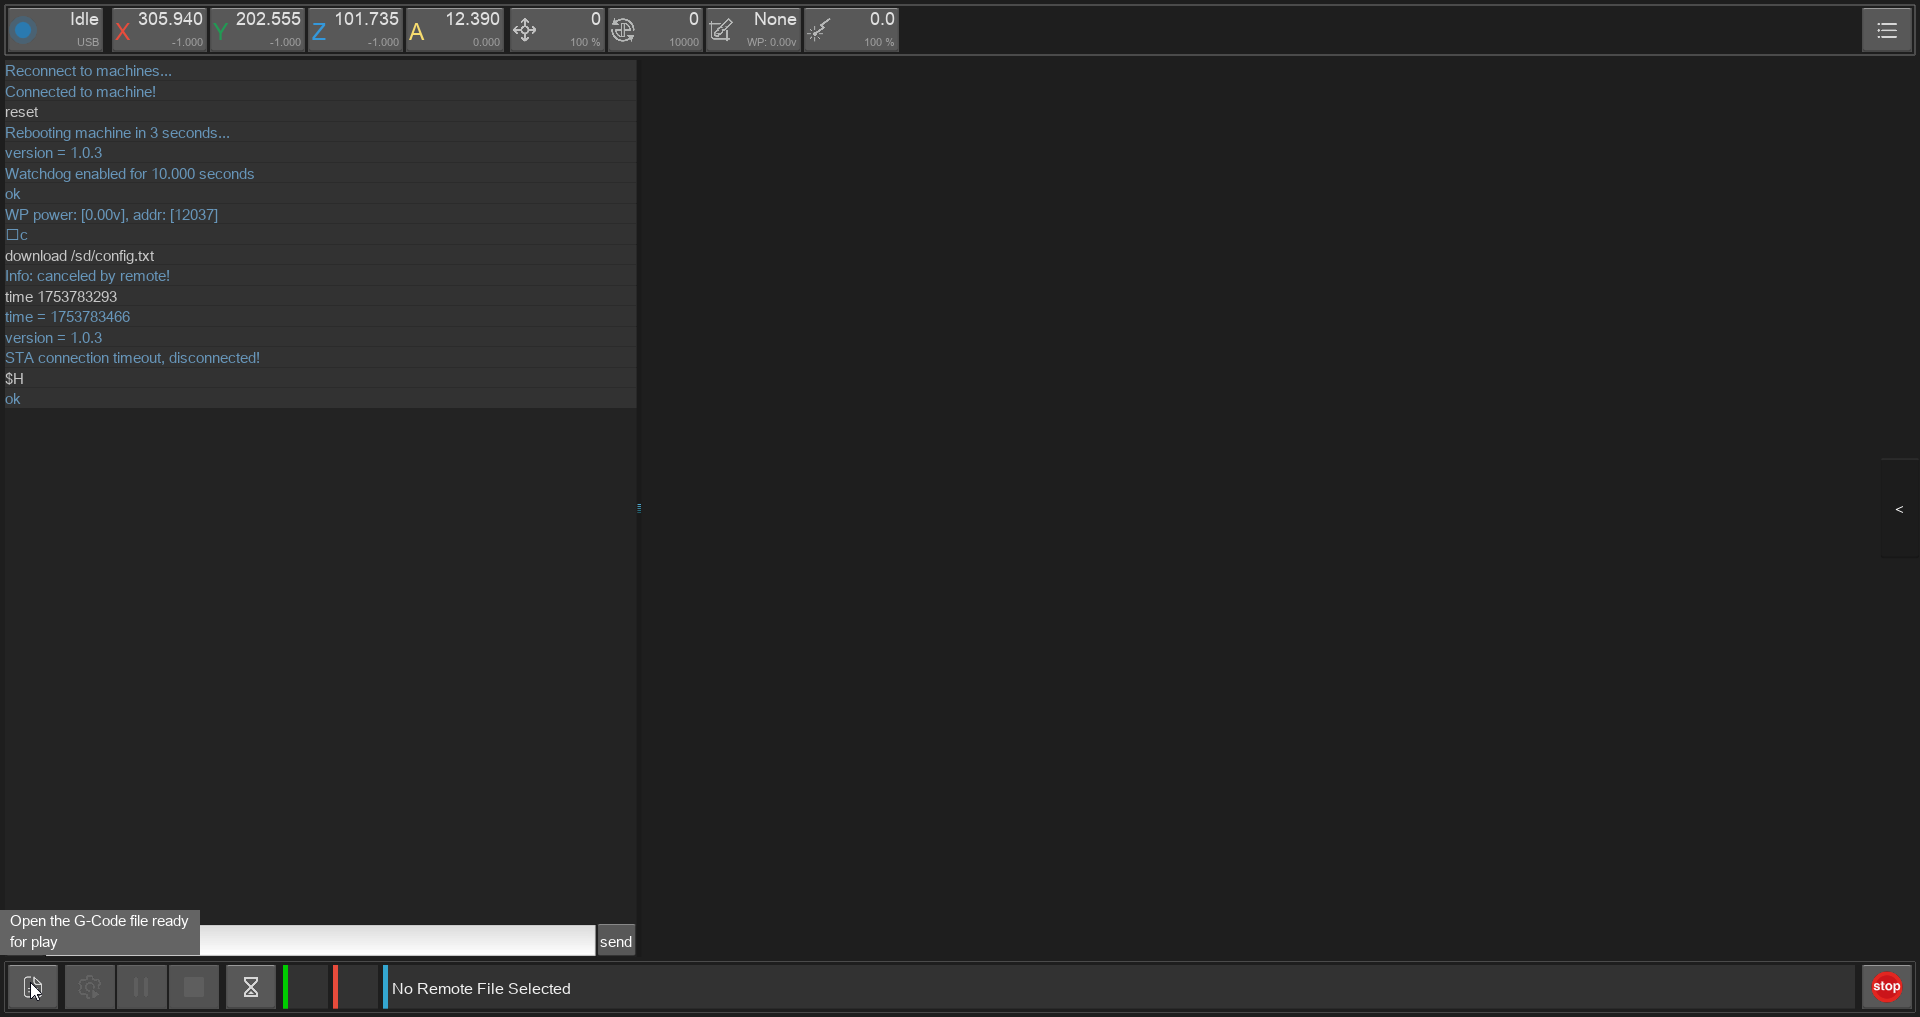](https://unikat-ilmenau.de/wiki/uploads/images/gallery/2025-07/carveracontroller-upload-gcode.png)
Then the carvera file-manager popup appears.
2. Then go to your folder/ create a new one for you and go to the top right **'Upload File'**
[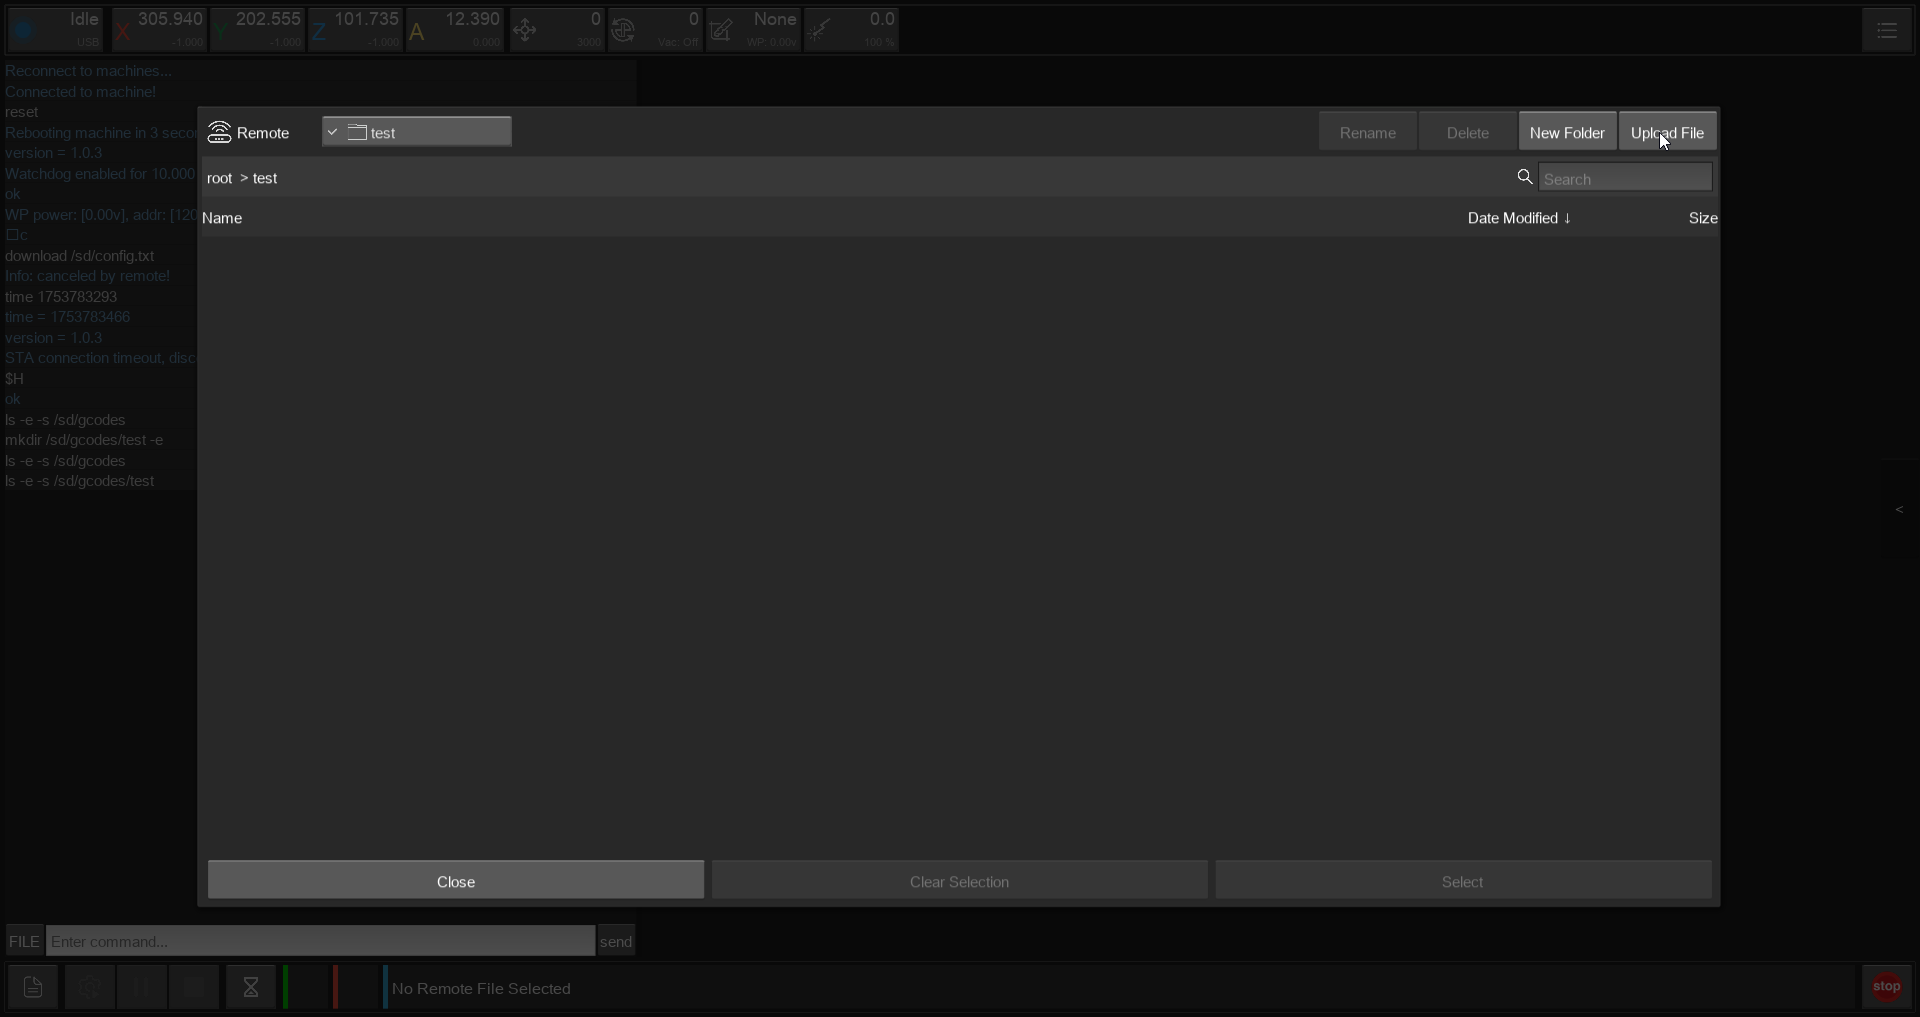](https://unikat-ilmenau.de/wiki/uploads/images/gallery/2025-07/carveracontroller-uploadfile.png)
3. Then use the top left to navigate to your file and then use 'Upload&Select' to load the file onto the machine and select it for milling.
[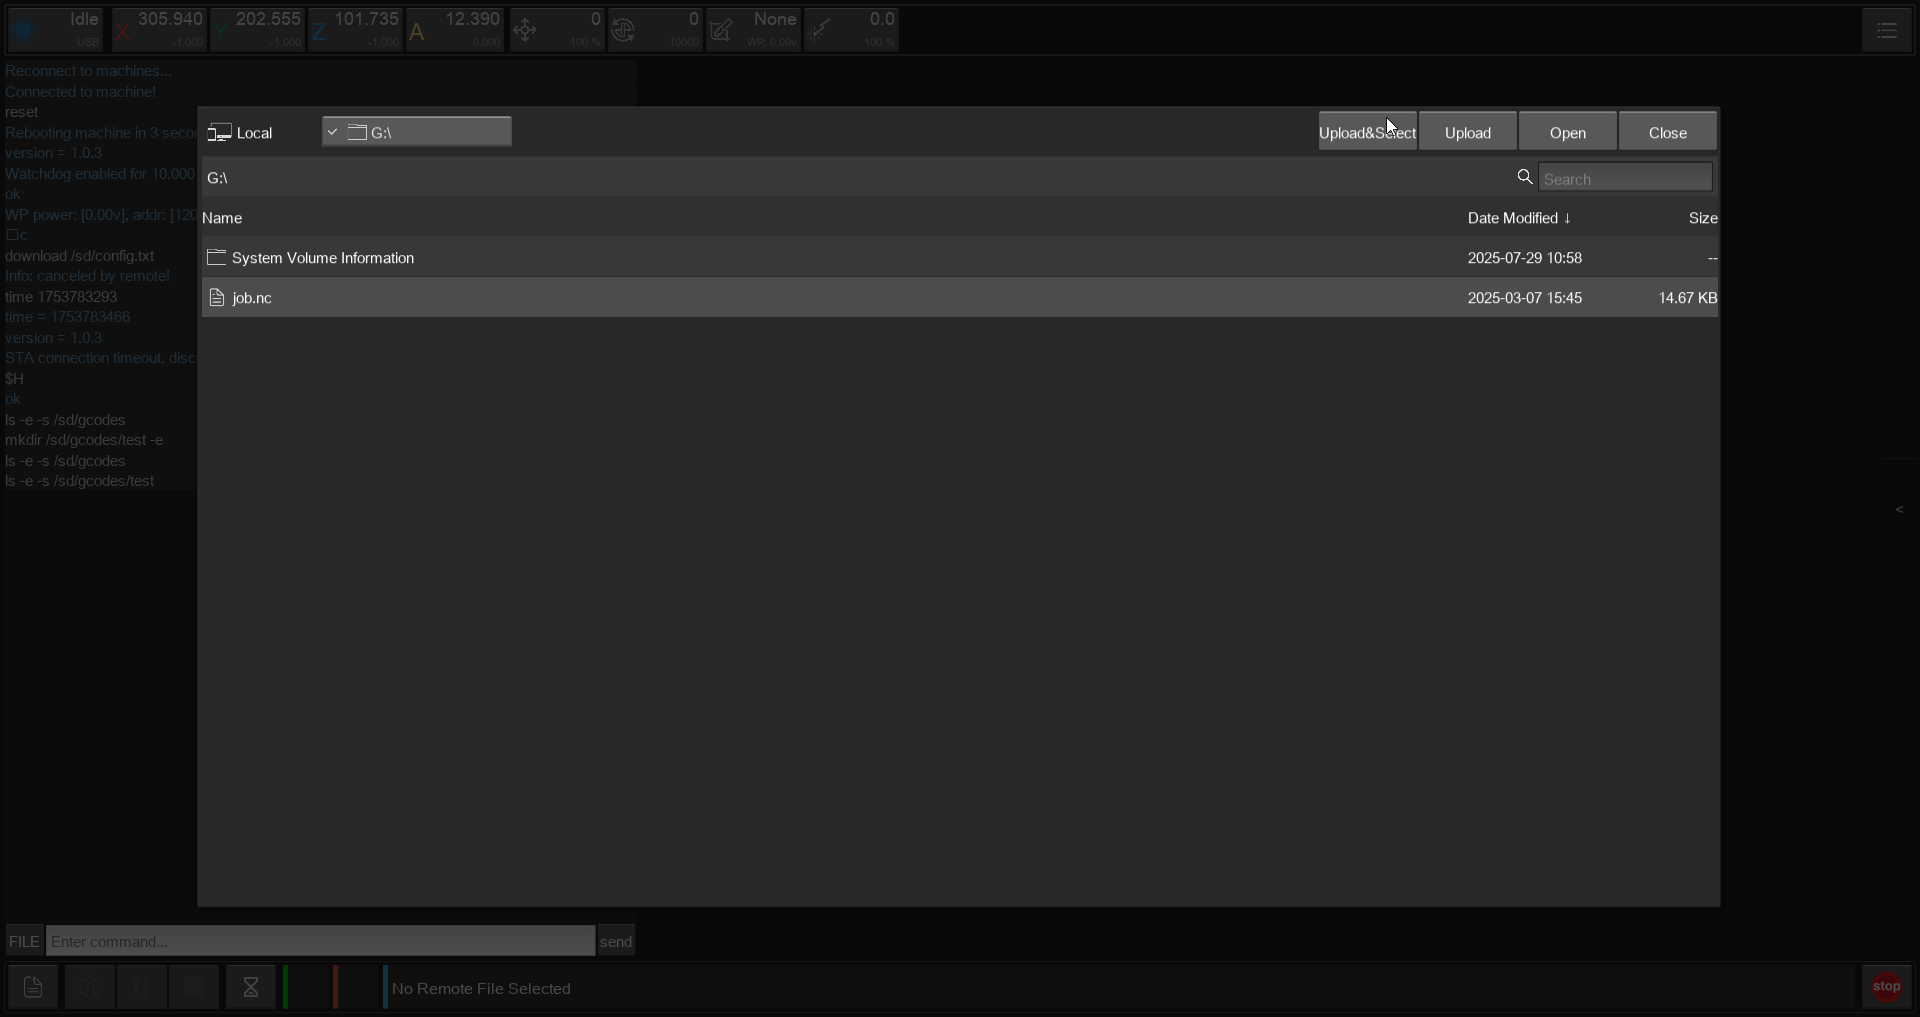](https://unikat-ilmenau.de/wiki/uploads/images/gallery/2025-07/carveracontroller-upload-and-select.png)
Or use **'Upload'** then **'Close'** on the screen and then **'Select'** on the correct file in the other screen.
[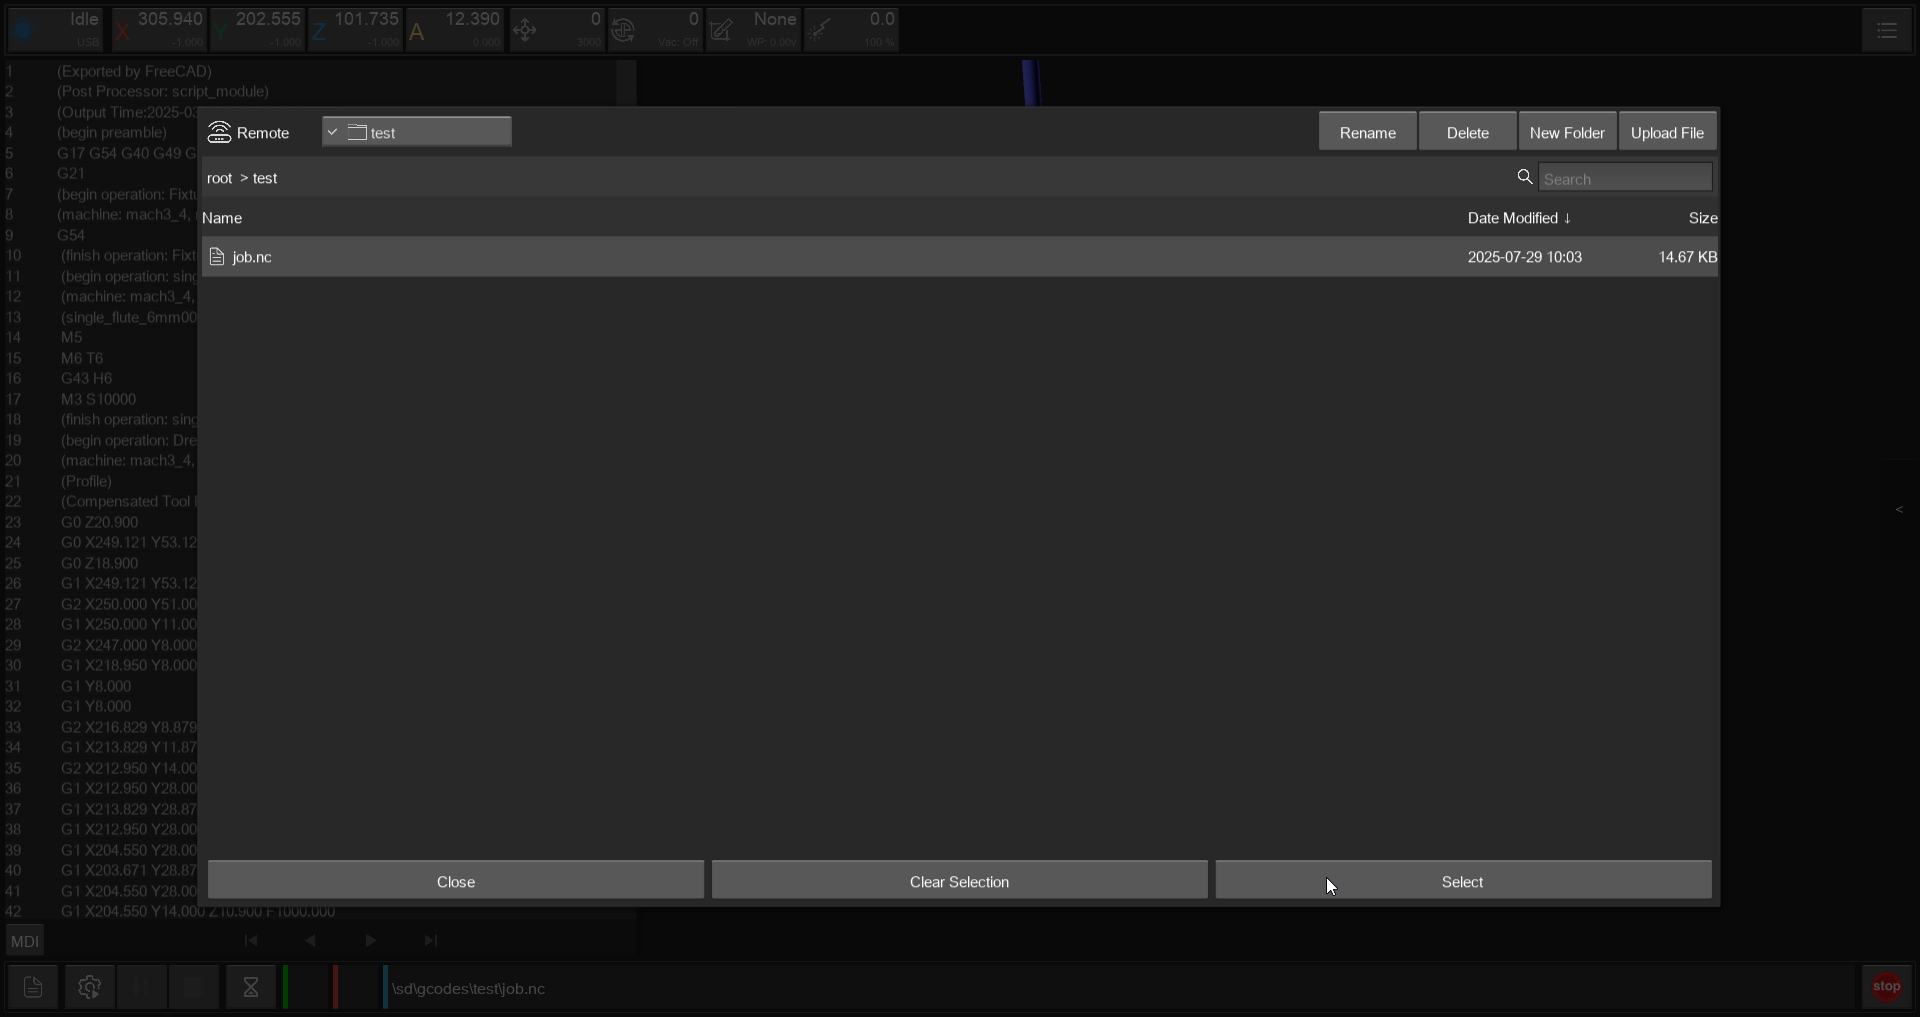](https://unikat-ilmenau.de/wiki/uploads/images/gallery/2025-07/carveracontroller-selectfile.png)
5. There should appear a preview of the GCODE, check the path and choosen tools. Then use the **Gear-Icon** on the bottom left to start the milling.
[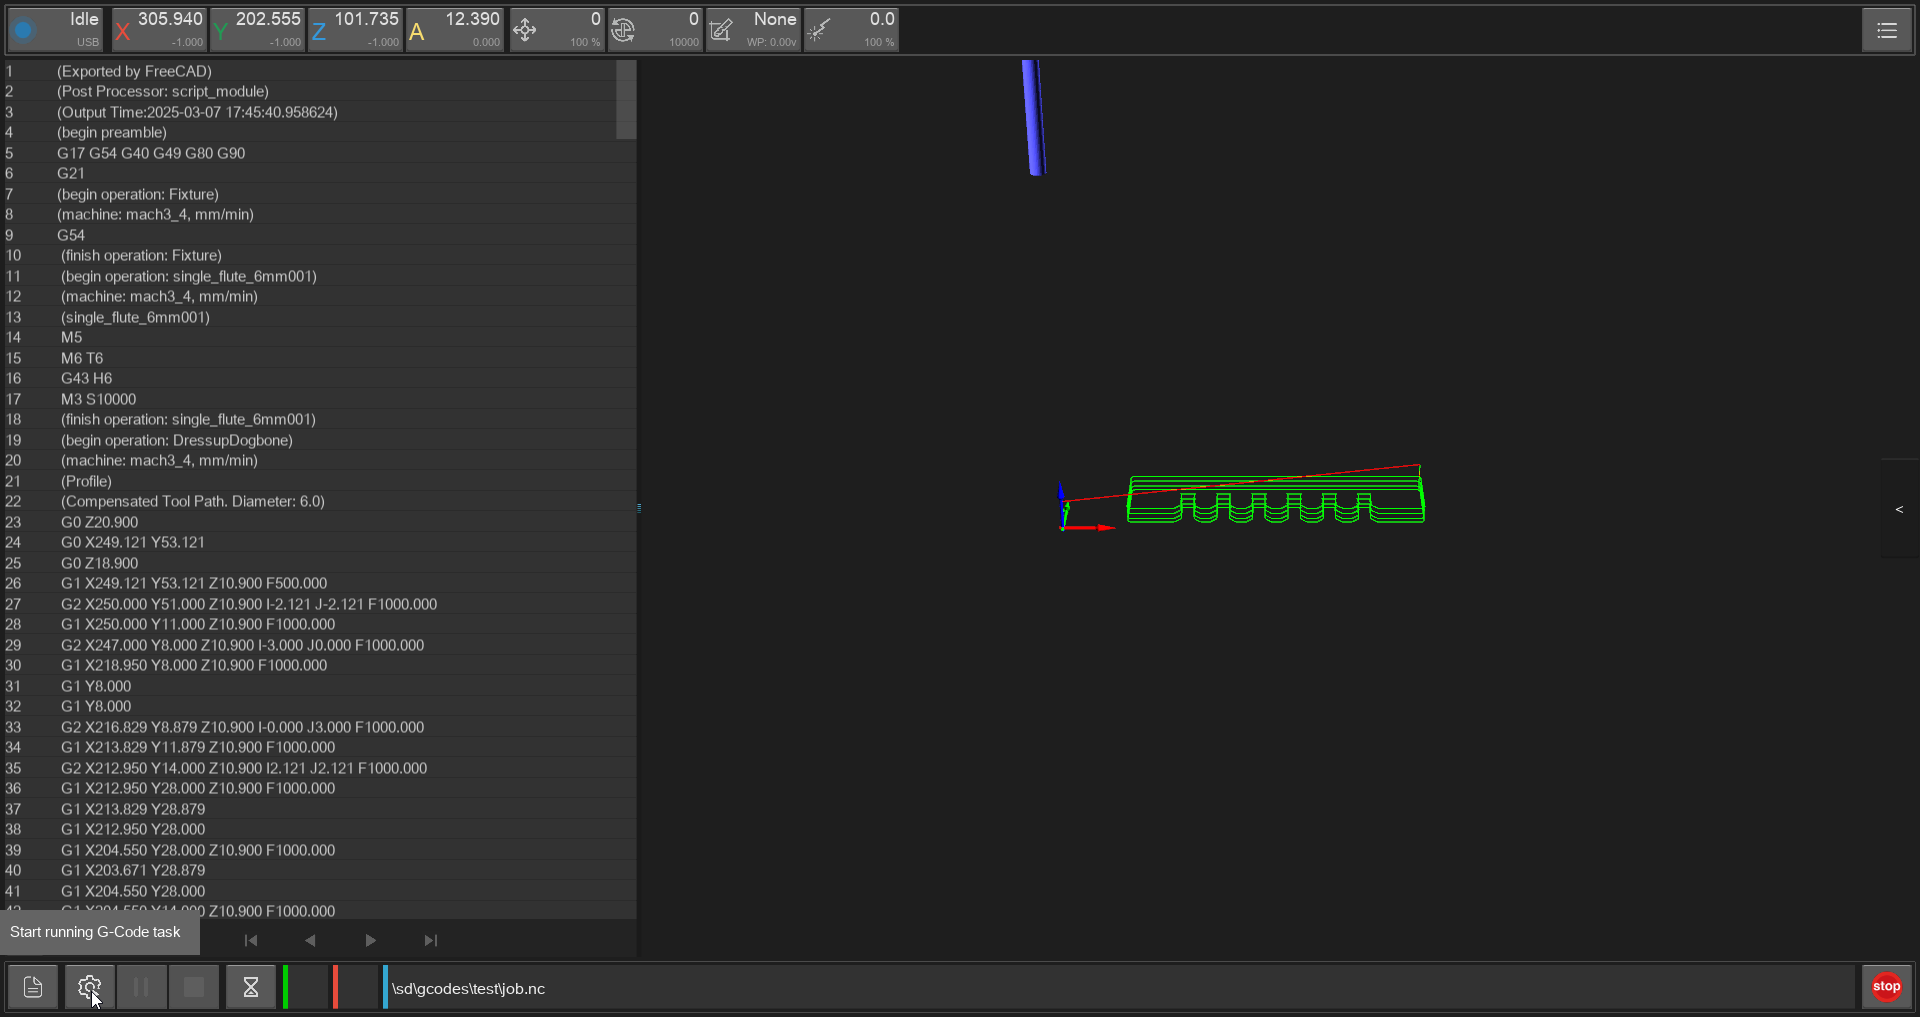](https://unikat-ilmenau.de/wiki/uploads/images/gallery/2025-07/carveracontroller-startgcode.png)
ALWAYS CHECK THE PATH ON THE BOTTOM!!
Then here deactivate **'Scan Margin'** and if allready done **'Auto Z Probe'** and press **'RUN'**.
[](https://unikat-ilmenau.de/wiki/uploads/images/gallery/2025-07/carveracontroller-autozprobe.png)
# See also
- [Software Documentation](https://wiki.makera.com/en/carvera/manual/software)