CNC Milling machine
A small enclosed CNC Machine with a Tool changer mainly used for milling PCBs or small wood/metal things.
Usefull Links:
A bigger, non enclosed CNC Machine with a lesser stiffness for milling bigger materials.
Usefull Links:
- Specification/Available Tools
- Safety Instructions
- Carvera How to Use
- Tips and Tricks
- Maintenance
- Troubleshooting
Specification/Available Tools
Carvera Makera
Features
- Tool Changer (6 Tools)
- Auto-Z Probe
- Dust Collector (mainly for bigger chips)
-
- Axis for rotaty objects
Specs
- 36cm(X) * 24cm(Y) * 14cm(Z) Volume
- 9.2cm(Diameter) * 24cm(Length) 4. Axis
- 200 watt
- collet 1/8in integrated (optional: 1/4in, 6mm, 4mm)
- 600cm/min max X/Y Axis movement speed
- Less than 0.01mm Runout
- 0.01 mm motor precision
- 0 - 15000 RPM Spindel
- 0.8 liter Dust Tank Volume
Machinable Materials (e.g.)
Wood:
- Hardwoods
- softwoods
- MDF
- plywoods, etc.
Plastic:
- Foam
- PVC
- ABS
- Acrylic
- PC
- HDPE, etc.
Composite materials:
- Carbon fiber
- FR1, FR4, etc.
Non-Ferrous metals:
- Aluminum
- brass
- copper, etc.
Stepcraft D840
Features
- MDF machine table with aluminum T-slots
Specifications
- Working Space (X,Y,Z): 594 mm x 883 mm x 132 mm
- Clamping Surface (X,Y): 616 mm x 920 mm
- Ø 43 mm tool holder
Machinable Materials (e.g.)
Wood:
- softwood
- hardwood
- plywood
- artificial wood
Plastics:
- thermoplastics
- ABS
- PE
- PP
- soft/hard PVC
- Lexan®
- polyamide
- Plexiglas®
CFRP / carbon
Non-ferrous metals
Elastomers, duroplastics
Mixed materials
Safety Instructions
Our Recommendations
- when milling a material, keep the lid closed
- always think about z heights to not mill into the bed
- for PCBs and not milling through set it on top
- for anything else, set it on the
- do not wear headphones so you can heat, if something is not right in the milling process
- DO NOT LET THE MILL ALONE
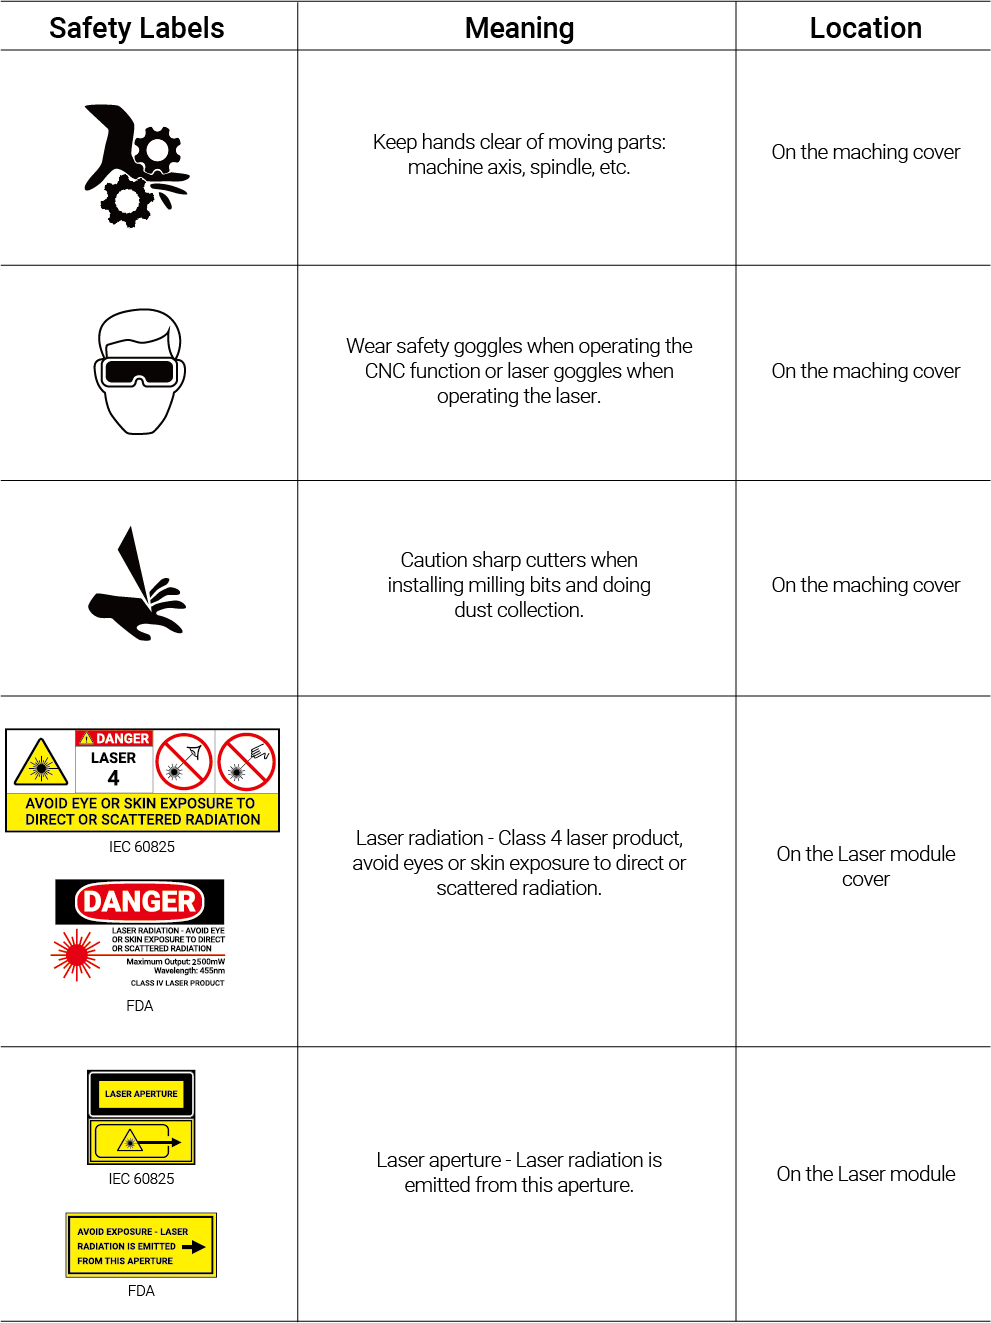
Makera Safety Instructions
-
Always wear safety goggles when operating Carvera, especially when the protective cover is open.
-
Always wear laser protection goggles when using laser function.
-
Please wear hearing protection when Carvera is machining on the hard materials.
-
Do not put your hands close to the spindle or machining area. Keep the protective cover closed when operating Carvera.
-
Do not leave your Carvera unattended while it is machining.
-
Please be aware of the sharpness of the milling bits during installation, dust collection, and other operations.
-
Milling and laser carving will generate heat. Inappropriate parameters will cause fire hazards. Make sure an extinguisher is in your vicinity.
-
Some materials are harmful to people when machining or laser craving, such as carbon fiber and epoxy resin. Please wear a face mask and turn on the automatic dust collection.
-
Do not expose this machine to rain or wet conditions.
-
Keep children and bystanders away while operating this machine. It requires supervision and the assistance of an adult when children use this machine.
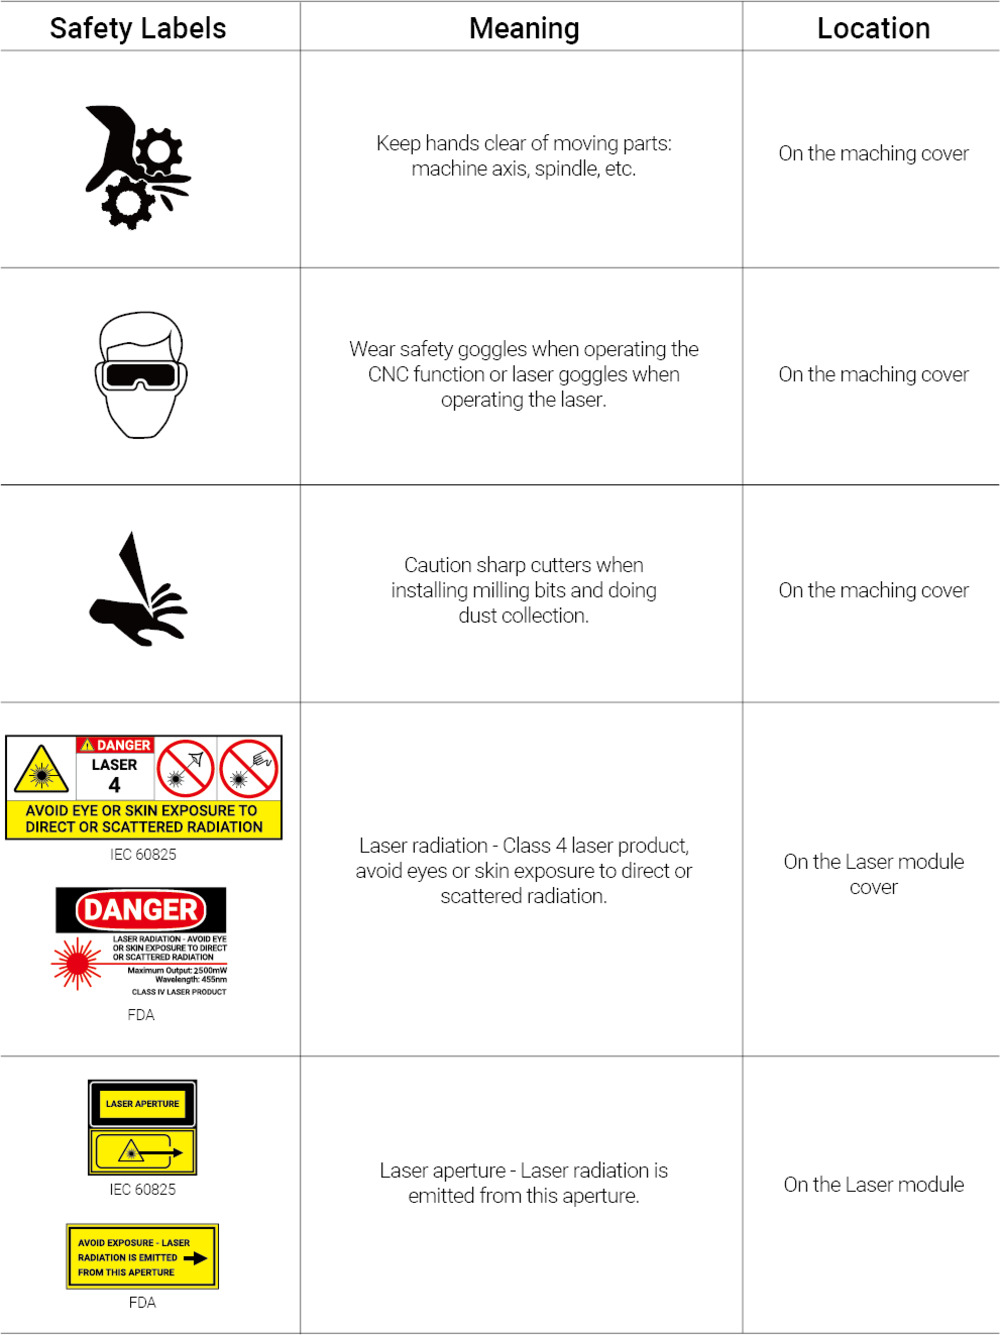 (Source)
Carvera How to Use
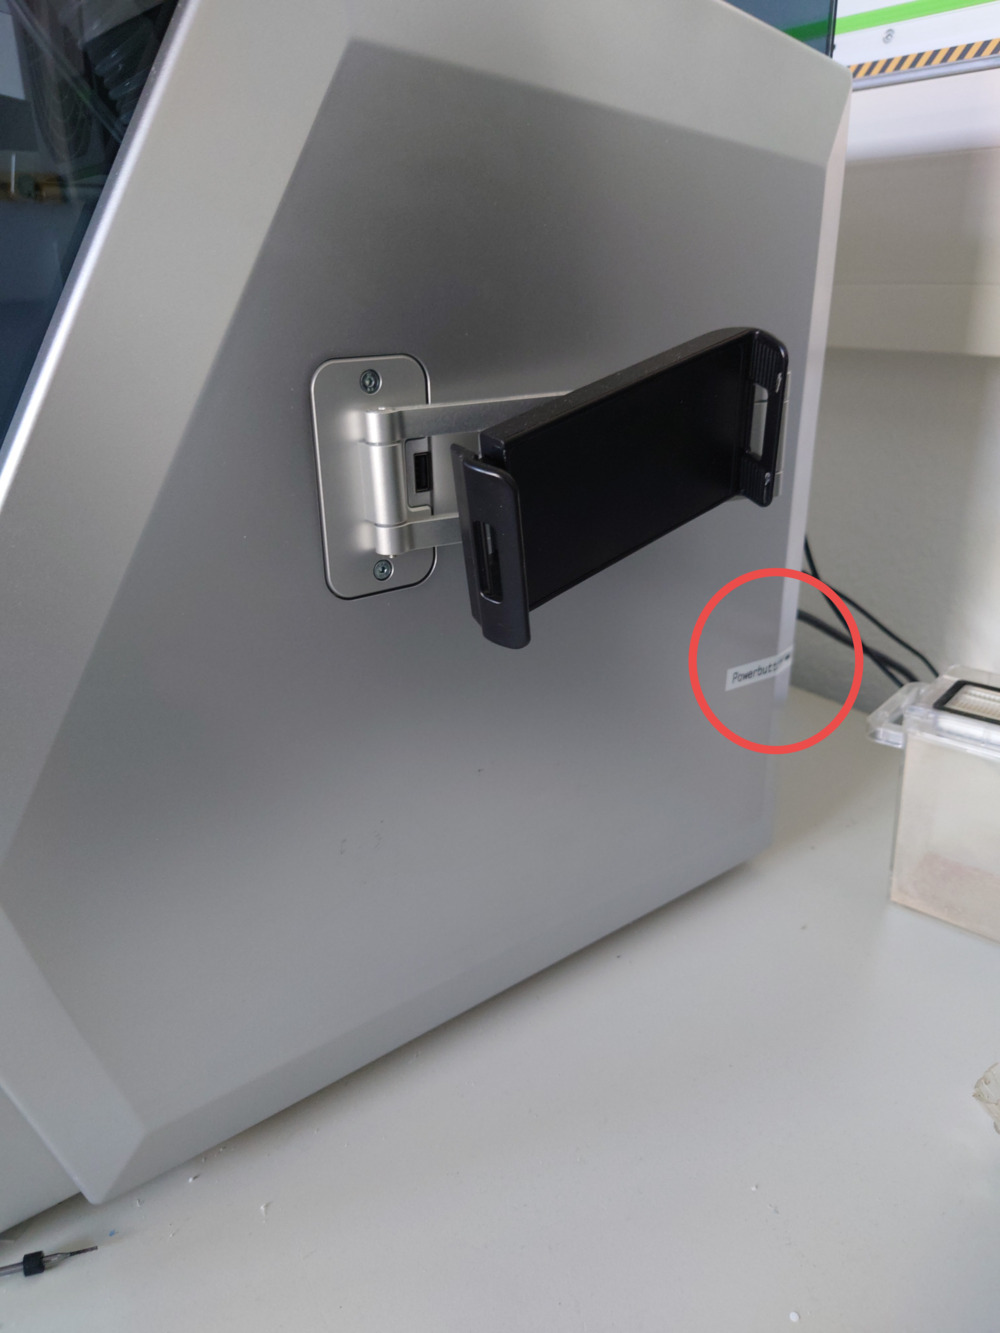
1. Turn On
- Use the Back-Switch to turn on the CNC:
2. Connect and Home
You should always home the machine before milling, (even after starting it as a good practice)!
- To do that, open makera controller:

- Connect the software via USB on the top left corner:

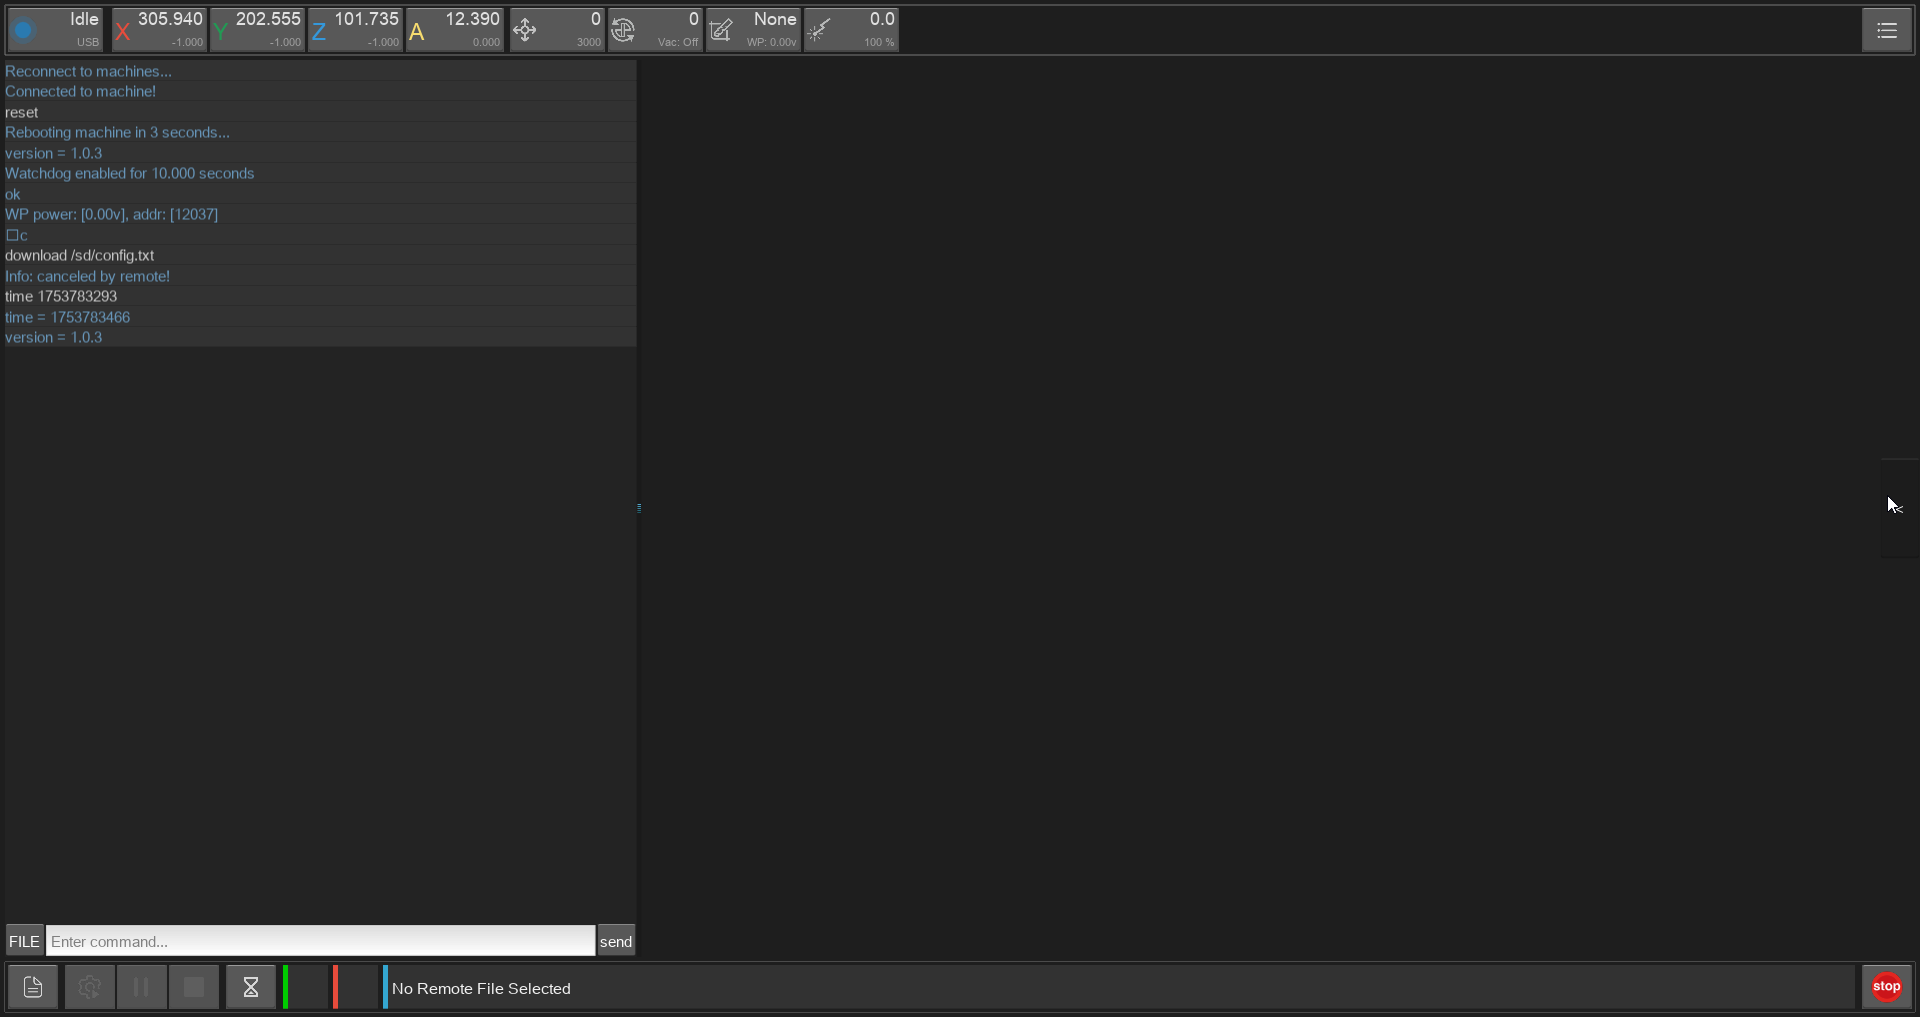
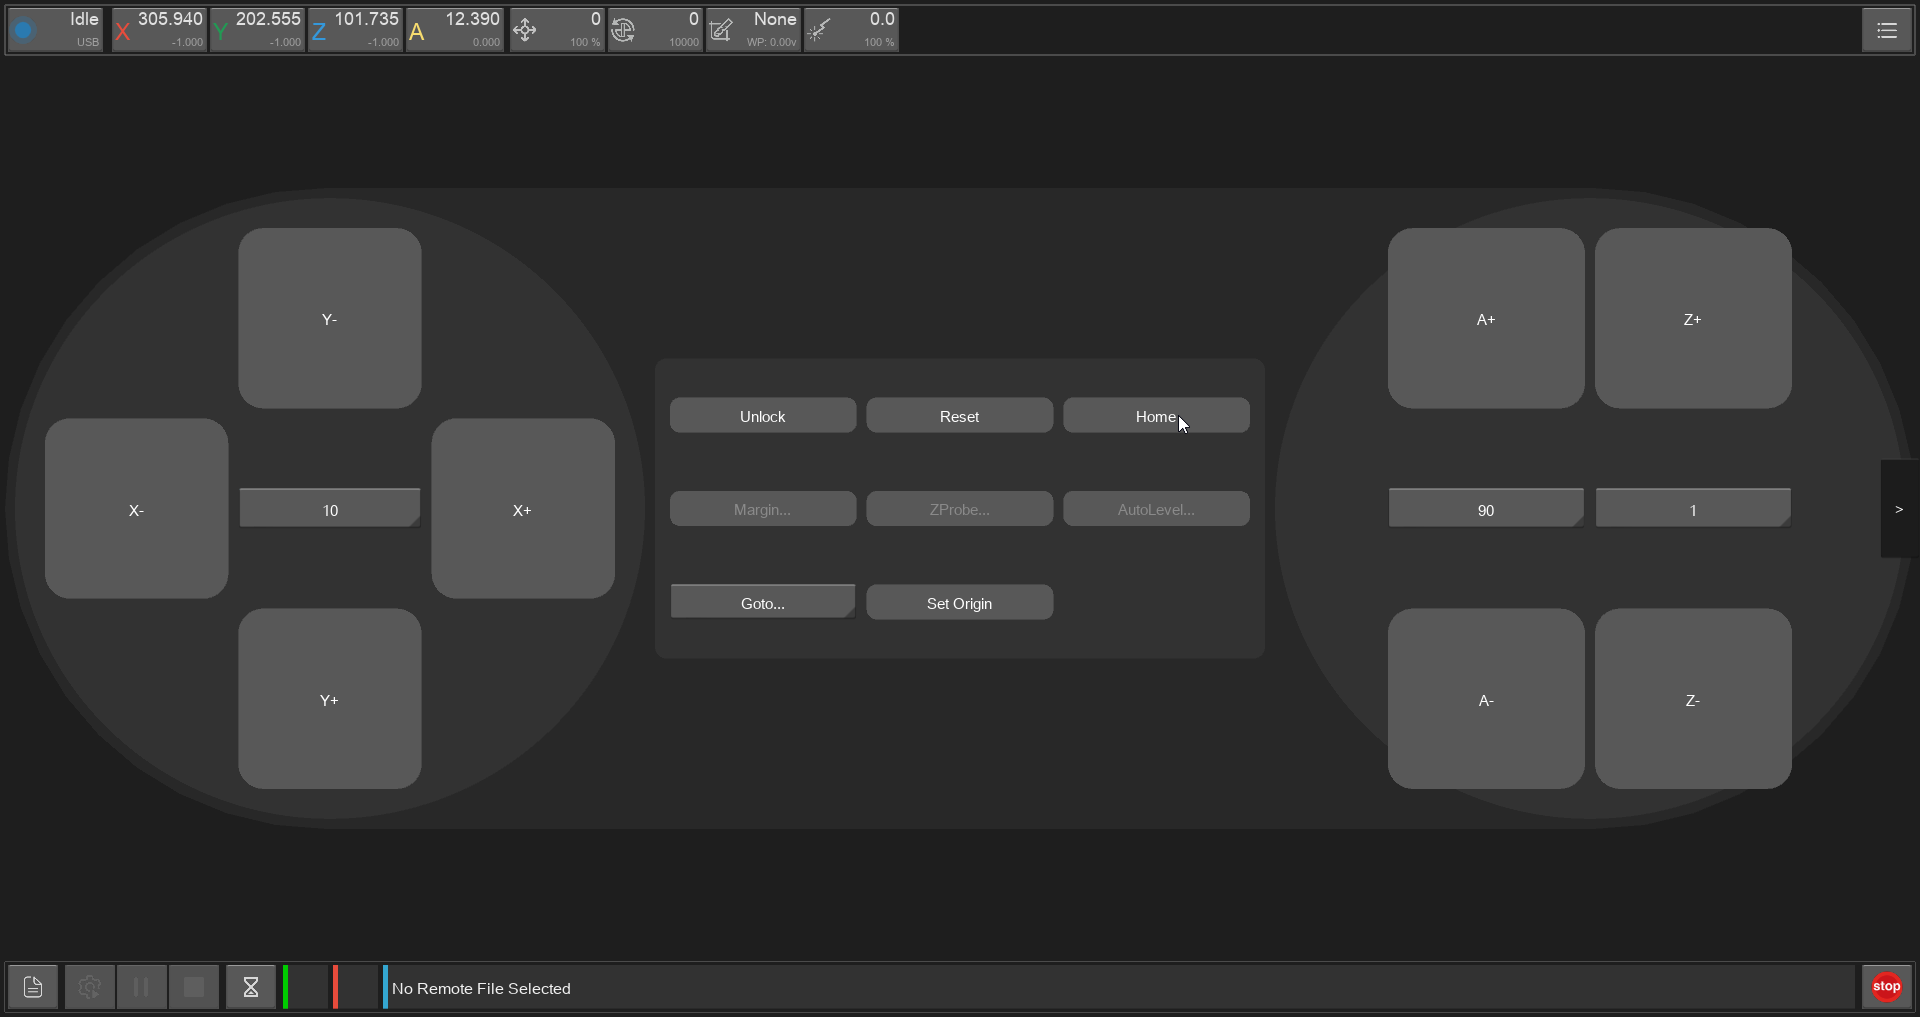
- Go to the side panel and press 'HOME':

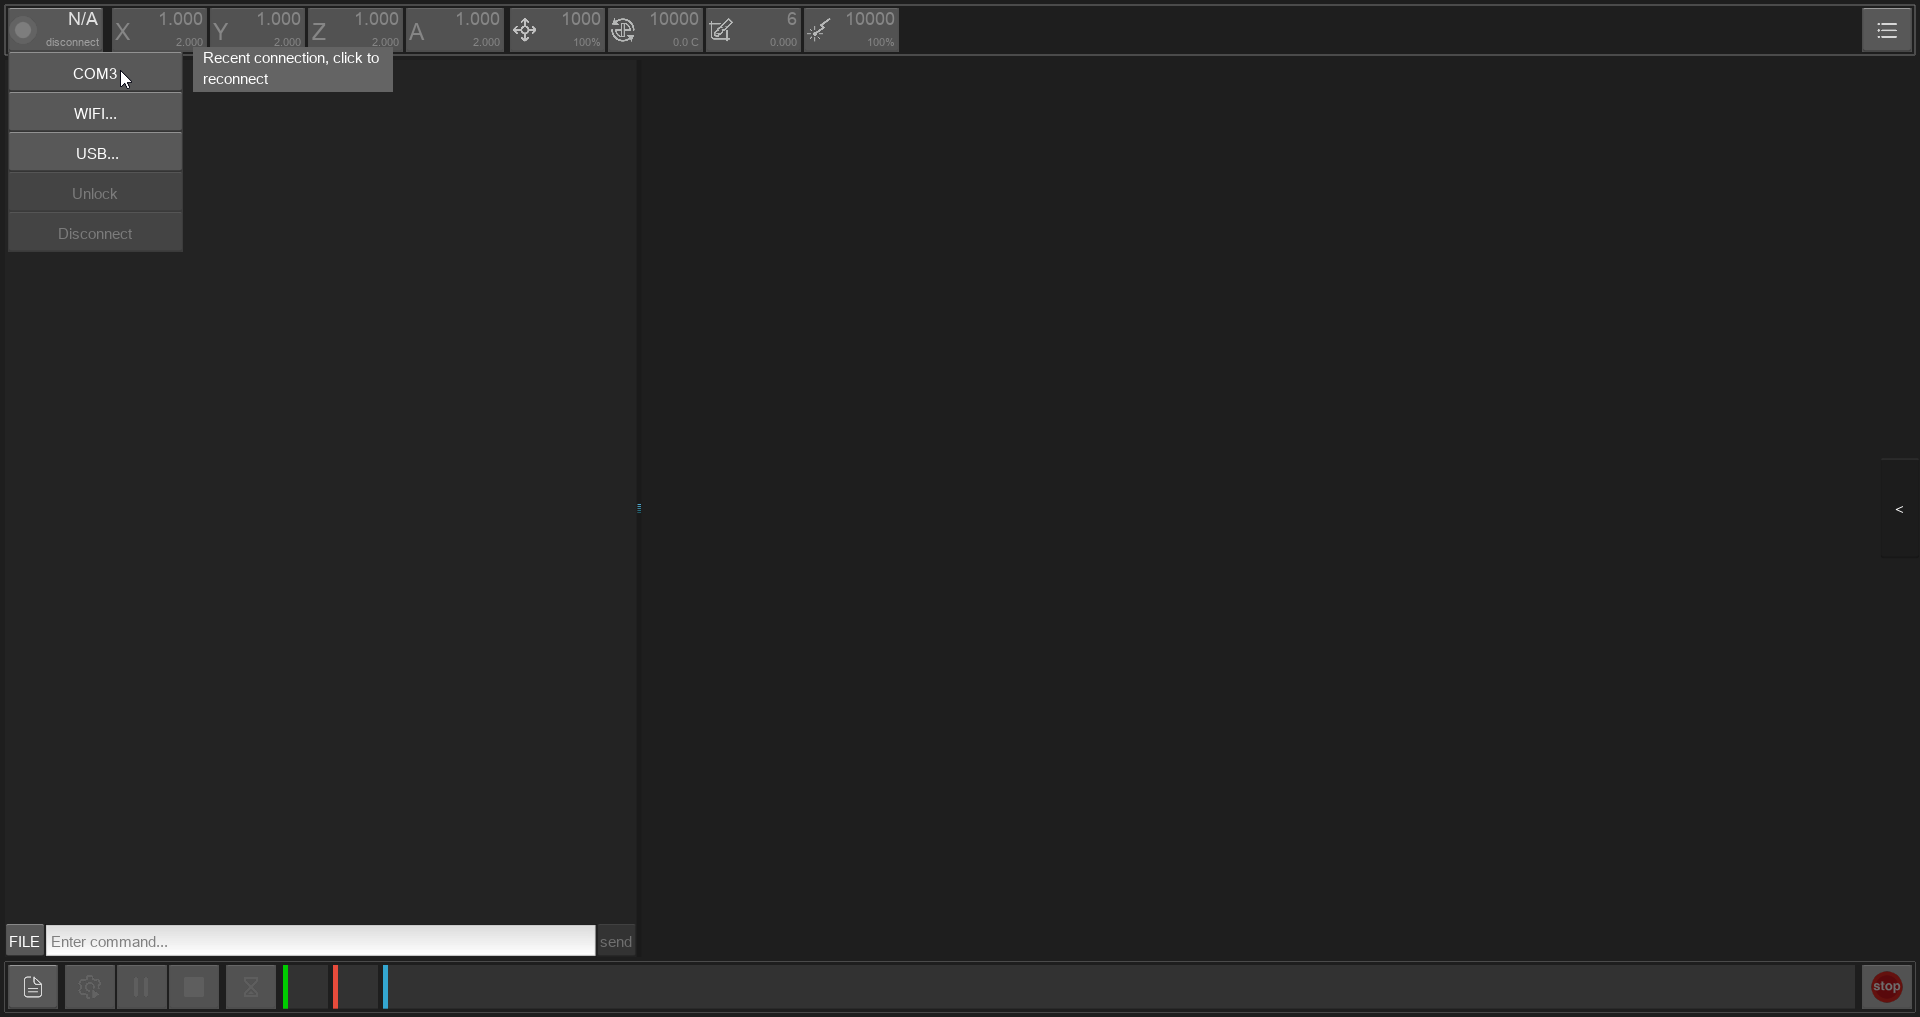
| Side Panel Button on the right | Virtual Controller with 'HOME' in the middle |
|---|---|
 |
 |
3. Fasten the Workpiece
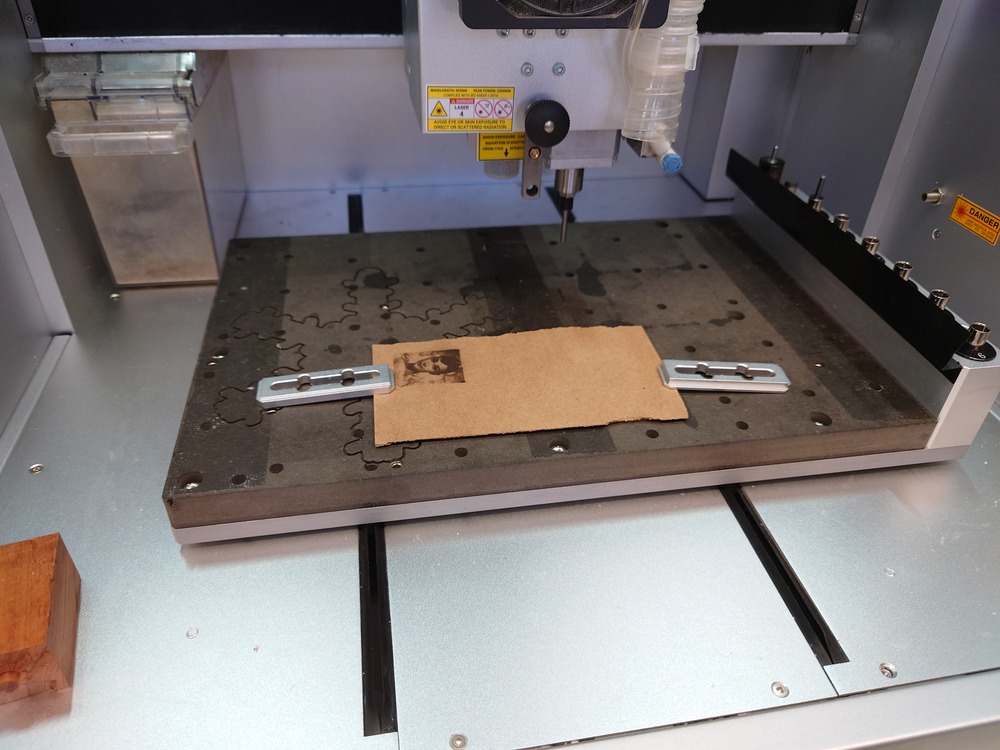
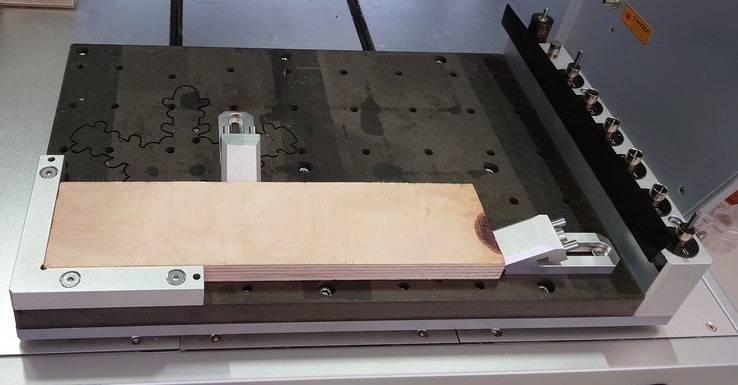
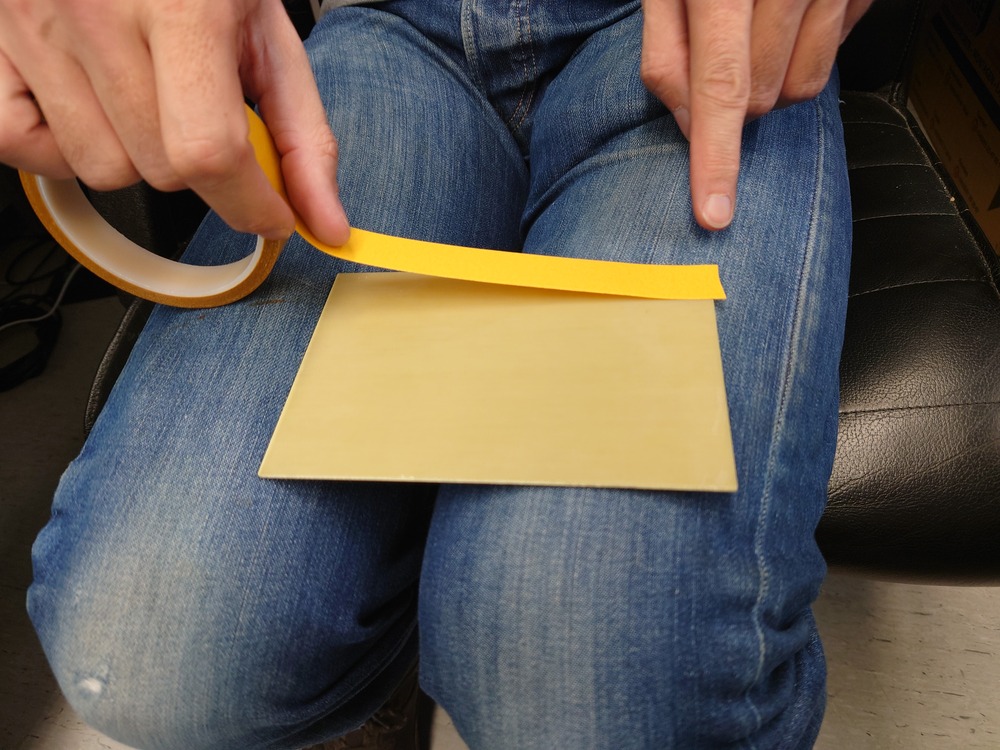
Then use the controller to move the bed thowards you and fasten your workpiece:
| Type of fastening | Example |
|---|---|
| Clamps Place the clamps on the bad and tighten the workpiece with them |
  |
| Tape on a flat workpiece, place some tape on the bottom equally and just stick it onto the bed |
 |
| Vacuum | TODO |
| Screws | TODO |
4. Zero
Then go to you work origin and use top left buttons to set it individually:
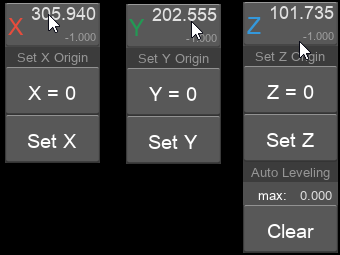
Or use the button 'Set Origin' in the controller on the right:
Auto Z Probe
Finding the Z-zero-point is more special because of the precision needed for it. For this, the Auto Z Probe can be used like this:
- Make sure, the Auto Z Probe is in the tool changer
- Place the tool where you want to measure the Zero Point
- Go to the controller and press 'ZProbe'

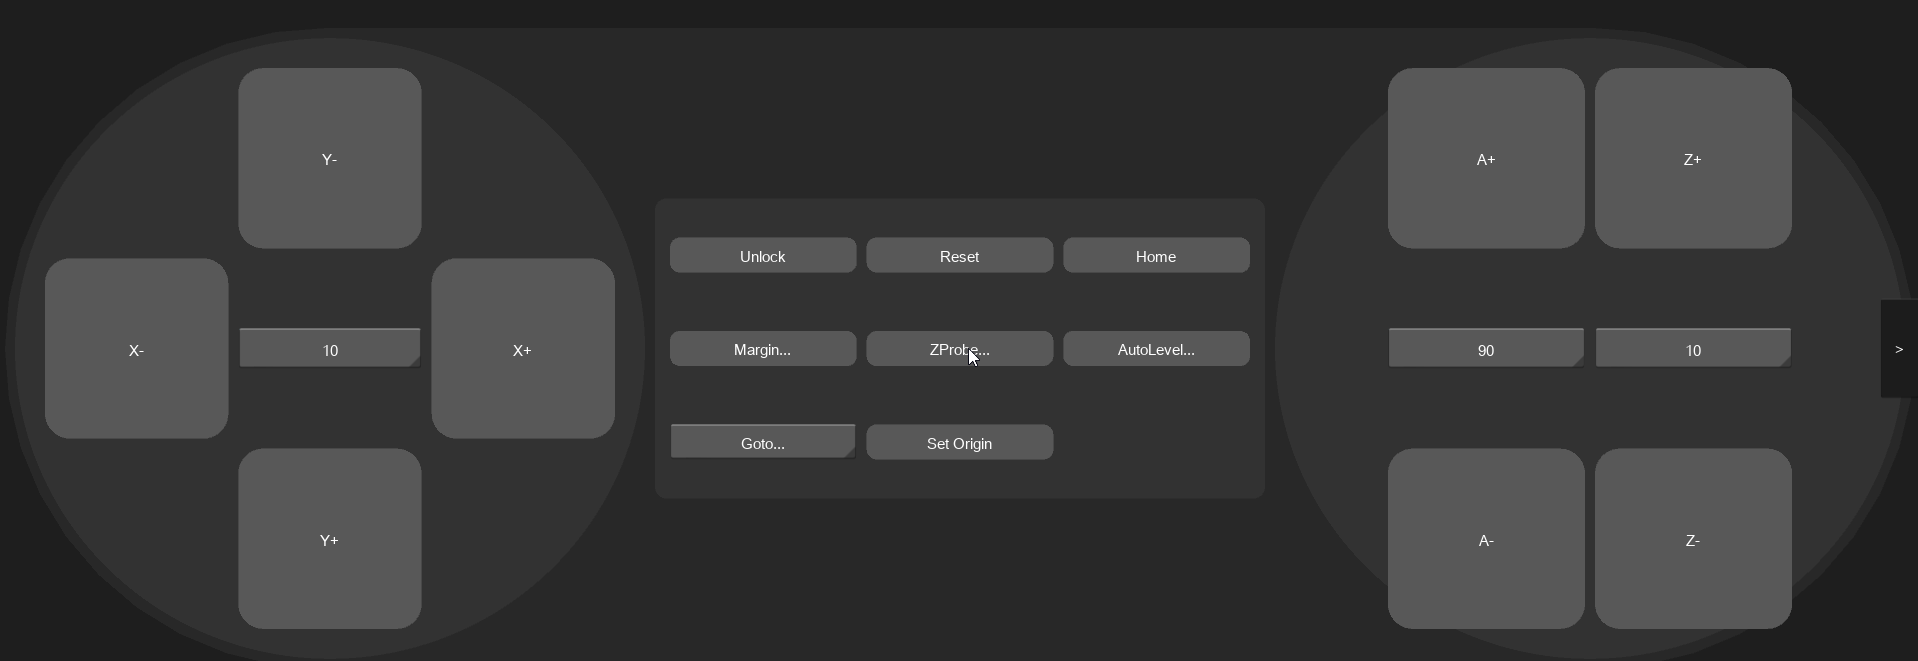
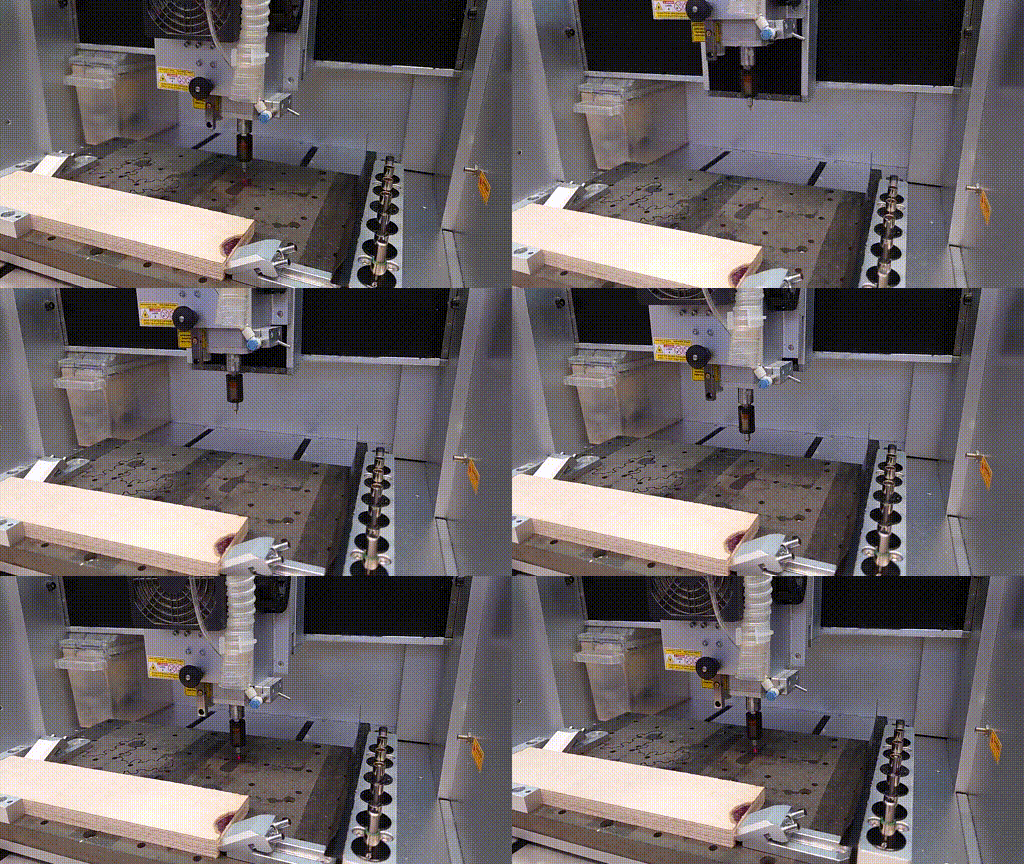
In this case we set the origin on the bottom of the workpiece.
Before Milling
It is also possible to probe before the milling (the Check-Box with 'Auto Z Probe'):
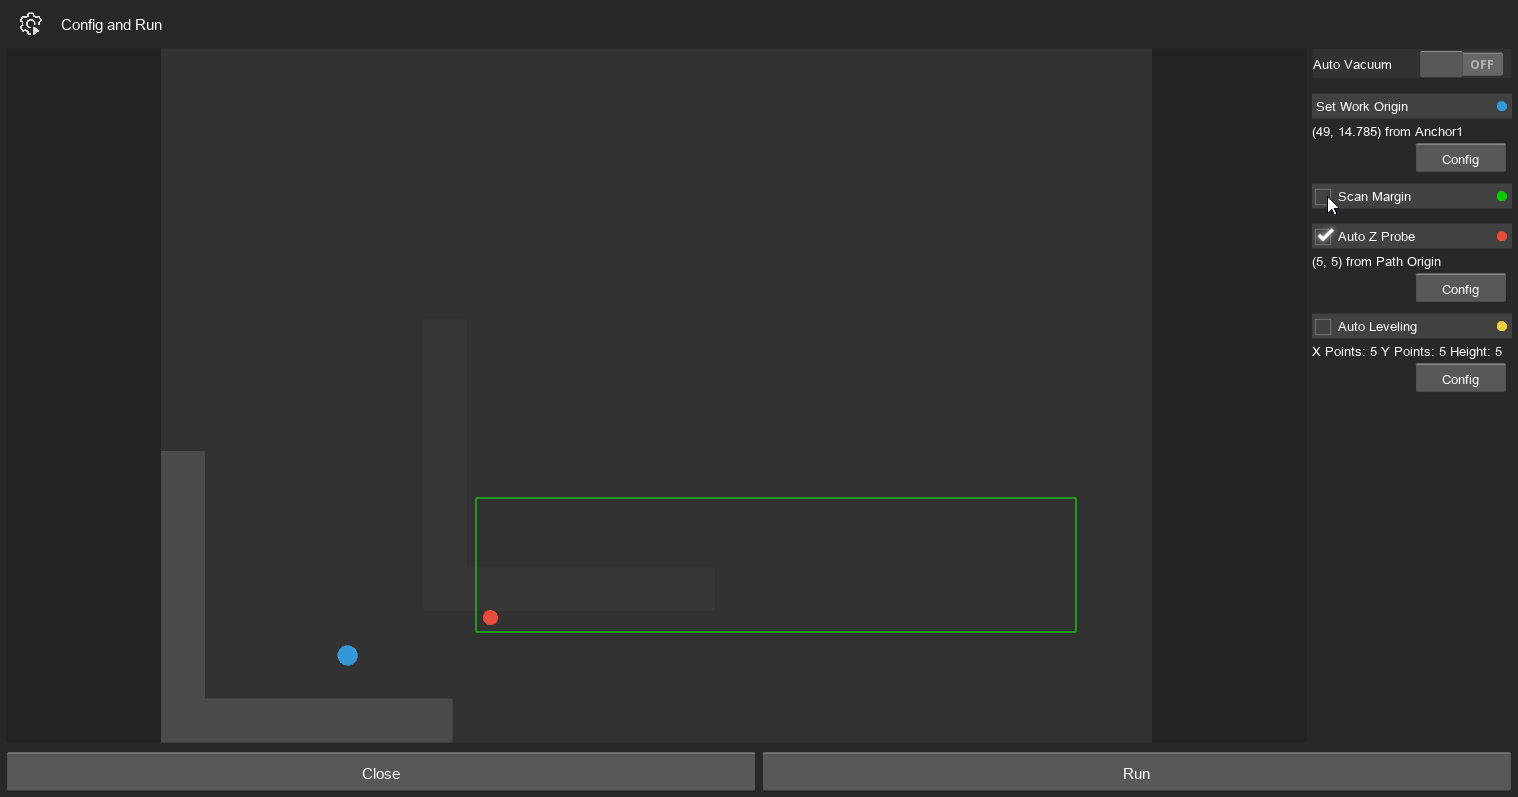
5. Upload & Start GCODE
First you need to upload a file to the machine, then select it and then, you can run it.
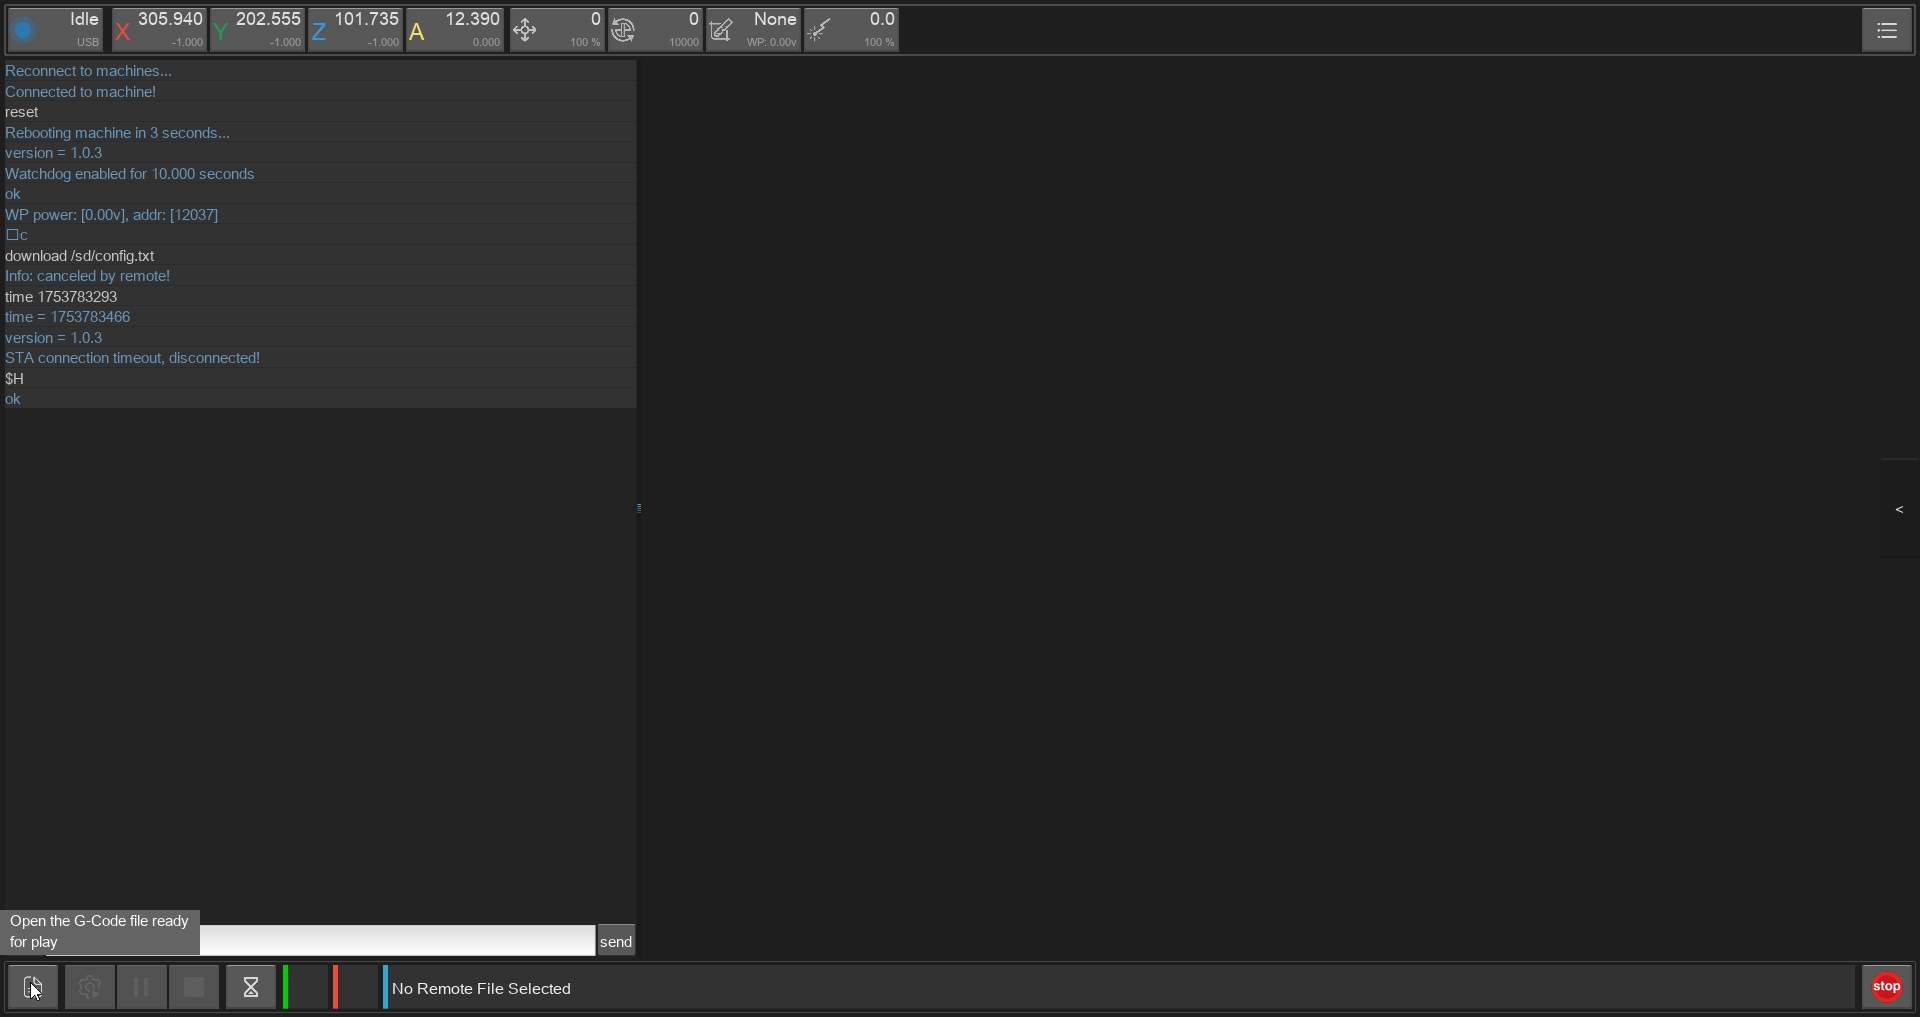
- Press the File-Icon on the bottom left (or in the top right hamburger-menu)
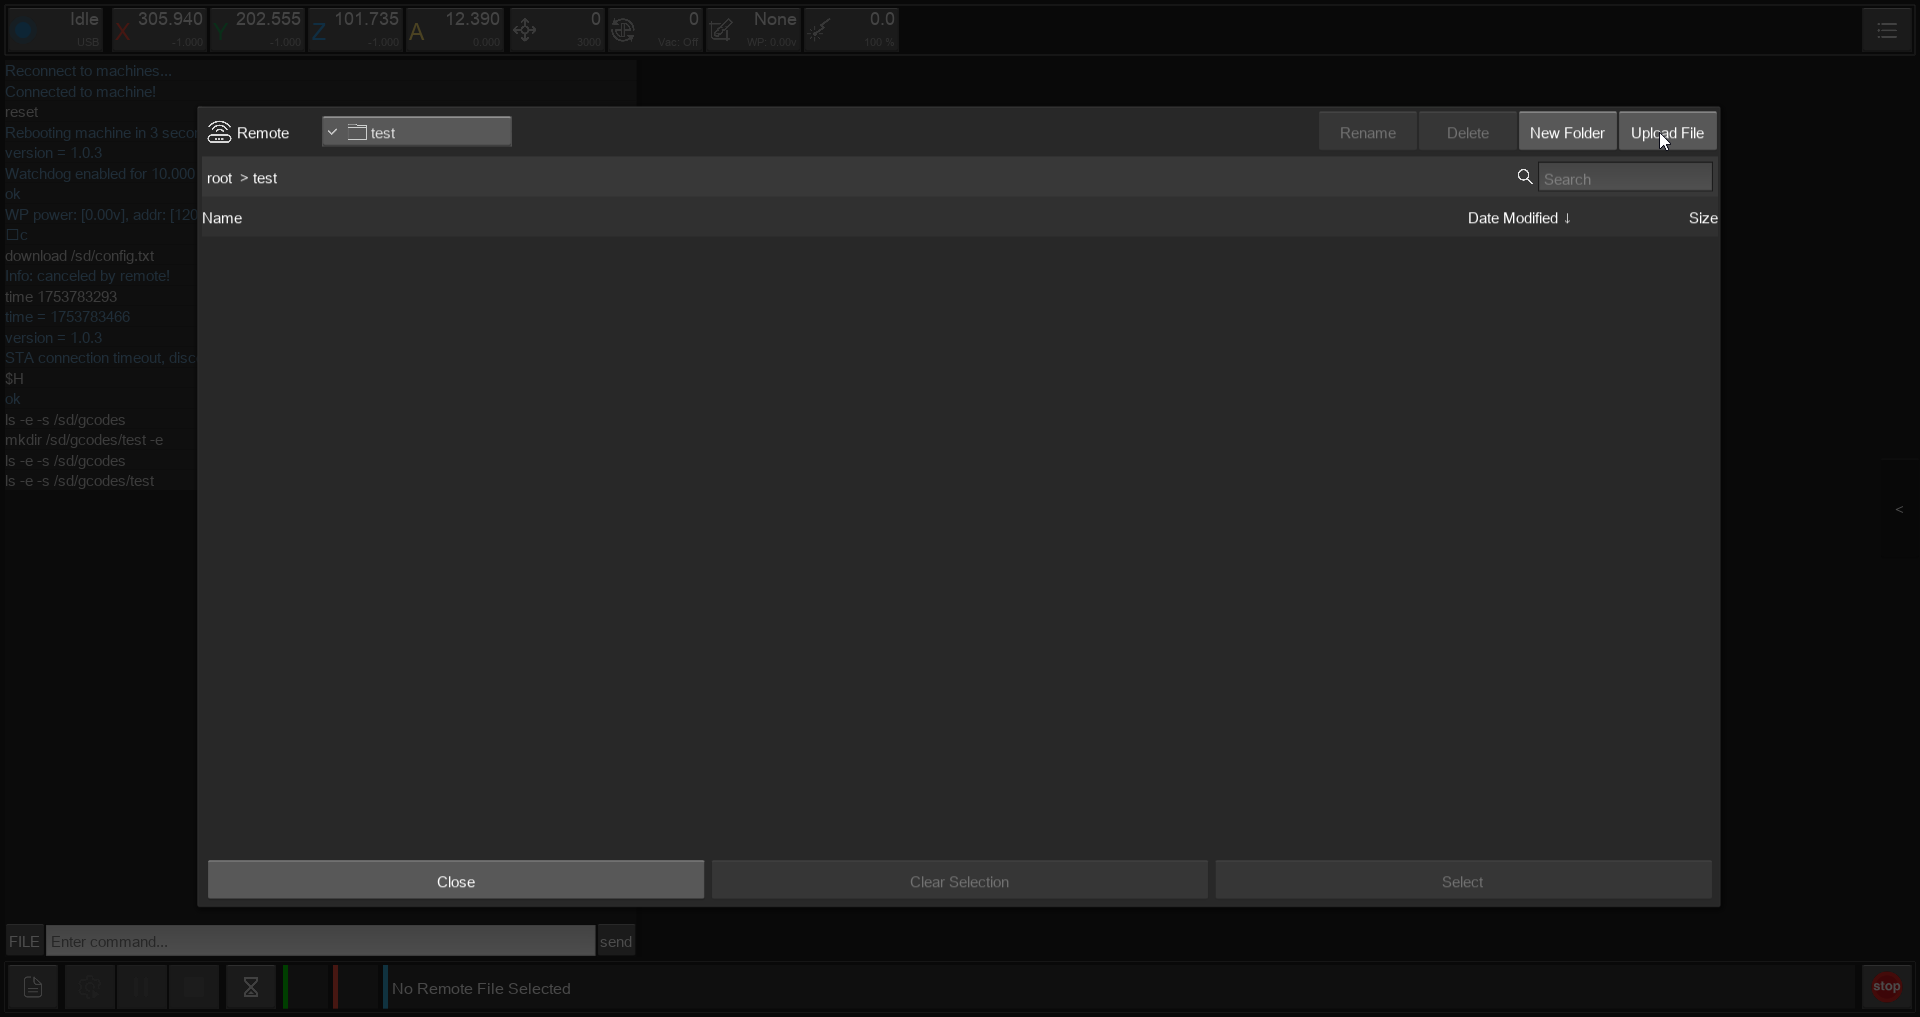
 Then the carvera file-manager popup appears.
 - Then go to your folder/ create a new one for you and go to the top right 'Upload File'

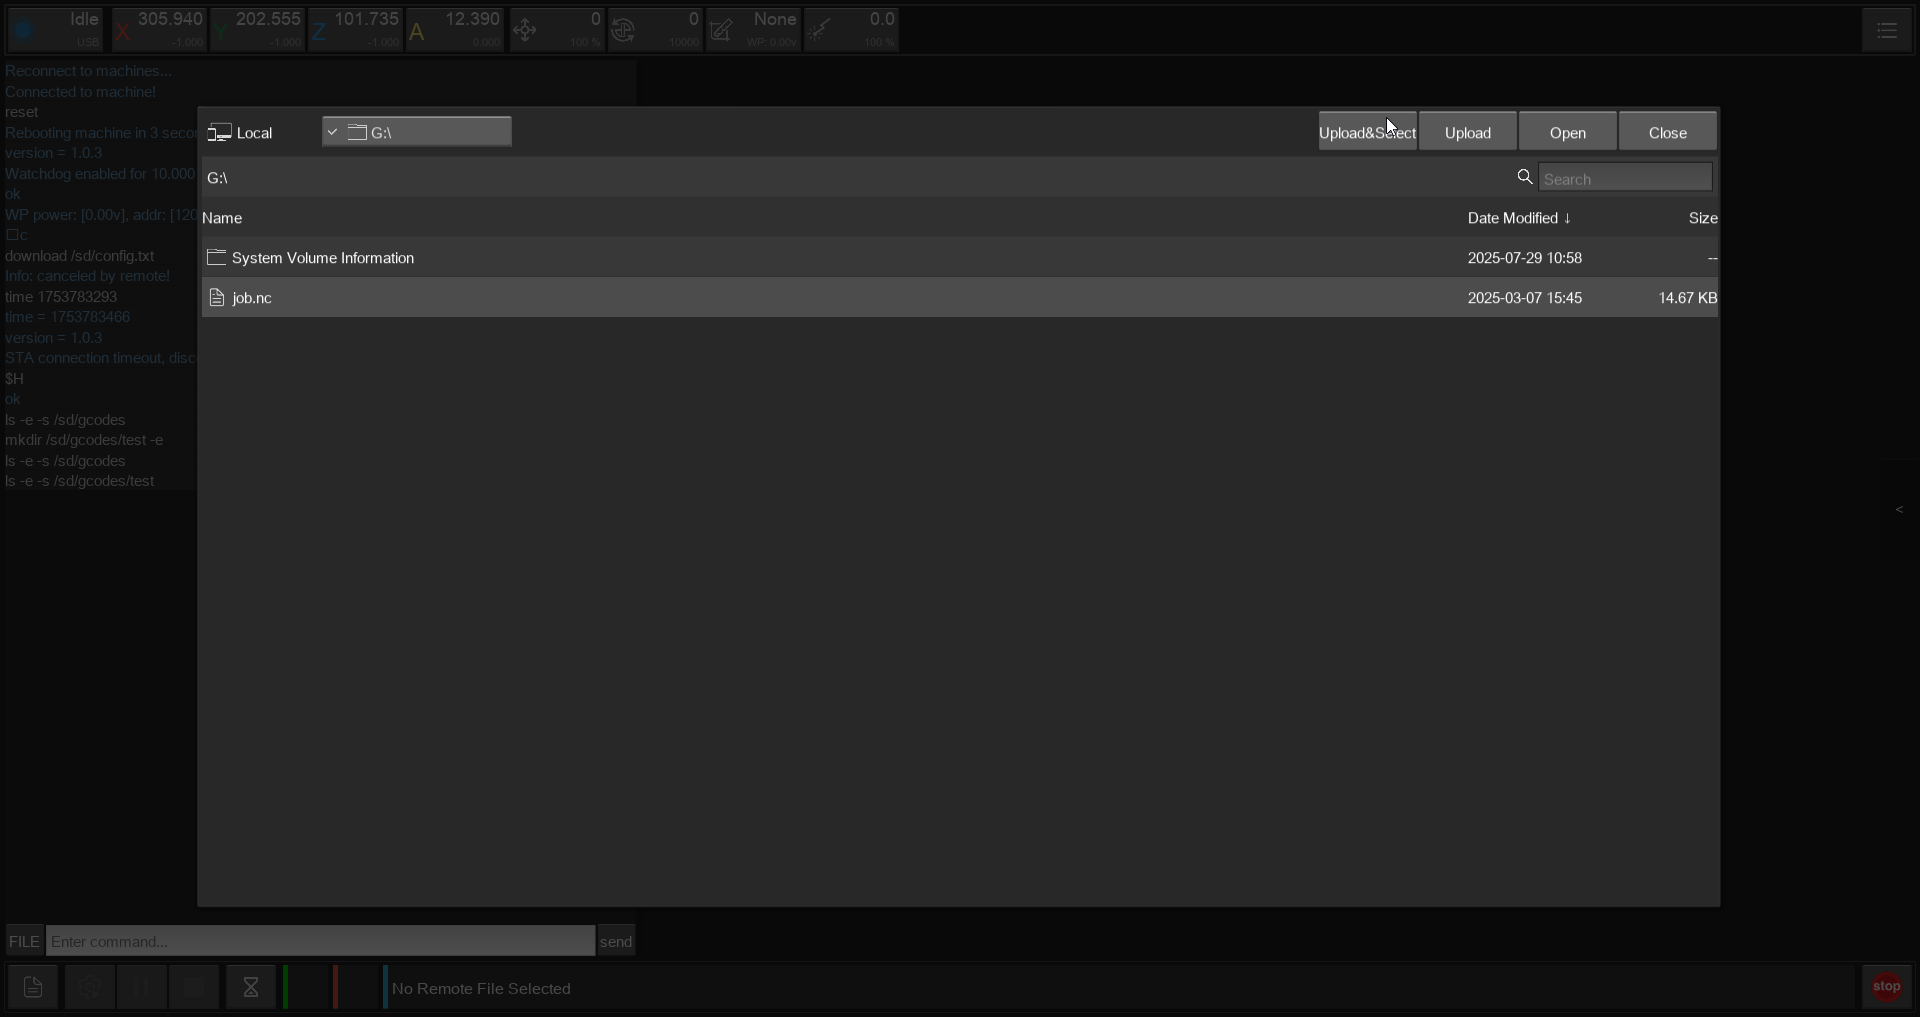
- Then use the top left to navigate to your file and then use 'Upload&Select' to load the file onto the machine and select it for milling.
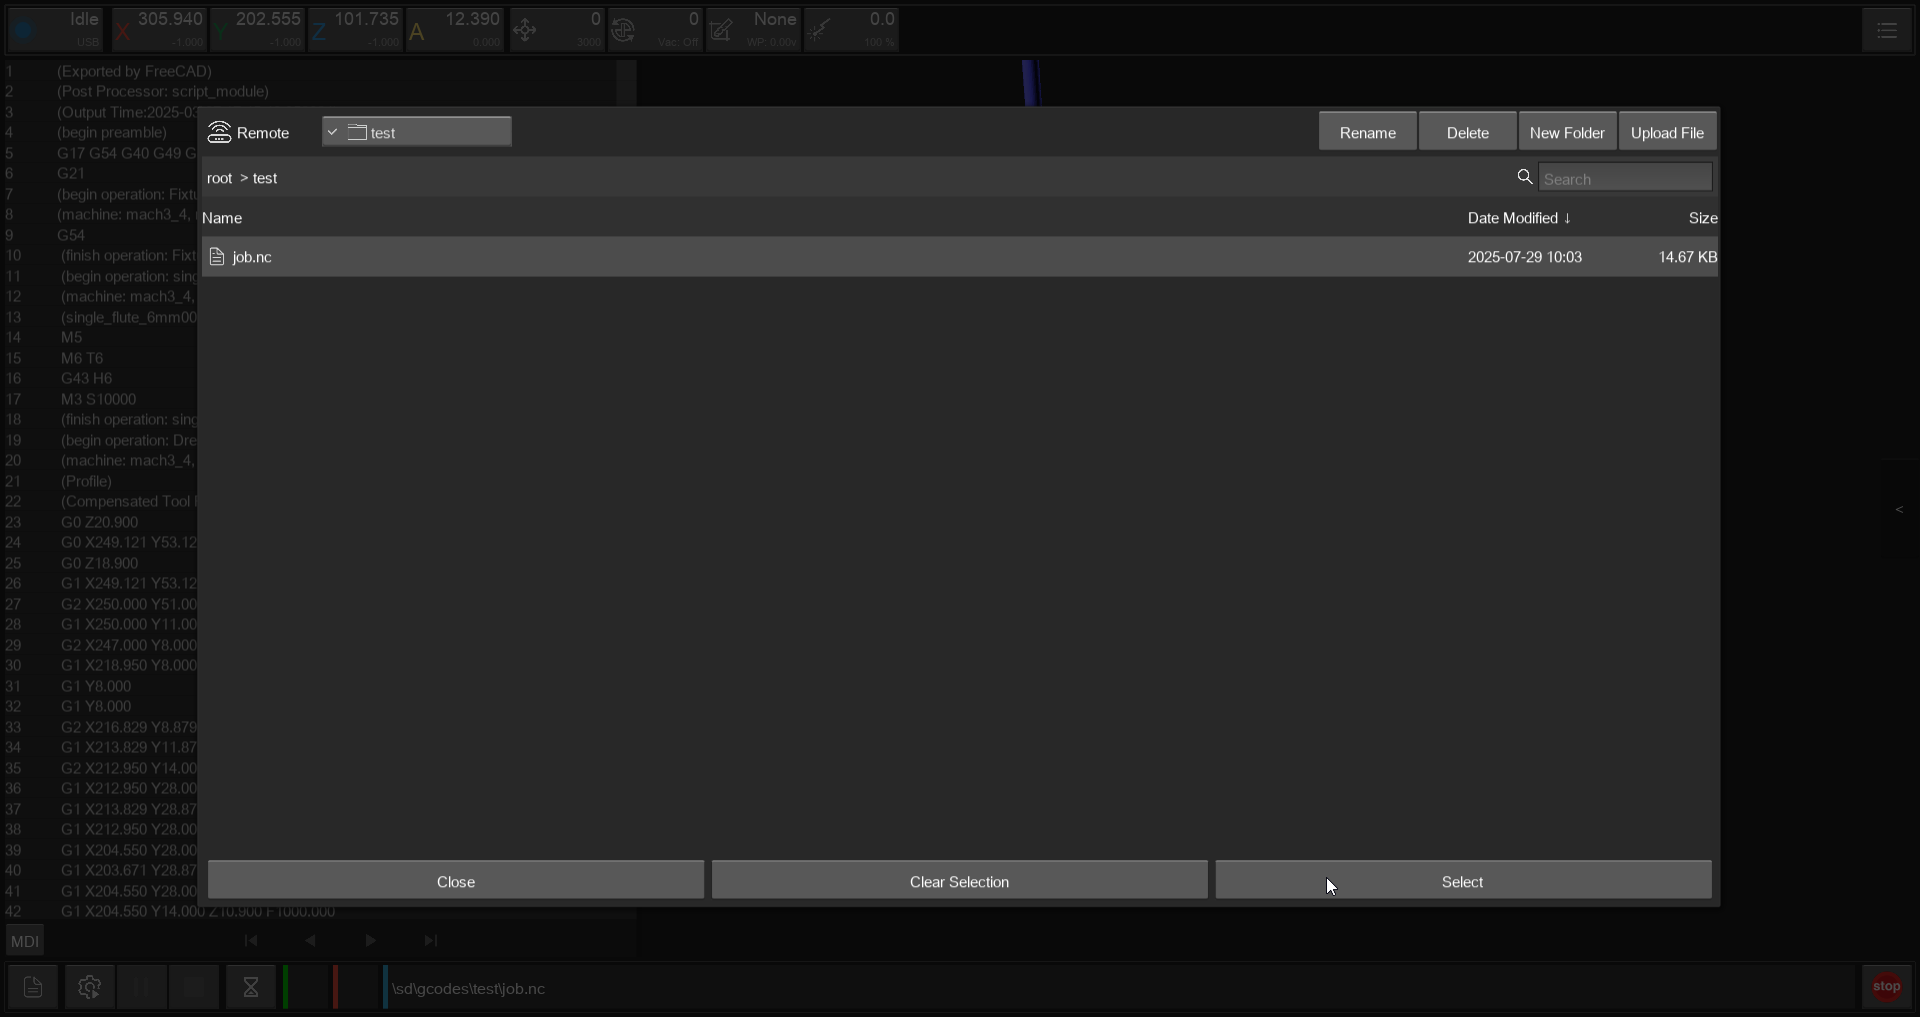
 Or use 'Upload' then 'Close' on the screen and then 'Select' on the correct file in the other screen.

- There should appear a preview of the GCODE, check the path and choosen tools. Then use the Gear-Icon on the bottom left to start the milling.
 ALWAYS CHECK THE PATH ON THE BOTTOM!!
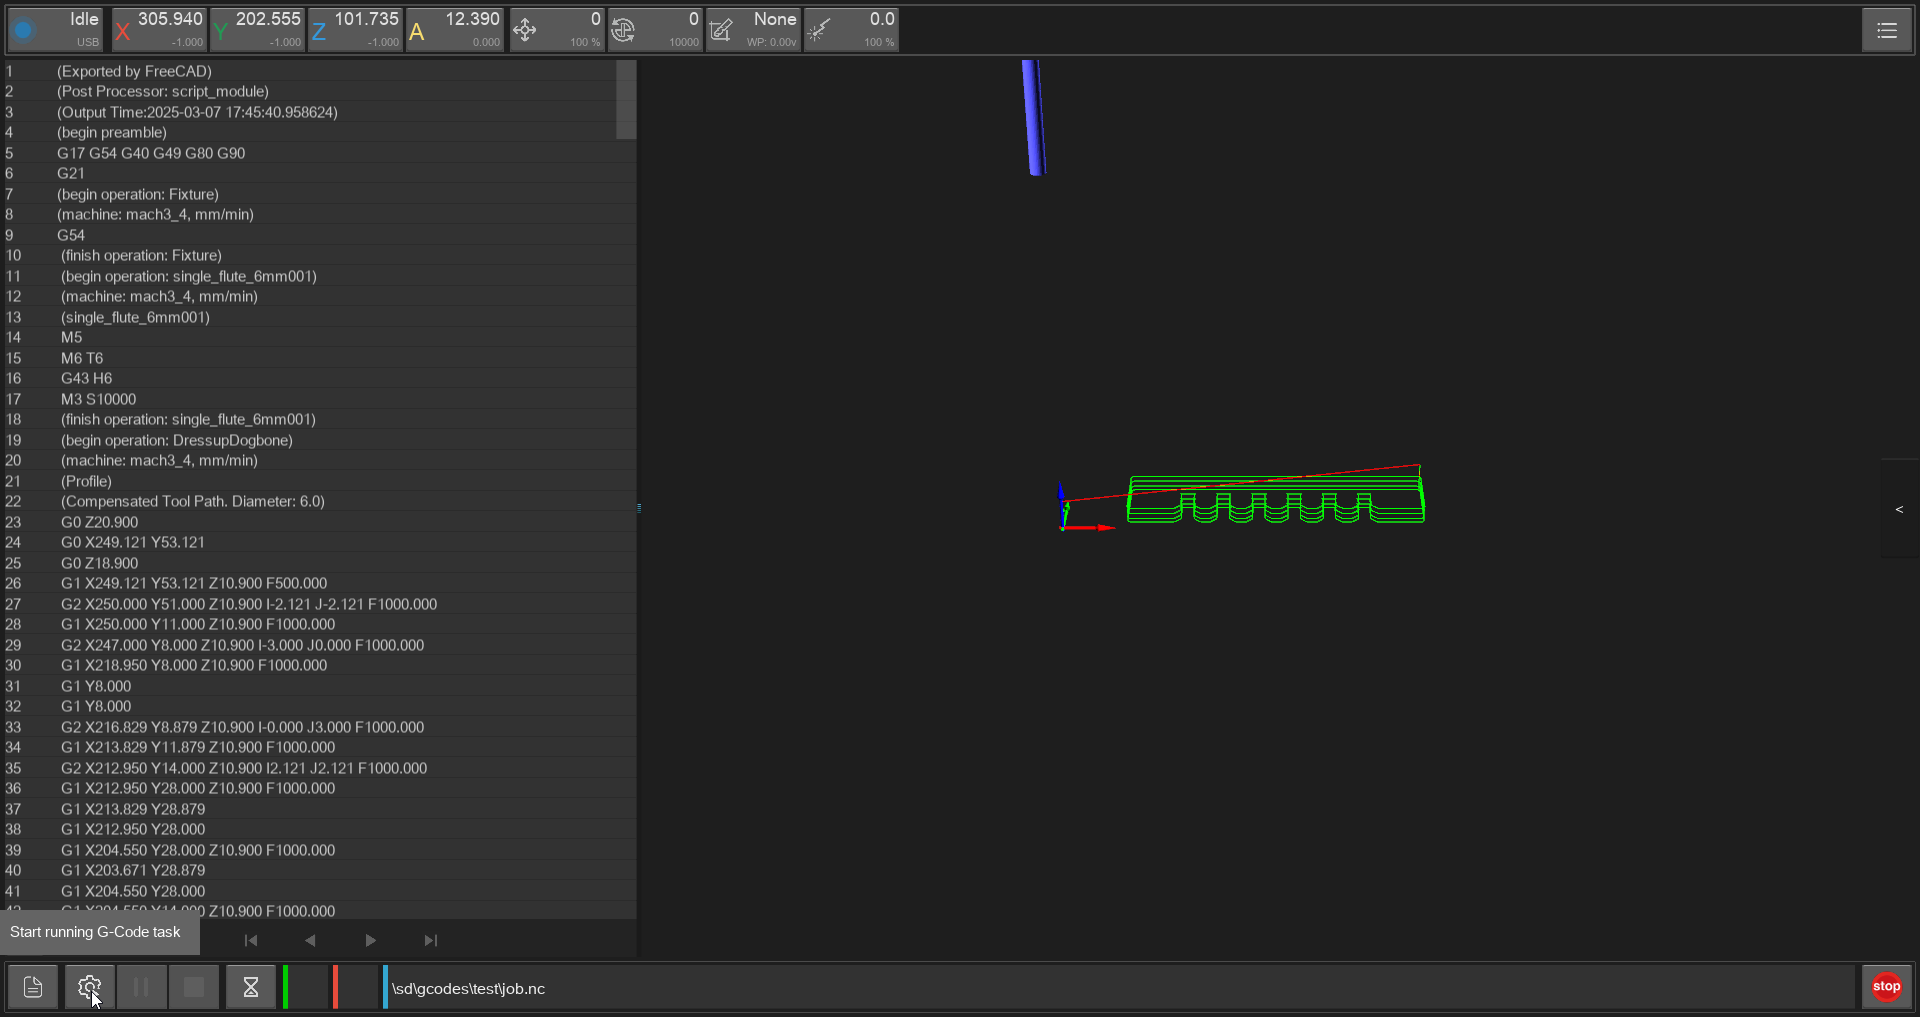
Then here deactivate 'Scan Margin' and if allready done 'Auto Z Probe' and press 'RUN'.
See also
Tips and Tricks
Maintenance
Troubleshooting
Carvera Makera
Machine coordinates in the software constantly increase
- just restart the machine, ALSO DISCONNECT THE MACHINE FROM USB and then restart the software
Toolchanger often failes on changeing the tool
- happens because the tools is not correctly inserted and can be solved by bending the metal clamp inwards
TODO IMAGE